background image

Utility Tool

15

IC-203

15-22

4

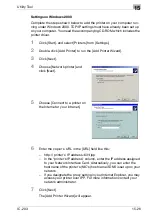
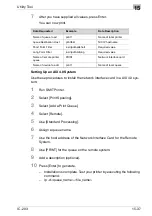
Click [Finish].

The [Select Program Folder] win-
dow will appear.

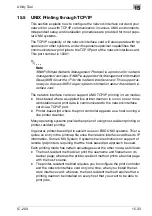
Uninstallation of KONICA MINOLTA Peer to Peer Printing Tool

When uninstalling the KONICA MINOLTA Peer to Peer Printing Tool, perform 
the following procedure.

1

Change the printer port or delete the printing system using KONICA 
MINOLTA Peer to Peer Printing Tool from the [Printers] folder.

2

Delete the [KONICA MINOLTA Peer to Peer Printing Tool] by using 
[Add/Delete Applications] from the [Control Panel].

Perform Peer to Peer Printing

To perform Peer to Peer Printing, add a port on the printer driver by the fol-
lowing steps.

1

Select [Start]-[Settings]-[Printers], and display the [Printers] window.

2

Right-click the printer icon in use and select [Properties].

3

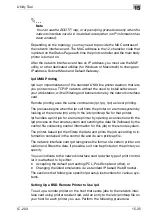
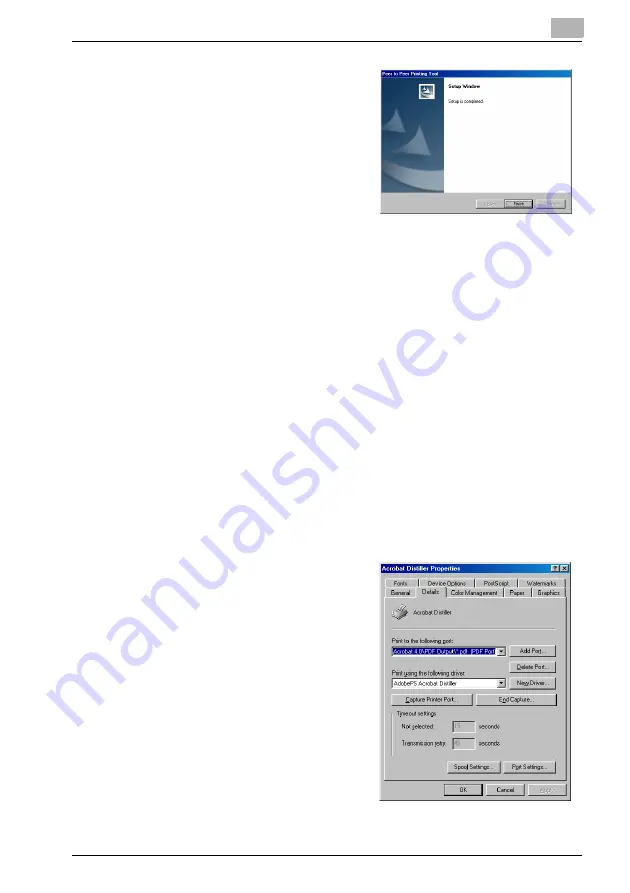
Open the screen where you can 
add a port, and click [Add Port].

Screens for [Add Port] differ 
depending on the printer driv-
er in use.

Summary of Contents for IC-203

Page 1: ...inter driver Chapter 7 Basic Printing and Various Function Chapter 8 PCL Printer Driver Setting Windows Chapter 9 PostScript PPD Printer Driver setting Windows Chapter 10 KONICA MINOLTA PS Printer Driver Setting Windows Chapter 11 PostScript PPD Printer Driver setting Mac OS 9 Chapter 12 PostScript PPD Printer Driver setting Mac OS X Chapter 13 Troubleshooting Chapter 14 Font Chapter 15 Utility To...

Page 2: ...1 11 2 Overview 2 1 Printer Driver 2 2 2 2 Composition of a product 2 3 2 2 1 Optional memory 2 3 2 2 2 PostScript3 option 2 3 2 2 3 Other options 2 4 2 3 Connections of the Print Controller 2 5 2 3 1 Parallel Connection 2 5 2 3 2 Ethernet Connection 2 5 2 4 Product Specifications 2 6 2 4 1 Restrictive Conditions 2 8 3 Installation Installer 4 Installation Local printing 4 1 Printer Drivers 4 2 4 ...

Page 3: ...the Front Back cover insertion sheet and cover sheet 7 21 7 2 6 To set for finishing 7 24 7 2 7 To set a Watermark 7 28 7 2 8 To set an image and shade 7 31 7 2 9 To set font related items 7 34 7 2 10 Checking the Printer Driver Setting 7 35 7 2 11 How to store the job and reprint 7 36 8 PCL Printer Driver Setting Windows 8 1 About Properties window 8 1 8 1 1 Properties window 8 2 8 2 About button...

Page 4: ...9 4 9 4 General tab 9 5 9 5 Sharing tag 9 7 9 6 Ports tab 9 8 9 7 Advanced tab 9 10 9 8 Security tab 9 12 9 9 Device Settings tab 9 13 9 10 Layout tab 9 17 9 11 Paper Quality tab 9 19 9 12 Advanced Options windows 9 21 10 KONICA MINOLTA PS Printer Driver setting Windows 10 1 About Properties window 10 1 10 1 1 Properties window 10 2 10 2 About button 10 3 10 3 Combination of the function 10 4 10 4...

Page 5: ...4 Watermark dialog box 11 13 11 5 Custom Page Default dialog box 11 15 11 6 General dialog box 11 17 11 7 Background Printing dialog box 11 19 11 8 Cover Page dialog box 11 20 11 9 Layout dialog box 11 21 11 10 Printer Specific Options dialog box 1 11 23 11 11 Printer Specific Options dialog box 2 11 25 11 12 Configure dialog box 11 37 12 PostScript PPD Printer Driver setting Mac OS X 12 1 About M...

Page 6: ...t PCL 14 1 14 2 Font List PostScript 14 4 14 3 Screen Fonts 14 8 14 4 PostScript Downloading New Fonts 14 15 15 Utility Tool 15 1 PageScope Web Connection 15 1 15 1 1 Outline of the PageScope Web Connection 15 2 15 1 2 Start the PageScope Web Connection 15 3 15 1 3 Print the Report 15 20 15 2 Using KONICA MINOLTA Peer to Peer Printing Tool 15 21 15 3 Internet Printing 15 25 15 4 NetWare 15 29 15 5...

Page 7: ...o ON FCC Regulation Warning This equipment has been tested and found to comply with limits for a Class B digital device pursuant to part 15 of FCC rules These limits are designed to provide reasonable protection against harmful interference in a residential area This equipment generates uses and can radiate radio frequency energy and if not installed and used in accordance with the instructions ma...

Page 8: ...ected Consult your dealer or an experienced radio TV technician for help Canadian Department of Communications Regulations This Class B digital apparatus complies with Canadian ICES 003 Patent Notice The product includes an implementation of LZW licensed under U S Patent 4 558 302 Built in Fonts The print controller includes support for PCL5e 6 Language HP PCL clone and includes the 88 built in Ag...

Page 9: ...Apple Macintosh and Mac are registered trademarks or trademarks of Apple Computer Inc Adobe Adobe Logo Acrobat Acrobat Logo PostScript and PostScript Logo are registered trademarks or trademarks of Adobe Systems Inc Other company names and product names used in this User s Guide are the registered trademarks or trademarks of their respective companies RC4 is a registered trademark or trademark of ...

Page 10: ...s the latest information as well as limits of the system and the user software Screenfonts Macintosh User s Guide this manual The following items are supplied with the PostScript3 Option optional PS 503 CD ROM Windows Printer driver PPD file Screen Fonts User s Guide this manual Release Note describes the latest information as well as limits of the system and the users software Macintosh Printer d...

Page 11: ... and file names are not necessarily preceded by the root directory Backup DirectP Driver Drivers bizhubPRO920 Driver ini EN Win9X_Me Printer Driver for Windows 98 Me WinNT Printer Driver for Windows NT4 0 Win2000_XP Printer Driver for Windows 2000 XP DE ES FR IT JA Lang P2P Readme Printer Driver Product Infomation J2RE JobSpooler Manual EN 920_prt_ug_eng_vxx pdf IC 203 User s Guide JA Readme Peer2...

Page 12: ...er for MacOS9 x PPD file OS10_2_x Printer Dreiver for MacOS X 10 2x PPD pkg file OS10_3_x Printer Dreiver for MacOS X 10 3x or more PPD pkg file Screen Fonts ATM Light ATM Light Installer for MacOS9 x PS3 TrueType Screen Fonts for PS3 TrueType PS3 Type1 Screen Fonts for PS3 Type1 UserGuide 920_prt_ug_eng_vxx pdf IC 203 User s Guide Readme txt Product Infomation Driver AdobePS Win9x_Me Printer Drei...

Page 13: ...scribes how to install the printer driver for local printing to Windows compliant computers Chapter 5 Installation Network printing This chapter describes how to install the printer driver for network printing to Win dows compliant computers and Macintosh Chapter 6 Uninstallation of the printer driver This chapter describes how to update the printer driver Chapter 7 Basic Printing and Various Func...

Page 14: ...he printer driver Chapter 14 Font This chapter lists the built in printer fonts in cluded with the print controller Chapter 15 Utility Tool This chapter describes how to use the utility tool included on the user software CD Chapter 16 Appendix This chapter lists and describes technical terms to read this manual ...

Page 15: ...bines the above 1 2 3 and 4 products printing system 5 Microsoft Windows 98 Windows 98 6 Microsoft Windows Me Windows Me 7 Microsoft Windows NT4 0 Windows NT4 0 or Windows NT 8 Microsoft Windows 2000 Windows 2000 9 Microsoft Windows XP Windows XP 10 Microsoft Windows Server 2003 Server 2003 11 Mac OS 9 x Mac OS 9 12 Mac OS X v10 2x v10 4x Mac OS X 13 Above OSs Windows 98 Me Windows NT4 0 2000 XP W...

Page 16: ...nt from File menu in an application The Print dialog appears 2 Select printer in pull down menu besides the Name 3 Click Properties to set detail if necessary 4 Click OK if a required setup is finished The display returns to the Print dialog Note Reminder Detail Explains important notices on operating procedures are used for the terms displayed on the screens Hints and Advices on operating procedu...

Page 17: ...grams to reproduce weights styles and versions of letters numerals characters and sym bols Typefaces on the display or monitor for your own internal busi ness purposes 3 You may make one backup copy of the Host Software provided your backup copy is not installed or used on any computer Notwithstanding the above restrictions you may install the Host Software on any number of computers solely for us...

Page 18: ...LIMITA TION IMPLIED WARRANTIES OF MERCHANTABILITY FITNESS FOR A PARTICULAR PURPOSE TITLE AND NON INFRINGEMENT OF THIRD PARTY RIGHTS SOME STATES OR JURISDICTIONS DO NOT ALLOW THE EXCLUSION OR LIMITATION OF INCIDENTIAL CONSEQUENTIAL OR SPECIAL DAMAGES SO THE ABOVE LIMITATIONS MAY NOT AP PLY TO YOU 11 Notice to Government End Users The Software is a commercial item as that term is defined at 48 C F R...

Page 19: ...ing between the parties KMBT reserves any rights not expressly granted to You This pack age may contain third party software provided by Adobe Systems Incorpo rated Adobe or other suppliers in which case KMBT grants to you a non exclusive sublicense to use the Software and Documentation provided that you agree to the following 1 LICENSE GRANT You do not receive title to the Software or User Doc um...

Page 20: ...Software and Documentation as described in g below or to the extent expressly per mitted by the laws of the country in which you use the Software and Li censed Articles You may not create derivative works based upon the Software or any part thereof You may not copy the Licensed Articles ex cept as specifically provided in this License Agreement g You may assign your rights under this Agreement to ...

Page 21: ...e Product destroy all copies of the Software and Printer Drivers from the hard drive of the Equipment and destroy all copies of the Software and Printer Drivers and User Doc umentation 6 LICENSE FEES The license fees of 250 00 included in the purchase price of the Equipment paid by You are paid in consideration of the li cense granted under this License Agreement 7 LIMITED WARRANTY Licensor warran...

Page 22: ...ereof 10 COSTS OF LITIGATION If any action is brought by either party to this License Agreement against the other party regarding the subject matter hereof the prevailing party shall be entitled to recover in addition to any other relief granted reasonable attorneys fees and expenses of litiga tion 11 NO WAIVER The failure of any party to enforce any rights granted here under or to take action aga...

Page 23: ...ark Avenue San Jose CA 95110 2704 is a third party beneficiary to this Agreement to the extent that this Agreement contains provisions which relate to Li censee s use of the Software Font Programs Typefaces and the trade marks licensed hereby Such provisions are made expressly for the benefit of Adobe and are enforceable by Adobe in addition to KMBT ...

Page 24: ...r imaging to the licensed output device s solely for your own internal business purposes 2 In addition to the license for Font Programs set forth in Section 1 Print ing Software above you may use Roman Font Programs to reproduce weights styles and versions of letters numerals characters and sym bols Typefaces on the display or monitor for your own internal busi ness purposes 3 You may make one bac...

Page 25: ...states or jurisdictions do not allow the exclusion or limitation of incidental consequential or special damages so the above limitations may not apply to you 11 Notice to Government End User s The Software is a commercial item as that term is defined at 48 C F R 2 101 consisting of commercial com puter software and commercial computer software documentation as such terms are used in 48 C F R 12 21...

Page 26: ...Overview 2 IC 203 2 1 2 Overview The print controller feature enables the copier to connect to computers and networks to use as a printer Copier ...

Page 27: ...on of printer driver Printer Driver Compliant OS PCL Printer Driver Windows 98 Me Windows NT4 0 2000 XP Server 2003 PostScript PPD Printer Driver optional PostScript kit required About how to receive the op tional PostScript PPD driver contact your service represent ative Windows 98 Me Windows NT4 0 2000 XP Server 2003 Mac OS 9 x Mac OS X v10 2x v10 4x KONICA MINOLTA PS Printer Driver optional Pos...

Page 28: ...tains the expanded memory EM 701 256 MB By increasing the memory errors of PostScript reduce to ensure smooth printing operation For optimum printing performance expanding the memory capacity is rec ommended 2 2 2 PostScript3 option Installing the PostScript3 option in the print controller enables you to can print data from the application on Windows98 Me NT 4 0 2000 XP Server 2003 or Mac OS 9 X w...

Page 29: ...PK 503 enables to use the punch functions Installing the Cover Sheet Feeder PI 501 enables to select PI Cover Sheet Punch Z Fold Unit Option ZU 602 2 Hole Type enables to select Punch and Fold function Trimmer Unit option TU 501 enables to select Center Staple and Fold Trim function 2 Note Installing various options built in the copier properly on the printer driver allows you to use a variety of ...

Page 30: ...Local printing on page 4 1for more information about installation of the printer driver 2 3 2 Ethernet Connection You can also connect the copier to computers supporting Ethernet Several alternatives can be considered in the Ethernet connection In any of them you must set up the printer driver in each computer after configuring the network such as TCP IP settings for the print controller or the co...

Page 31: ...an guage PCL The Direct Printing of the PDF TIFF is available However an additional application is required PostScript 3 TIFF PDF optional PostScript kit re quired Built in fonts Agfa Microtype fonts Adobe PosrScript Font optional PostScript kit re quired Compliant OS Windows 98 Me Windows NT4 0 NT Service Pack 6a or more Windows 2000 Windows XP Windows Server 2003 Mac OS 9 x optional PostScript k...

Page 32: ...alk Dedicated Utilities Peer to Peer Printing Tool for Windows 98 Me Compliant Web Browser Netscape Navigator Internet Explorer Paper Type Paper A3 A4 A5 A6 B4 B5 B6 11 x 17 8 1 2 x 14 8 1 2 x 11 8 x 13 8 1 2 x 13 8 1 4 x 13 8 1 8 x 13 1 4 5 1 2 x 8 1 2 8K 16K Japanese Postcard A4 Tab 8 1 2 x 11 Tab A3 Wide A4 Wide A5 Wide B4 Wide B5 Wide 11 x 17 Wide 8 1 2 x 11 Wide 5 1 2 x 8 1 2 Wide Custom Size...

Page 33: ...de the power is not turned off until the data output is finished when print data remains in the Image memory 2 Note Specifications are subject to change without notice Ethernet Connection 100Base TX 10Base T Network Connector RJ 45 Status Indicators Green LED 2 Operating Environment Temperature Same as the copier Humidity Same as the copier ...

Page 34: ...r through the network Automatic installation PCL with installer Install the printer driver with the installer This installer can be used with any Windows OSs supporting it to install the KONICA MINOLTA PCL driver Fol low the procedure below to install the printer driver 1 Insert the IC 203CD ROM into the CD ROM tray of the personal computer Menu window appears 2 Click Printer Install The printer d...

Page 35: ...920 PCL is displayed on the screen as shown below Then select Select Printers MFPs to Install from the List You can se lect Multiple Printers MFPs turn the check box on the left of the driver name to ON and click Next Confirm Installation Settings window is displayed If no copier is detected click the Search Setting button enter the IP address and subnet mask and click the Search When specifying m...

Page 36: ...tion setting condition is dis played Check the setting and click Install The printer driver is installed and the Finish Installing Drivers window ap pears 7 Click Finish Installation is completed Detail Click the buttons as follows To check the details of the printer driver again Review To change the printer name Rename Printer To share the printer Share Setting To see the property of printer Prop...

Page 37: ...284 Ethernet cable and con nect the print controller and your computer 2 Prepare User Software CD and Install the printer driver for local printing to your computer 3 Print the test page This chapter describes how to install the printer driver for local printing to Windows compliant computers and how to print the test page Refer to Installation Network printing on Page 5 1 about network printing ...

Page 38: ...upported Operating Systems PCL KONICA MINOLTA PCL Driver Windows 98 Windows Me Windows NT 4 0 SP6a Windows 2000 Professional Windows XP Home Edition Windows XP Pro fessional and Windows Server 2003 PostScript 3 optional KONICA MINOLTA PS Driver Windows 98 Windows Me Windows NT 4 0 SP6a Windows 2000 Professional Windows XP Home Edition Windows XP Pro fessional and Windows Server 2003 PostScript PPD...

Page 39: ...he Start menu to click Printers from the sub menu The Printers window appears 3 Double click Add Printer icon of the Printers window The Add Printer Wizard window appears to set the printer 4 Click Next The Add Printer Wizard window appears 5 Select Local printer When the printing system is directly connected to a com puter in which the printer driv er will be installed select Local printer When p...

Page 40: ...D ROM drive 11 Select the following file When you install PCL6 driver KPIC600 inf file in the Driver Drivers bizhub920 EN Win9X_Me folder of the IC 203 CD ROM When you install PPD driver oemsetup inf file in the EN Driver AdobePS Win9x_Me folder of the PS 503 CD ROM 12 Click Open The Install From Disk window appears again 13 Click OK The Add Printer Wizard window to select the printer manufacturer...

Page 41: ...h the print ing system is connected Select LPT port when the printing system is used as a local printer 17 Click Next The Add Printer Wizard window to specify the printer name appears 18 In the Printer name text box check the printer name If you want to change the printer name enter the new printer name in the Printer name text box 19 Select whether to use this printer as the default printer or no...

Page 42: ...nstallation If you have selected Yes recommended at step 21 performing of the test print starts 23 Make sure the test page printed properly If you have selected No at step 21 the test page will not be print ed If the test page is printed properly click Yes 24 The installation is completed The printer driver of the printing system becomes available without re starting your computer 2 Note You must ...

Page 43: ...f the task bar Then select Settings of the Start menu and click Printers from the sub menu The Printers window appears 4 Double click Add Printer icon of the Printers window The Add Printer Wizard window will appear to add the printer 5 Select My Computer When the printing system is directly connected to a com puter in which the printer driv er will be installed select My computer When the printin...

Page 44: ...etails refer to Installing to Windows NT4 0 PCL6 PPD on Page 5 7 The window to select the printer manufacturer and model appears 9 Click Have Disk The Install From Disk window appears 10 Click Browse The Locate File window ap pears 11 Set the IC 203 CD ROM or PS 503 CD ROM in the CD ROM drive 12 Change Look in to CD ROM drive 13 Select the following file When you install PCL6 driver KPIC601 inf fi...

Page 45: ...s highlighted When you install PPD driver KONICA MINOLTA 920 PS P is highlighted KONICA MINOLTA 920 PCL KONICA MINOLTA 920 PS P is the default print er name 17 Click Next The Add Printer Wizard window appears 18 In the Printer name text box check the printer name If you want to change the printer name enter the new printer name in the Printer name text box 19 Select whether to use this printer as ...

Page 46: ...rint appears 23 Select Whether to perform the test print or not by selecting Yes recommended or No Printing the test page is also possible after the installation of the printer driver 24 Click Finish Necessary files will be copied from the IC 203 CD ROM or PS 503 CD ROM to complete the installation If you have selected Yes recommended at step 23 performing of the test print starts 25 Make sure the...

Page 47: ... IC 203 4 11 2 Note You must delete the current printer driver at first if you want to update reinstall the printer driver Refer to Deleting the Printer Driver Windows NT4 0 on Page 6 5 for the method of deleting the printer driver ...

Page 48: ... Then select Settings of the Start menu and click Printers from the sub menu The Printers window appears 4 Double click Add Printer icon of the Printers window The Add Printer Wizard window appears to add the printer 5 Click Next The Add Printer Wizard window appears 6 Select Local printer When the printing system is directly connected to a com puter in which the printer driv er will be installed ...

Page 49: ...stem is directly connected If you want to print directly to the printing system via the network select the LPR port For details refer to Installing to Windows 2000 XP Server 2003 PCL6 PPD on Page 5 13 9 Click Next The window to select the printer manufacturer and model appears 10 Click Have Disk The Install From Disk window appears 11 Click Browse The Locate File window ap pears 12 Set the IC 203 ...

Page 50: ...dd Printer Wizard window to select the manufacturer and model of the printer appears 17 Confirm the followings in the list of Printers When you install PCL6 driver KONICA MINOLTA 920 PCL is highlighted When you install PPD driver KONICA MINOLTA 920 PS P is highlighted KONICA MINOLTA 920 PCL KONICA MINOLTA 920 PS P is the default print er name 18 Click Next The Add Printer Wizard window to check ch...

Page 51: ...elect Share as or Do not share this printer checkbox When you select Share as you can input the shared name in the textbox 23 Click Next If you have selected Do not share this printer at step 22 the Add Printer Wizard window to perform the test print will appear In this case go to step 26 If you have selected Share as at step 22 the Add Printer Wizard window to enter location and comment will appe...

Page 52: ...test print starts 29 Make sure the test page printed properly If you have selected No at step 26 the test page will not be print ed If the test page is printed properly click OK 30 The installation is completed The printer driver of the printing system becomes available without restarting your computer 2 Note You must delete the current printer driver at first if you want to update reinstall the p...

Page 53: ...xit from all active Windows applications if required 3 Click Start of the task bar Then select Printers and Faxes of the Start menu The Printers and Faxes window appears 4 Click Add a printer icon of the Printers and Faxes window The Add Printer Wizard window will appear to add the printer 5 Click Next The Add Printer Wizard window to select the printer connection appears 6 Select Local printer at...

Page 54: ...000 XP Server 2003 PCL6 PPD on Page 5 13 7 Click Next The window to select the printer port appears 8 Select the port connecting the printer from the list displayed by clicking at the side of the Use the following port box Select the port to which the printing system is directly connected If you want to print directly to the printing system via the network select the LPR port For details refer to ...

Page 55: ...P INF file in the EN Driver AdobePS Win2000_XP folder of the PS 503 CD ROM 15 Click Open The Install From Disk window appears 16 Click OK The Add Printer Wizard window to select the manufacturer and model of the printer appears 17 Confirm the followings in the list of Printers When you install PCL6 driver KONICA MINOLTA 920 PCL is highlighted When you install PPD driver KONICA MINOLTA 920 PS P is ...

Page 56: ...ect whether to share the print er or not Select Share name or Do not share this printer When you select Share name you can input the shared name in the textbox 23 Click Next If you have selected Do not share this printer at step 22 the win dow to perform the test print will appear In this case go to step 26 If you have selected Share name at step 22 the window to enter location and comment appears...

Page 57: ...of the printer driver 27 Click Next The Add Printer Wizard completion window appears 28 Click Finish If you have selected Yes at step 26 performing of the test print starts 29 Make sure the test page printed properly If you have selected No at step 26 the test page will not be print ed If the test page is printed properly click OK 30 The installation is completed The printer driver of the printing...

Page 58: ... 4 22 2 Note You must delete the current printer driver at first if you want to update reinstall the printer driver Refer to Deleting the Printer Driver Windows 2000 XP Server 2003 on Page 6 6 for the method of deleting the printer driver ...

Page 59: ...escription 0 About how to receive the optional PS driver for Windows 98 Me contact your service representative 1 Turn on the computer and start Windows In case of Windows NT4 0 2000 XP Server 2003 log on as an Ad ministrator or a user entitled to install printer drivers such as Pow er User etc Exit from all active Windows applications if running 2 Place the User Software CD in the CD ROM drive 3 O...

Page 60: ... on the network by selecting Yes or No If you want to share the printer on the network refer to Installing the KONICA MINOLTA PS Driver on Page 5 17 9 Click Next 10 Select the port to which the PS printing system is connected and click Next 11 Confirm the printer name If you want to change the printer name enter a new name into the Printer Name text box ...

Page 61: ...or Printer Properties For more information refer to KONICA MINOLTA PS Print er Driver setting Windows on Page 10 1 16 Click Exit to Windows The installation session is over and you go back to the desktop You do not need to restart the computer for the installed printer driver to take effect 2 Note You must delete the current printer driver at first if you want to update reinstall the printer drive...

Page 62: ...hen select Properties The properties window may different depending on your OS How to open the Properties window is depending on OS Refer to About Properties window for more information about Properties window KONICA MINOLTA 920 PCL Properties dialog box appears 3 Select General tab in the KONICA MINOLTA 920 PCL Properties di alog box and click Print Test Page The test page is printed and the conf...

Page 63: ...uter to your network 3 Install the printer driver for network printing to your computer 4 Test print This chapter describes how to install the printer driver for network printing to Windows compliant computers and Macintosh and how to print the test page Refer to Installation Local printing on Page 4 1 about local printing This chapter also describes the outline of the network configuration Refer ...

Page 64: ...r Windows 98 Windows Me Windows NT 4 0 SP6a Windows 2000 Professional Windows XP Home Edition Windows XP Pro fessional and Windows Server 2003 PostScript 3 optional KONICA MINOLTA PS Driver Windows 98 Windows Me Windows NT 4 0 SP6a Windows 2000 Professional Windows XP Home Edition Windows XP Pro fessional and Windows Server 2003 PostScript PPD Driver Windows 98 Windows Me Windows NT 4 0 SP6a Windo...

Page 65: ...gs from the Start menu to click Printers from the sub menu The Printers window appears 3 Double click Add Printer icon of the Printers window The Add Printer Wizard window appears to set the printer 4 Click Next The Add Printer Wizard window appears 5 Select Network printer When personal computers are connected to a network and you want to print via the network select Network printer When using th...

Page 66: ... the printer driver for Win dows 98 Me is not saved in the server the window to se lect the printer manufacturer and model will appear In this case go to step 10 If the printer driver for Win dows 98 Me is saved in the server the window to check change the printer name will appear In this case go to step 21 10 Click Have Disk The Install From Disk window appears 11 Click Browse The Open window app...

Page 67: ...16 Click OK The next Add Printer Wizard window to select the printer manufactur er and model appears 17 Confirm the followings in the list of Printers When you install PCL6 driver KONICA MINOLTA 920 PCL is highlighted When you install PPD driver KONICA MINOLTA 920 PS P is highlighted KONICA MINOLTA 920 PCL KONICA MINOLTA 920 PS P is the default print er name 18 Click Next The Add Printer Wizard wi...

Page 68: ...on of the printer driver 23 Click Finish button Necessary files will be copied from the IC 203 CD ROM or PS 503 CD ROM to complete the installation If you have selected Yes recommended at step 22 performing of the test print starts 24 Make sure the test page printed properly If you have selected No at step 22 the test page will not be print ed If the test page is printed properly click Yes 25 The ...

Page 69: ...ters from the sub menu The Printers window appears 4 Double click Add Printer icon of the Printers window The Add Printer Wizard window will appear to add the printer 5 Select Network printer server When personal computers or workstations are connected to the network and you want to print via the network select Network printer server When using the network printer server it is necessary to complet...

Page 70: ... the first printer installed on the computer A message is displayed If you click OK the window to select the printer manufacturer and model will appear Follow the same pro cedure of If the printer driver for Windows NT4 0 is not installed in the server and install the printer driver for Windows NT4 0 9 Select whether to use this printer as the default printer or not by select ing Yes or No If you ...

Page 71: ... page printed properly If you have selected No at step 11 the test page will not be print ed If the test page is printed properly click Yes 14 The installation is completed The printer driver of the printing system becomes available without re starting your computer ...

Page 72: ...stall PCL6 driver KPIC601 inf file in the Driver Drivers bizhubPRO920 EN WinNT folder of the IC 203 CD ROM When you install PPD driver Oemsetup inf file in the EN Driver AdobePS WinNT folder of the PS 503 CD ROM 6 Click Open The Install From Disk window appears again 7 Click OK The Add Printer Wizard window to select the manufacturer and model of the printer appears 8 Confirm the followings in the...

Page 73: ...rinter to the computer for the first time Default printer setting will not appear and the first printer installed will be the default printer 12 Click Next The Add Printer Wizard window to perform the test print appears 13 Select Whether to perform the test print or not by selecting Yes recommended or No Printing the test page is also possible after the installation of the printer driver 14 Click ...

Page 74: ...lick Yes 16 The installation is completed The printer driver of the printing system becomes available without re starting your computer 2 Note You must delete the current printer driver at first if you want to update reinstall the printer driver Refer to Deleting the Printer Driver Windows NT4 0 on Page 6 5 for the method of deleting the printer driver ...

Page 75: ...2 Log on as an administrator or a user entitled to install a printer Exit from all active Windows applications if required 3 Click Start of the task bar Then select Printers and Faxes of the Start menu or select Start Settings Printers and Faxes The Printers and Faxes window appears 4 Click Add a printer icon of the Printers and Faxes window The Add Printer Wizard window will appear to add the pri...

Page 76: ... In this case go to step 9 If the printer driver for Windows 2000 XP Server 2003 is not saved in the server a message is displayed If you click OK the window to select the printer manufacturer and model will appear Follow the same procedure of If the printer driver for Windows 2000 XP Serv er 2003 is not saved in the server If you don t know the network printer name click Next and search the netwo...

Page 77: ...M in the CD ROM drive 4 Change Look in to CD ROM drive 5 Select the following file When you install PCL6 driver KPIC602 inf file in the Driver Driv ers bizhubPRO920 EN Win2000_XP folder of the IC 203 CD ROM When you install PPD driver OEMSETUP INF file in the EN Driver AdobePS Win2000_XP folder of the PS 503 CD ROM 6 Click Open The Install From Disk window appears 7 Click OK The Add Printer Wizard...

Page 78: ...printer will appear 10 Select whether to use this printer as the default printer or not by select ing Yes or No 11 Click Next The Add Printer Wizard completion window appears 12 Click Finish The installation is completed The printer driver of the printing system becomes available with out restarting your computer 2 Note You must delete the current printer driver at first if you want to update rein...

Page 79: ...e for description 0 About how to receive the optional PS driver for Windows 98 Me contact your service representative 1 Turn on the computer and start Windows In case of Windows NT4 0 2000 XP Server 2003 log on as an Ad ministrator or a user entitled to install printer drivers such as Pow er User etc Exit from all active Windows applications if running 2 Place the PS 503 CD ROM in the CD ROM drive...

Page 80: ...er on the network If you share it select Yes If you do not share the printer on the network refer to Installing the KONICA MINOLTA PS Driver on Page 4 23 9 Click Next 10 Click Add Network Port to se lect the network printer you want to add 11 Confirm the printer name If you want to change the printer name enter a new name into the Printer Name text box ...

Page 81: ...quired 15 Confirm the port and printer name you configured and click Finish The printer driver will be installed 16 If you want to manually configure the printer click Document De faults or Printer Properties For more information refer to KONICA MINOLTA PS Print er Driver setting Windows on Page 10 1 17 Click Exit to Windows The installation session is over and you go back to the desktop You do no...

Page 82: ...g 5 IC 203 5 20 2 Note You must delete the current printer driver at first if you want to update reinstall the printer driver Refer to Uninstallation of the printer driver on Page 6 1 for the method of deleting the printer driver ...

Page 83: ...rinter driver is not installable on Mac OS 8 x or earlier 4 Copy the PPD file onto the hard disk Select KONICAMINOLTA920vxxx ppd file and copy it into the HDD System Folder Extensions Printer Descriptions 5 Execute the installer Select and double click AdobePS Installer The dialog box appears 6 Click Continue The License dialog box appears 7 Click Accept You must agree to the license to use the pr...

Page 84: ...Installation Network printing 5 IC 203 5 22 9 Click Restart Then go to Selecting the printer with the Chooser ...

Page 85: ...lt your network administrator for more infor mation 5 Click Setup if you are using the PS3 printing system printer for the first time Select the PPD file that is copied from the CD ROM 6 Click each items to set the options for the PS3 printing system printer 7 Click OK The Chooser dialog appears 8 Close Chooser dialog 2 Note You must delete the current printer driver at first if you want to update...

Page 86: ...n the CD ROM drive 3 From User Software CD double click EN Driver OS10_2_x or OS10_3_x folder and copy KONICAMINOLTA_920_xxx pkg onto desktop The pkg files vary depending on the OS version as shown below KONICAMINOLTA_920_102 pkg For Mac OS X v10 2x KONICAMINOLTA_920_103 pkg For Mac OS X v10 3x v10 4x 4 Double click on KONICAMINOLTA_920_xxx pkg When using the Mac OS X v10 2x enter the name and pas...

Page 87: ...ick Continue 9 Click Agree You must agree to the license to use the printer driver for the PS3 printing system Click Agree and go to the next step Select a Destination window appears 10 Select a disk to be installed and then click Continue Easy Install window appears ...

Page 88: ...ion Install may be changed to Up grade Printer driver will be installed on PC When the installation completes a message appears 12 Click Close The printer driver is installed now 2 Note You must delete the current printer driver at first if you want to update reinstall the printer driver Refer to Deleting the Printer Driver Mac OS X PPD on Page 6 9 for the method of deleting the printer driver ...

Page 89: ...ystem Preference set the printer you want to use 1 Open System Preference In case of Mac OS X v10 2x select Print Center In case of Mac OS X v10 3x v10 4x select Print Fax 2 Select Set Up Printers 3 Click Add If the applicable printer is set the illustration of 2 is not dis played ...

Page 90: ...t KONICA MINOLTA 6 Select the KONICA MINOLTA 920 PS P and then click Add If you choose IP Printing as a connection method of the printer you need to input the IP address of the printer 7 Click the printer name and from menu Printers select Show Info Printer Info window will be dis played 8 Select Installable Options ...

Page 91: ...Installation Network printing 5 IC 203 5 29 9 Setup the options that are equipped to copier 10 Click Apply Changes 11 Close Print Info window ...

Page 92: ...open the Properties window is depending on OS Refer to About Properties window for more information about Properties window KONICA MINOLTA 920 PCL Properties dialog box appears 3 Select General tab in the KONICA MINOLTA 920 PCL Properties di alog box and click Print Test Page The test page is printed and the confirmation window appears 4 Verify that it is printed properly Then click Yes The test p...

Page 93: ...e de leted with the installer is KONICA MINOLTA PCL only Follow the proce dure below for deletion 0 Windows XP screens are indicated here for description 1 Insert the IC 203CD ROM into the CD ROM tray of the personal computer Menu window appears 2 Click Printer Install The printer driver installer is started and the License Agreement win dow appears 3 Read through the license agreement and click t...

Page 94: ...heck box on the left of the driver name to ON and click Unin stall 6 Printer driver name is displayed again for confirmation click Unin stall 7 Upon completion of deletion of the printer driver you are prompted to restart the computer Click OK to start again Deletion of the printer driver with the installer is now completed ...

Page 95: ...mpu ter Windows Deleting a Printer Driver Windows 98 Me Deleting the Printer Driver Windows 98 Me on Page 6 4 Windows NT4 0 Deleting the Printer Driver Windows NT4 0 on Page 6 5 Windows 2000 XP Serv er 2003 Deleting the Printer Driver Windows 2000 XP Server 2003 on Page 6 6 Macintosh Deleting a Printer Driver Mac OS 9 x Deleting the Printer Driver Mac OS 9 PPD on Page 6 8 Mac OS X v10 2x v10 4x De...

Page 96: ... menu to click Printers from the sub menu Exit from all active Windows applications if required The Printers window appears 3 Right click the icon for the printer you want to delete Then select De lete 4 Click Yes 5 Restart the computer If the printer has been set as the default printer the message saying the default printer is deleted appears after the deletion The printer driver is uninstalled 6...

Page 97: ... the sub menu Exit from all active Windows applications if required The Printers window appears 3 Right click the icon for the printer you want to delete Then select De lete The confirmation message appears 4 Click Yes The printer driver is uninstalled After completion of uninstall close the Printers window 5 Restart the computer To avoid the system failure make sure to restart the computer after ...

Page 98: ...r select Start Settings Printers and Faxes Exit from all active Windows applications if required The Printers and Faxes window appears 3 Select the icon for the printer you want to delete Then click Delete this printer The confirmation message will appear 4 Click Yes If the printer has been set as the default printer the mes sage saying the default print er is deleted appears after the deletion Th...

Page 99: ...ers Then click Remove The confirmation message ap pears 8 Click Yes The printer driver is deleted uninstalled 9 Restart the computer To avoid the system failure make sure to restart the computer after deleting the printer driver 10 When updating the printer driver go to Installing to Windows XP Serv er 2003 PCL6 PPD on Page 4 17 ...

Page 100: ...d uninstalled 3 Select KONICAMINOLTA920vxxx ppd in HDD System Folder Extensions Printer Descriptions and drag it onto Trash KONICAMINOLTA920vxxx ppd loses its effect on the printer just by removing it from the Extensions folder PPD file name varies depending on models of the machine The files related to the driver file are deleted 4 When updating the printer driver go to Installing to Macintosh Ma...

Page 101: ...ete unnecessary files in the hard disk HDD with the printer driver installed In case of Mac OS v10 3x v10 4x Drag the following files in the HDD Library Receipts to Trash KONICAMINOLTA_920_103 pkg Drag the following files in the HDD Library Printers PPDs Contents Resources to Trash KONICAMINOLTA920 gz Drag the following files in the HDD Library Printers KONI CAMINOLTA PDEs to Trash KONICA MINOLTA ...

Page 102: ...ONICA MINOLTA 920 Finishing plugin KONICA MINOLTA 920 ImageLayout plugin KONICA MINOLTA 920 Security plugin KONICA MINOLTA 920 Setup plugin 6 Restart the computer This completes the deletion of the printer driver 7 When updating the printer driver go to Installing to Macintosh Mac OS X on Page 5 24 2 Note Delete the old driver without fail before updating the driver software If any old driver file...

Page 103: ...The following shows the basic methods for the printing from a Windows This pages is explained by using Windows XP 1 Select Print from File menu in an application Command name may be differ ent depending on the applica tion The Print dialog appears 2 Select printer in pull down menu besides the Name 3 Click Properties to set detail if necessary 4 Click OK if a required setup is finished The display...

Page 104: ...5 Click OK The print controller receives and processes a print job sent from your computer 2 Note Refer to PCL Printer Driver Setting Windows on Page 8 1 PostScript PPD Printer Driver setting Windows on Page 9 1 for more information about print setup ...

Page 105: ...oser dialog Make sure that Active is ON in AppleTalk 3 Select File Print of the applica tion Command name may be differ ent depending on the applica tion The Print dialog appears 4 Make sure that compliant printer name is selected in the Printer Refer to PostScript PPD Printer Driver setting Mac OS 9 on Page 11 1 for more information about print setup 5 Click Print The print controller receives an...

Page 106: ...Printer List window appears 2 Select the printer and close Printer List window 3 Select File Print of the applica tion Command name may be differ ent depending on the applica tion 4 Make sure that compliant printer name is selected in the Printer Refer to PostScript PPD Printer Driver setting Mac OS X on Page 12 1 for more information about print setup 5 Click Print The print controller receives a...

Page 107: ...tion of the paper and other paper related items can be set as shown below To set the orientation Set the orientation output paper in Portrait or Landscape Operating System Printer Driver Refer to Windows KONICA MINOLTA PCL Setup tab on Page 8 13 PostScript PPD Layout tab on Page 9 17 KONICA MINOLTA PS Setup tab on Page 10 15 Mac OS 9 PostScript PPD Page Attributes dialog box on Page 11 10 Mac OS X...

Page 108: ...OLTA PCL Setup tab on Page 8 13 PostScript PPD Advanced Options windows on Page 9 21 KONICA MINOLTA PS Setup tab on Page 10 15 Mac OS 9 PostScript PPD Page Attributes dialog box on Page 11 10 Mac OS X PostScript PPD Page Attributes Page Setup window on Page 12 3 Operating System Printer Driver Refer to Windows KONICA MINOLTA PCL Setup tab on Page 8 13 PostScript PPD Paper Quality tab on Page 9 19 ...

Page 109: ...CL Setup tab on Page 8 13 PostScript PPD Advanced Options windows on Page 9 21 KONICA MINOLTA PS Setup tab on Page 10 15 Mac OS 9 PostScript PPD Printer Specific Options dialog box 2 on Page 11 25 Mac OS X PostScript PPD Setup Print window on Page 12 21 Operating System Printer Driver Refer to Windows KONICA MINOLTA PCL Setup tab on Page 8 13 PostScript PPD Advanced Options windows on Page 9 21 KO...

Page 110: ... on Page 8 13 PostScript PPD Advanced Options windows on Page 9 21 KONICA MINOLTA PS Setup tab on Page 10 15 Mac OS 9 PostScript PPD Page Attributes dialog box on Page 11 10 Mac OS X PostScript PPD Page Attributes Page Setup window on Page 12 3 Operating System Printer Driver Refer to Mac OS 9 PostScript PPD Custom Page Default dialog box on Page 11 15 Mac OS X PostScript PPD Custom Paper Size Pag...

Page 111: ...r Source unit You can make the printer driver recognize an optional paper source unit Operating System Printer Driver Refer to Windows KONICA MINOLTA PCL Option tab on Page 8 11 PostScript PPD Device Settings tab on Page 9 13 KONICA MINOLTA PS Option tab on Page 10 13 Mac OS 9 PostScript PPD Configure dialog box on Page 11 37 Mac OS X PostScript PPD Printer Info on Page 12 28 Paper Sources ...

Page 112: ...tScript PPD Device Settings tab on Page 9 13 KONICA MINOLTA PS Setup tab on Page 10 15 Mac OS 9 PostScript PPD General dialog box on Page 11 17 Mac OS X PostScript PPD Paper Feed Print window on Page 12 8 Operating System Printer Driver Refer to Windows KONICA MINOLTA PCL Option tab on Page 8 11 PostScript PPD Device Settings tab on Page 9 13 KONICA MINOLTA PS Option tab on Page 10 13 Mac OS 9 Pos...

Page 113: ...ay varies depending on the optional unit Operating System Printer Driver Refer to Windows KONICA MINOLTA PCL Setup tab on Page 8 13 PostScript PPD Advanced Options windows on Page 9 21 KONICA MINOLTA PS Setup tab on Page 10 15 Mac OS 9 PostScript PPD Printer Specific Options dialog box 2 on Page 11 25 Mac OS X PostScript PPD Finishing Print window on Page 12 9 Output tray ...

Page 114: ...le sets of pages Operating System Printer Driver Refer to Windows KONICA MINOLTA PCL Setup tab on Page 8 13 PostScript PPD Advanced Options windows on Page 9 21 KONICA MINOLTA PS Setup tab on Page 10 15 Mac OS 9 PostScript PPD General dialog box on Page 11 17 Mac OS X PostScript PPD Copies Pages Print window on Page 12 6 Operating System Printer Driver Refer to Windows KONICA MINOLTA PCL Setup tab...

Page 115: ...quired umber of the second pages the third page Operating System Printer Driver Refer to Windows KONICA MINOLTA PCL Setup tab on Page 8 13 PostScript PPD Advanced Options windows on Page 9 21 KONICA MINOLTA PS Setup tab on Page 10 15 Mac OS 9 PostScript PPD Printer Specific Options dialog box 2 on Page 11 25 Mac OS X PostScript PPD Copies Pages Print window on Page 12 6 ABCD 1 ABCD 1 ABCD 1 ABCD 2...

Page 116: ...pies Operating System Printer Driver Refer to Windows KONICA MINOLTA PCL Setup tab on Page 8 13 PostScript PPD Advanced Options windows on Page 9 21 KONICA MINOLTA PS Setup tab on Page 10 15 Mac OS 9 PostScript PPD Printer Specific Options dialog box 2 on Page 11 25 Mac OS X PostScript PPD Finishing Print window on Page 12 9 ABCD ABCD ABCD ABCD ABCD ABCD ABCD ABCD ABCD Offset Copies ...

Page 117: ...erating System Printer Driver Refer to Windows KONICA MINOLTA PCL Special Functions tab on Page 8 40 PostScript PPD Advanced Options windows on Page 9 21 KONICA MINOLTA PS Special Functions on Page 10 43 Mac OS 9 PostScript PPD Printer Specific Options dialog box 2 on Page 11 25 Mac OS X PostScript PPD Finishing Print window on Page 12 9 Master copier Sub copier ...

Page 118: ...ront and back sides Operating System Printer Driver Refer to Windows KONICA MINOLTA PCL Setup tab on Page 8 13 PostScript PPD Advanced Options windows on Page 9 21 KONICA MINOLTA PS Setup tab on Page 10 15 Mac OS 9 PostScript PPD Printer Specific Options dialog box 2 on Page 11 25 Mac OS X PostScript PPD Finishing Print window on Page 12 9 Double Sides Top Binding Double Sides Right Binding Double...

Page 119: ...le page for printing Operating System Printer Driver Refer to Windows KONICA MINOLTA PCL Setup tab on Page 8 13 PostScript PPD Layout tab on Page 9 17 KONICA MINOLTA PS Setup tab on Page 10 15 Mac OS 9 PostScript PPD Layout dialog box on Page 11 21 Mac OS X PostScript PPD Layout Print window on Page 12 7 2 in 1 4 in 1 6 in 1 8 in 1 9 in 1 16 in 1 1 2 1 2 3 4 1 2 4 5 3 6 1 2 5 6 3 7 4 8 1 2 4 5 3 6...

Page 120: ... Operating System Printer Driver Refer to Windows KONICA MINOLTA PCL Special Functions tab on Page 8 40 PostScript PPD Advanced Options windows on Page 9 21 KONICA MINOLTA PS Special Functions on Page 10 43 Mac OS 9 PostScript PPD Printer Specific Options dialog box 2 on Page 11 25 Mac OS X PostScript PPD Image Layout Print window on Page 12 25 ABCD 1 ABCD 2 2 in 1 ABCD 1 ABCD 1 2 in 1 Repeat 2 Re...

Page 121: ...he paper Operating System Printer Driver Refer to Windows KONICA MINOLTA PCL Setup tab on Page 8 13 PostScript PPD Advanced Options windows on Page 9 21 KONICA MINOLTA PS Setup tab on Page 10 15 Mac OS 9 PostScript PPD Printer Specific Options dialog box 2 on Page 11 25 Mac OS X PostScript PPD Image Layout Print window on Page 12 25 Operating System Printer Driver Refer to Windows KONICA MINOLTA P...

Page 122: ...KONICA MINOLTA PCL Setup tab on Page 8 13 PostScript PPD Advanced Options windows on Page 9 21 KONICA MINOLTA PS Setup tab on Page 10 15 Mac OS 9 PostScript PPD Printer Specific Options dialog box 2 on Page 11 25 Mac OS X PostScript PPD Finishing Print window on Page 12 9 Operating System Printer Driver Refer to Windows KONICA MINOLTA PCL Setup tab on Page 8 13 A B C D 8 A B C D 1 A B C D 1 A B C ...

Page 123: ...fferent paper from that for the body pages Operating System Printer Driver Refer to Windows KONICA MINOLTA PCL Per Page Setting tab on Page 8 33 PostScript PPD Advanced Options windows on Page 9 21 KONICA MINOLTA PS Per Page Setting on Page 10 36 Mac OS 9 PostScript PPD Printer Specific Options dialog box 2 on Page 11 25 Mac OS X PostScript PPD Setup Print window on Page 12 21 ABCD ABCD ABCD ABCD ...

Page 124: ... Page 9 21 KONICA MINOLTA PS Per Page Setting on Page 10 36 Mac OS 9 PostScript PPD Printer Specific Options dialog box 2 on Page 11 25 Mac OS X PostScript PPD Setup Print window on Page 12 21 Operating System Printer Driver Refer to Windows KONICA MINOLTA PCL Per Page Setting tab on Page 8 33 KONICA MINOLTA PS Per Page Setting on Page 10 36 Back Cover Blank Back Cover Printed ABCD ABCD ABCD ABCD ...

Page 125: ...r Refer to Windows KONICA MINOLTA PCL Per Page Setting tab on Page 8 33 PostScript PPD Advanced Options windows on Page 9 21 KONICA MINOLTA PS Per Page Setting on Page 10 36 Mac OS 9 PostScript PPD Printer Specific Options dialog box 2 on Page 11 25 Mac OS X PostScript PPD Setup Print window on Page 12 21 Operating System Printer Driver Refer to Windows KONICA MINOLTA PCL Per Page Setting tab on P...

Page 126: ...d finishing To set stapling Staple output paper Operating System Printer Driver Refer to Windows KONICA MINOLTA PCL Setup tab on Page 8 139 PostScript PPD Advanced Options windows on Page 9 21 KONICA MINOLTA PS Setup tab on Page 10 15 Mac OS 9 PostScript PPD Printer Specific Options dialog box 2 on Page 11 25 Mac OS X PostScript PPD Finishing Print window on Page 12 9 ABCD ABCDEF ...

Page 127: ...b on Page 8 11 PostScript PPD Device Settings tab on Page 9 13 KONICA MINOLTA PS Option tab on Page 10 13 Mac OS 9 PostScript PPD Configure dialog box on Page 11 37 Mac OS X PostScript PPD Printer Info on Page 12 28 Operating System Printer Driver Refer to Windows KONICA MINOLTA PCL Setup tab on Page 8 13 PostScript PPD Advanced Options windows on Page 9 21 KONICA MINOLTA PS Setup tab on Page 10 1...

Page 128: ... paper Operating System Printer Driver Refer to Windows KONICA MINOLTA PCL Special Functions tab on Page 8 40 PostScript PPD Advanced Options windows on Page 9 21 KONICA MINOLTA PS Special Functions on Page 10 43 Mac OS 9 PostScript PPD Printer Specific Options dialog box 2 on Page 11 25 Mac OS X PostScript PPD Image Layout Print window on Page 12 25 ABC ABC ...

Page 129: ... fold it into three cut it Operating System Printer Driver Refer to Windows KONICA MINOLTA PCL Special Functions tab on Page 8 40 PostScript PPD Advanced Options windows on Page 9 21 KONICA MINOLTA PS Special Functions on Page 10 43 Mac OS 9 PostScript PPD Printer Specific Options dialog box 2 on Page 11 25 Mac OS X PostScript PPD Finishing Print window on Page 12 9 ...

Page 130: ...sign that is printed on the output paper To print a Overlay Sets a overlay and print it on the output paper Operating System Printer Driver Refer to Windows KONICA MINOLTA PCL Overlay tab on Page 8 45 KONICA MINOLTA PS Overlay tab on Page 10 52 Operating System Printer Driver Refer to Windows KONICA MINOLTA PCL Overlay tab on Page 8 45 KONICA MINOLTA PS Overlay tab on Page 10 52 ABCD ...

Page 131: ...em Printer Driver Refer to Windows KONICA MINOLTA PCL Watermark tab on Page 8 48 KONICA MINOLTA PS Watermarks tab on Page 10 57 Mac OS 9 PostScript PPD Watermark dialog box on Page 11 13 Operating System Printer Driver Refer to Windows KONICA MINOLTA PCL Watermark tab on Page 8 48 KONICA MINOLTA PS Watermarks tab on Page 10 57 Mac OS 9 PostScript PPD Watermark dialog box on Page 11 13 ABCD COPY AB...

Page 132: ...river Refer to Windows KONICA MINOLTA PCL Watermark tab on Page 8 48 PostScript PPD Advanced Options windows on Page 9 21 KONICA MINOLTA PS Special Functions on Page 10 43 Mac OS 9 PostScript PPD Printer Specific Options dialog box 2 on Page 11 25 Mac OS X PostScript PPD Image Layout Print window on Page 12 25 Operating System Printer Driver Refer to Windows KONICA MINOLTA PCL Watermark tab on Pag...

Page 133: ...ng To set printing pattern Set printing pattern from fine or coarse To set draft print Prints lightly which is switable for draft documents Operating System Printer Driver Refer to Windows KONICA MINOLTA PCL Quality tab on Page 8 52 Operating System Printer Driver Refer to Windows KONICA MINOLTA PCL Quality tab on Page 8 52 Operating System Printer Driver Refer to Windows KONICA MINOLTA PCL Qualit...

Page 134: ...L Quality tab on Page 8 52 KONICA MINOLTA PS Quality tab on Page 10 55 Operating System Printer Driver Refer to Windows KONICA MINOLTA PCL Quality tab on Page 8 52 PostScript PPD Advanced Options windows on Page 9 21 KONICA MINOLTA PS Quality tab on Page 10 55 Mac OS 9 PostScript PPD Printer Specific Options dialog box 2 on Page 11 25 Mac OS X PostScript PPD Image Layout Print window on Page 12 25...

Page 135: ...smoothly Operating System Printer Driver Refer to Windows KONICA MINOLTA PCL Quality tab on Page 8 52 PostScript PPD Advanced Options windows on Page 9 21 KONICA MINOLTA PS Quality tab on Page 10 55 Mac OS 9 PostScript PPD Printer Specific Options dialog box 2 on Page 11 25 Mac OS X PostScript PPD Image Layout Print window on Page 12 25 Smoothing ...

Page 136: ...gs Selects the printer fonts which substitutes for the highlighted True Type Font To set the format of the font that is to be downloaded Download Font Format Selects the font format to be downloaded to the printer Outline or BMP Operating System Printer Driver Refer to Windows KONICA MINOLTA PCL Font tab on Page 8 54 KONICA MINOLTA PS Font tab on Page 10 11 Operating System Printer Driver Refer to...

Page 137: ...this printing system is used Operating System Printer Driver Refer to Windows KONICA MINOLTA PCL Setup tab on Page 8 13 PostScript PPD Advanced Options windows on Page 9 21 KONICA MINOLTA PS Setup tab on Page 10 15 Mac OS 9 PostScript PPD Printer Specific Options dialog box 2 on Page 11 25 Mac OS X PostScript PPD Security Print window on Page 12 15 Operating System Printer Driver Refer to Windows ...

Page 138: ...it can be printed as needed To print with protection by a password Secure Print Protects a print job with a password when printing a confidential document Operating System Printer Driver Refer to Windows KONICA MINOLTA PCL Setup tab on Page 8 13 KONICA MINOLTA PS Setup tab on Page 10 15 Mac OS X PostScript PPD Security Print window on Page 12 15 Operating System Printer Driver Refer to Windows KON...

Page 139: ... Start Settings Printers to open the Printers folder right click the printer icon and select Properties Windows XP Server 2003 Select Start Printers and Faxes to open the Printers and Faxes folder right click the printer icon and select Proper ties Operating System Method Windows 98 Me Select Start Settings Printers to open the Printers folder right click the printer icon and select Properties Win...

Page 140: ... the Printers and Faxes folder are ap plied to print outs from any application How to setup with application Settings can be made in the print dialog indicated by selecting the print com mand in the application In this case the settings are effective only when the application is in use 2 Note This chapter is described by using the printer window of Windows XP The properties window may differ from ...

Page 141: ...ancel is clicked all tab settings are cancelled with the close of the properties window Apply When the Apply is clicked the present tab settings are saved This button is usefull when you want conduct other settings in other tabs and the present tab settings are registered before using other tabs Help When the Help is clicked Help information appears As well when you click Help which appears when r...

Page 142: ... select a function which causes a confliction with the settings al ready configured the message will be displayed This is a confirmation message to decide which setting will be turned off When this message is displayed select Yes or No In case of Yes the conflict setting will be turned OFF ...

Page 143: ... is located For example 2nd floor Room 101 Domain ABC and so on Comment Enters information about the printer For example User documentation team Maintenance 123 456 789 and so on Printing Preference Displays the property window of the selected printer You can change the setting of the printer driver with the property window Print Test Page Prints a test page of Windows You can print a test page wi...

Page 144: ...printer Detail The method to open the Properties window depends on OS Refer to About Properties window on Page 8 1 about how to open the Property window By using this Sharing tab you can make the printer available to network us ers 2 Note For more information refer to the manual of the Windows ...

Page 145: ... Using this button enables you to add a new port for Vendor specific port monitor TCP IP or Unix printers using the LPR port and so on Delete Port Deletes the selected port from above list Configure Port Using this button enables you to configure the selected port from above list Enable printer pooling Enables printing to two or more identical print devices by using one logical printer 2 Note For ...

Page 146: ...window Always available Available from Configures how many hours the printer is available You can choose from 24 hours or specified hours Priority Configures the priority of the current setting Driver Displays the installed printer driver name New Driver Clicks to install a new or updated printer driver Spool print documents so program finishes printing faster Sets to spool the documents before pr...

Page 147: ...nter setup Print spooled documents first Sets to print the spooled document irrespective of a priority settings Keep printed documents Sets to hold the spooled data of the documents after printing Enable advanced printing features Enables the advanced printing features 2 Note For more information refer to the manual of the Windows ...

Page 148: ...8 Color Management tab Performs settings related to color management Detail The method to open the Properties window depends on OS Refer to About Properties window on Page 8 1 about how to open the Property window It is not used in this printing system ...

Page 149: ...perties window on Page 8 1 about how to open the Property window Option Paper Sources Selects an installed paper source Option Finisher Selects an installed Finisher Option Punch Unit Selects an installed Punch Unit Option Cover Sheet Feeder Selects an installed Cover Sheet Feeder Option Punch Z Fold Unit Selects an installed Punch Z Fold Unit Trimmer Selects an installed Trimmer Unit ...

Page 150: ...on for the printer automatically Enhanced Security By turning ON the Enhanced Security you can enter nothing anymore to the password input field for the following functions so that the password cannot be transmitted from the printer driver to the printing system through the net work Secure Print page 8 25 User Authentication Account Track page 8 30 To print using these functions you should enter t...

Page 151: ...nds on OS Re fer to About Properties window on Page 8 1 about how to open the Printing Preference window Paper Orientation Sets the orientation to output paper in Portrait or Landscape The default is Portrait Paper Original Size You can select a original size from the list shown by clicking Document size that can be selected A3 A4 A5 A6 B4 B5 B6 11 x 17 8 1 2 x 14 ...

Page 152: ... and register the original size 8 1 2 x 11 8 x 13 8 1 2 x 13 8 1 4 x 13 8 1 8 x 13 1 4 5 1 2 x 8 1 2 8K 16K Japanese Postcard A4 Tab 8 1 2 x 11 Tab A3 Wide A4 Wide A5 Wide B4 Wide B5 Wide 11 x 17 Wide 8 1 2 x 11 Wide 5 1 2 x 8 1 2 Wide Custom Size Settings Print Position Settings Document size that can be selected ...

Page 153: ...iginal size Document size that can be selected Same as Original Size A3 A4 A5 A6 B4 B5 B6 11 x 17 8 1 2 x 14 8 1 2 x 11 8 x 13 8 1 2 x 13 8 1 4 x 13 8 1 8 x 13 1 4 5 1 2 x 8 1 2 8K 16K Japanese Postcard A4 Tab 8 1 2 x 11 Tab A3 Wide A4 Wide A5 Wide B4 Wide B5 Wide 11 x 17 Wide 8 1 2 x 11 Wide 5 1 2 x 8 1 2 Wide Custom Size Settings Print Position Settings ...

Page 154: ...s is selected from the Output Size Print Posi tion Settings dialog appears List of Custom Size Select from among 10 custom sizes of the paper Custom Size Name Edit the name of the custom size in the list above Size Width Set the width of the selected custom size in the list 100 324 mm Size Length Set the length of the selected custom size in the list for the current tray 140 460 mm Size Unit Selec...

Page 155: ...ects and prints from a suitable paper tray Paper Type Settings When Paper Type Settings is pressed the Paper Type Settings dialog ap pears Top Print using the top of the paper Center Print using the center of the paper Bottom Print using the bottom of the paper Feed Tray paper size that can be used Tray 1 to Tray 3 A3 A4 A5 A6 B4 B5 B6 11 x 17 8 1 2 x 14 8 1 2 x 11 8 x 13 8 1 2 x 13 8 1 4 x 13 8 1...

Page 156: ...aper such as memo paper Thick 1 This is set when printing coated paper such as pamphlet Thick 2 This is set when printing thick paper such as a post card Thin This is set when printing thin paper Recycled This is set when printing recycled paper Label This is set when printing the paper such as label Transparency This is set when printing OHP sheet Trace This is set when printing trace paper User ...

Page 157: ...Interleave Check when using Transparency 2 Note You can select when Transparency is set for Bypass Tray Transparency Interleave Settings Binding Binding Position Sets the binding position for the document to be printed The position select ed here will be the position of stapling punching and base position of the im age shift Blank This is set when inserting the blank interleaf for the trans parent...

Page 158: ...g Combination Prints multiple pages onto a single sheet of the paper Binding Combination Details When selects the Details from the list of the Combination Combination Details dialog appears Combination Selects the number of pages to be printed onto a single sheet Order Selects the printing order of pages Border Selects whether draw a frame or line as the border between pages ABCD ABCD 2 in 1 ABCD ...

Page 159: ...lick Details File Margin Details dialog appears Front Side Sets the margin for the front side Back Side Sets the margin for the back side Same value for front and back sides Selects to use the same margin for the front and back sides Shift Mode Selects the shift mode Parallel Shift shifts the image parallel Auto Reduction shifts the image parallel and reduce an image to attain a hole print image p...

Page 160: ...ting The Staple cannot be set in the following cases When Finisher is not available in Options tab When Default is not selected in Setup tab Output Tray When Booklet is selected in Setup tab Print Type ABCD ABCD ABCD ABCD ABCD 1 Staple Left Binding Portrait 1 Staple Top Binding Portrait ABCD 2 Staples Top Binding Portrait 1 Staple Right Binding Portrait 2 Staples Right Binding Portrait 2 Staples L...

Page 161: ... be changed according with the Binding Position setting The Hole Punch cannot be set in the following cases When Punch Unit or Punch Z Fold Unit is not available in Options tab When an item other than Z fold is selected in Special Function tab Fold When Booklet is selected in Setup tab Print Type 2 Holes Left Binding Portrait 2 Holes Left Binding Landscape 2 Holes Right Binding Landscape 2 Holes R...

Page 162: ...he center of the output paper and folds it into half The Center Staple and Fold cannot be set in the following cases When FS 604 is not available in Options tab When an item other than Multi Half Fold is selected in Special Function tab Fold Output Output Method Print Sets the normal printing ...

Page 163: ...nner 0 The Secure Print cannot be set in the following cases 0 When Tandem Mode is available in Special Functions tab 1 Open the file to be printed and select File Print of application 2 Click Properties to open the Print ing Preferences window 3 Select Secure Print in the Output Method Secure Print Settings window appears 4 Enter Secure Print ID and Pass word Secure Print ID Enter the confi denti...

Page 164: ...s 11 Enter Password 12 Press OK to close Password Input screen 13 Select the file to print and press 14 Select AutoOutput and press the OK Confidential file is printed Detail To confirm the settings for Confidential Output select WaitOutput or Proof Output and press OK For more information refer to User s Guide Network Scanner ...

Page 165: ...e set in the following cases 0 When Tandem Mode is available in Special Functions tab 1 Open the file to be printed and select File Print of application 2 Click Properties to open Printing Preferences window 3 Select Save in User Box or Save in User Box and Print in the Output Method Selecting Save in User Box stores the print job on the internal hard disk Selecting Save in User Box and Print stor...

Page 166: ... PageScope Job Spooler or operate on the control panel of copier For more information on PageScope Job Spooler refer to PageScope Job Spooler User s Guide For more information about how to operate on the control panel refer to bizhub PRO 920 User s Guide Network Scanner ...

Page 167: ...s window 5 Click Print to perform printing from the application When Wait Mode is selected it stops without being printed When Proof and Print is selected only one set is printed and it stops On the copier s control panel the Mode Check screen appears 6 In case of Proof and Print Proof Stop blinks on the left above the copier touch panel screen Press Proof Stop Mode Check screen appears on the con...

Page 168: ...aper starting with the first page N to 1 means to output paper starting with the last page Output Collate Prints the first one set of prints in one lot and then the second set of prints the third set of prints when printing multiple sets of pages Output Offset Only when the finisher unit has been setup select to shift the next position of each set of print out back and forth when printing multi se...

Page 169: ...iver Setting Windows 8 IC 203 8 31 Detail Contact your administrator about User Authentication Account Track When the User Authentication Account Track is clicked the User Authen tication Account Track dialog appears ...

Page 170: ...ion about User Au thentication and Account Track Public User Select when you access as Public user to the print control ler Recipient User Select when you access as Recipient user to the print con troller User Name Enter the Recipient User Name when the Recipient User is selected Password Enter the Recipient Password when the Recipient User is selected Department Name Enter the Department Name Pas...

Page 171: ... to sta ple and punch etc Detail The method to open the Printing Preference window depends on OS Re fer to About Properties window on Page 8 1 about how to open the Printing Preference window Front Cover Page Sets a front cover type When the Blank is selected a blank sheet is inserted before the 1st page When the Printed is selected the 1st page of the document is printed with the specified sheet ...

Page 172: ...Back Cover Page Paper Source Specifies the paper tray for the back cover PI Cover Sheet PI Front Cover Sets a front cover for which the paper is from the PI Tray 1 or PI Tray 2 The PI Cover Sheet cannot be set in the following cases When the Cover Sheet Feeder is not selected in the Option tab PI Cover Sheet PI Back Cover Sets a back cover for which the paper is from the PI Tray 1 or PI Tray 2 The...

Page 173: ... Functions tab Regular duplex printing Duplex printing when edited by chapter function If a page specified as an opening page of a chapter comes to a back side insert a blank page to shift the location of the specified page to the front side of the next paper Regular pamphlet printing Pamphlet printing when edited by chapter If a page specified as an opening page of a chapter does not come to the ...

Page 174: ...ist Name Each Per Page Setting can be saved as a list Selects the list name from the list Per Page Setting Edit List Name Changes the list name When click this button the Edit List Name dialog appears List Name Enter the list name Per Page Setting Staple Settings Sets to use staple in the Per Page Settings When click this button the Staple Settings dialog appears Staple Sets the number of stapling...

Page 175: ...s specify either Insert Blank Sheet Print Single Sided or Print Double Sided Paper Source Specifies the paper feed tray to be used in the Per Page Settings Selecting Same as Body sets the same one as that set in Paper source of the Setup tab Staple A setting is made to decide if the Per Page Settings are stapled or not When Same as Body is selected the setting is the same one as that set in Staple...

Page 176: ...ppears Per Page Setting Delete Deletes Per Page Setting When select the Per Page Setting from the list and click this button the se lected setting is deleted Details When this button is clicked the Tab Text Details dialog appears You can configure the orientation position font name font type and font size Tab Text Set the orientation and position of the tab text Font Settings Set the font font sty...

Page 177: ...er characters and other details can be set for the tab sheet Paper Size Select the tab paper size Number of Tabs Select the number of tabs Position Adjustment Space Above Set the top space above the first tab Position Adjustment Space Be low Set the top space under the last tab Position Adjustment Gap Set the space between each tab Position Adjustment Text Posi tion Set the text position in each t...

Page 178: ... 8 12 Special Functions tab Configures the special functions of the print controller Detail The method to open the Printing Preference window depends on OS Re fer to About Properties window on Page 8 1 about how to open the Printing Preference window ...

Page 179: ...ce as large as the selected size of paper Combination No Reduction cannot be set in the following cases When the Chapter is available in the Per Page Setting tab When the Skip Blank Pages is selected in the Setup tab ABCD 1 ABCD 2 ABCD 1 ABCD 2 ABCD 1 ABCD 1 ABCD 2 ABCD 1 ABCD 1 ABCD 1 ABCD 2 ABCD 2 2 in 1 2 Repeat ABCD 1 ABCD 2 ABCD 1 ABCD 1 ABCD 1 ABCD 2 2 Repeat Reversal L 2 Repeat Reversal R E...

Page 180: ...ailable when the following unit is installed Special Functions Trim Cuts the edges of the output paper The Trim cannot be set in the following cases When Trimmer is not available in Options tab Special Functions Image Shift Extension Adjusts the details of the printing position to the output paper Multi Half Fold Multi Letter Fold in Multi Letter Fold Out Z Fold Punch Z Fold Unit FS 604 Multi Half...

Page 181: ...nding using an adhesive binder The Adhesive Binding cannot be set in the following cases When an item other than Double Sided is selected in the Setup tab Print Type Switch Setup It specifies whether the Image Shift sets up by the driver side or the printer side Front Side Set the shift amount for the front side Back Side Set the shift amount for the back side Outside Offset Outside Offset is a fu...

Page 182: ...unc tions as the master copier and the other one is the sub copier For the tandem printing the two copiers should be connected by either method as follows Connect the two copiers directly with a cross cable In this case the net work functions cannot be used Connect them with a straight cable via HUB 2 Note Use a cross cable or straight cable higher than the category type 5 Tandem printing should o...

Page 183: ...to open the Printing Preference window Overlay None Selects to print without Overlay Overlay Print Overlay Selects to print all pages of the document with specified Overlay Check Before Printing Sets to display a dialog for confirmation before printing with Overlay to be displayed Overlay Create Overlay To prepare overlay turn ON the Create Overlay click the Browse Files and specify where to save ...

Page 184: ... overlay For creating overlays perform the following procedure 1 Create an overlay with the application in use 2 Select Print from the File menu The selected menu may differ depending on the application used 3 Select KONICA MINOLTA 920 PCL 4 Click Properties 5 Click Overlay tab 6 Select Create Overlay and click Browse Files 7 Input the file name in the File Name Use kmf as the extension 8 Click Sa...

Page 185: ...er depending on the application used 2 Select KONICA MINOLTA 920 PCL 3 Click Properties 4 Click Overlay tab 5 Click Print Overlay and select file to be printed from list 6 Click OK The Properties dialog box closes 7 Click OK and print the overlay Select Overlay None after printing has been completed Along with the overlay data the document to be printed is printed on top of the overlay data ...

Page 186: ...ns of Watermark Detail The method to open the Printing Preference window depends on OS Re fer to About Properties window on Page 8 1 about how to open the Printing Preference window Watermark This check box is ON Watermark function is available Watermark Pull down menu By clicking the watermark list appears ...

Page 187: ...termark from the list shown by clicking the Font Settings Font Name You can select only one font per watermark from the list shown by clicking the Font Settings Style You can select style from the list shown by clicking the When Regular is selected normal formatting will be applied to your se lected watermark text When Bold is selected bold formatting will be applied to your selected watermark tex...

Page 188: ...Current Watermark to the center of the paper Text Density You can control the density of the watermark text with this slider If you slide this to the right the density of the watermark text will be darker If you slide this to the left it will be lighter Watermark Type Overwrite Prints the Watermark on top of the document text The printed text under the Watermark will be obscured Transparent Prints...

Page 189: ...Page Number Start Page Specifies the first page to print the page numbers Page Number Starting Number Specifies the initial page number to print Distribution Number Stamping Type Specifies the type of the copy number to print You can choose either from Stamp or Watermark Distribution Number Stamping Pages to Print Specifies the pages to print the copy number You can choose either from All Pages or...

Page 190: ...on Page 8 1 about how to open the Printing Preference window Pattern Fine The Fine prints image with finely detailed pattern error diffusion Pattern Coarse The Coarse prints image with a coarse pattern dither algorithm Print Density The print density can be adjusted by the sliding the control bar Toner Save Saves the consumption of toner by controlling printing density Draft Print Prints lightly w...

Page 191: ...ions of normal characters Type 3 is suitable for printing the curved sections of ornamental writings and fine characters When None is selected no smoothing operation is made Print with Black Text and Graphics Checking on the Text and Graphics allows you to print colored characters and lines and graphics clearly in black Print with Black All Checking on the All allows you to print all objects inclu...

Page 192: ...nts while in printing It is also possible to transmit detailed information con cerning the replacement of fonts 2 Reminder The TrueType fonts used to display the Windows screen are sent directly to the printer for each font data to be handled while in normal printing Therefore the same printing results as displayed on the screen can be obtained When the printer fonts those contained in the printer...

Page 193: ... Printer Font TrueType Font Substitution Table Displays the substitution settings of the True Type Font which is substituted with the built in printer fonts Use Printer Font Font Substitution Settings Selects the printer fonts which substitutes for the highlighted True Type Font Download Font Format Selects the font format to be downloaded to the printer Outline or BMP ...

Page 194: ...s the printer driver version from the Properties window Detail The method to open the Printing Preference window depends on OS Re fer to About Properties window on Page 8 1 about how to open the Printing Preference window Displays the version of the current printer driver ...

Page 195: ...ollowing method 1 Click Save Restore Setting Save Current Setting Save Setting window appears 2 Input Name and click OK Setting is saved and the name entered is displayed on the Save Re store Setting pull down menu To restore the setting in storage Setting in storage can be restored when required 1 Click Save Restore Setting to display menu 2 Select the setting to be restored from the list on disp...

Page 196: ...mment Enter the information of the current printer settings Browse Specify the folder where the file will be saved Restore Saved Setting When this is selected the Restore Setting window appears Library Select the name of the settings Detailed Restore Settings When this is clicked the Detailed Restore Settings dialog appears Select the restore items in the Detailed Restore Settings dialog ...

Page 197: ... Select the name of the settings Delete Delete the selected settings from the list above Save Setting File in Library Click to save the selected settings from the list Detailed Restore Settings When this is selected the Detailed Restore Setting window appears Select the restore items in the Detailed Restore Settings dialog ...

Page 198: ...ows 8 IC 203 8 60 8 19 About View Area Setting of the printer driver and status of the optional unit can be checked To Check the Status of the Optional Unit Status of the optional unit can be checked by the image 1 Click Printer View ...

Page 199: ...e following tables Detail Refer to the HELP for more information about Icon view Image View What is set Image Sample Paper view Zoom N Up 2in1 Booklet Staple Punch Duplex Printer view Copiermainbody Option Paper Sources Output Tray Icon view Cover Front Cov er Page Back Cover Page Per Page Setting Watermark Secure Print Wait Mode Image Shift ...

Page 200: ...ws NT4 0 2000 Select Start Settings Printers to open the Printers folder right click the printer icon and select Properties Windows XP Server 2003 Select Start Printers and Faxes to open the Printers and Faxes folder right click the printer icon and select Proper ties Operating System Method Windows 98 Me Select Start Settings Printers to open the Printers folder right click the printer icon and s...

Page 201: ...es of the Printers and Faxes folder are ap plied to print outs from any application How to setup with application Settings can be made in the print dialog indicated by selecting the print com mand in the application In this case the settings are effective only when the application is in use 2 Note This chapter is described by using the printer window of Windows XP The properties window may differ ...

Page 202: ...ked all tab settings are saved with the close of the properties window Cancel When the Cancel is clicked all tab settings are cancelled with the close of the properties window Apply When the Apply is clicked the present tab settings are saved This button is usefull when you want conduct other settings in other tabs and the present tab settings are registered before using other tabs ...

Page 203: ...ready configured the message will be displayed This is a confirmation message to decide whether to restore the previous set tings or keep the settings When this message is displayed select Resolve all conflicts for me automatically or I will resolve the conflict myself When selecting Resolve all conflicts for me automatically the previous setting will be turned OFF ...

Page 204: ...out how to open the Property window Location Enters the name of a place where the printer is located For example 2nd floor Room 101 Domain ABC and so on Comment Enters information about the printer For example User documentation team Maintenance 123 456 789 and so on Printing Preference Displays the property window of the selected printer You can change the setting of the printer driver with the p...

Page 205: ...PPD Printer Driver setting Windows 9 IC 203 9 6 Print Test Page Prints a test page of Windows You can print a test page without using any application 2 Note For more information refer to the manual of the Windows ...

Page 206: ... of a printer Detail The method to open the Properties window depends on OS Refer to About Properties window on Page 9 1 about how to open the Property window By using this Sharing tab you can make the printer available to network us ers 2 Note For more information refer to the manual of the Windows ...

Page 207: ...e 9 1 about how to open the Property window Add Port Using this button enables you to add a new port for Vendor specific port monitor TCP IP or Unix printers using the LPR port and so on Delete Port Deletes the selected port from above list Configure Port Using this button enables you to configure the selected port from above list Enable bidirectional support Gets the status information from the p...

Page 208: ... Printer Driver setting Windows 9 IC 203 9 9 Enable printer pooling Enables printing to two or more identical print devices by using one logical printer 2 Note For more information refer to the manual of the Windows ...

Page 209: ...pends on OS Refer to About Properties window on Page 9 1 about how to open the Property window Always available Available from Configures how many hours the printer is available You can choose from 24 hours or specified hours Priority Configures the priority of the current setting Driver Displays the installed printer driver name New Driver Clicks to install a new or updated printer driver ...

Page 210: ...ling Hold mismatched documents Sets to hold the document which does not match to the printer setup Print spooled documents first Sets to print the spooled document irrespective of a priority settings Keep printed documents Sets to hold the spooled data of the documents after printing Enable advanced printing features Enables the advanced printing features 2 Note For more information refer to the m...

Page 211: ...rity tab Perform settings for the security Detail The method to open the Properties window depends on OS Refer to About Properties window on Page 9 1 about how to open the Property window 2 Note For more information about Security tab refer to the manual of the Win dows ...

Page 212: ...ail The method to open the Properties window depends on OS Refer to About Properties window on Page 9 1 about how to open the Property window From To Tray Assignment Selects the paper size to print for every Tray Document size that can be selected 11 x 17 Wide 16K 5 1 2 x 8 1 2 Wide 8 1 2 x 11 Tab 8 1 2 x 11 Wide 8 1 2 x 13 8 1 4 x 13 8 1 8 x 13 1 4 ...

Page 213: ...n refer to the Adobe PS User s Guide Output Protocol Selects the output protocol For more information refer to the Adobe PS Us er s Guide Send CTRL D Before Each Job Selects to send a Ctrl D signal to the printer to notify before the print job or not to send For more information refer to the Adobe PS User s Guide 8K 8 x 13 A3 A3 Wide A4 A4 Tab A4 Wide A5 A5 Wide A6 B4 B4 Wide B5 B5 Wide B6 Legal L...

Page 214: ...to add the Euro currency symbol to the PostScript font Refer to the Adobe PS User s Guide Job Timeout Specifies a maximum length of time in seconds available for the printer to complete a single print job For more information refer to the user s guide of the Adobe PostScript 3 Wait Timeout Specifies a maximum length of time in seconds during which the printer waits for print data to be fed in from...

Page 215: ... 512 MB Finisher None FS 509 FS 516 FS 604 Punch Z Fold Unit None ZU 601 4 Holes ZU 602 2 Holes ZU 602 2 3 Holes ZU 602 2 4 Holes PK 503 2 Holes PK 504 4 Holes PK 505 2 3 Holes PK 505 2 4 Holes ZU 601 PK 504 4 Holes ZU 602 PK 503 2 Holes ZU 602 PK 505 2 3 Holes ZU 602 PK 505 2 4 Holes Cover Sheet Feeder None PI 501 Trimmer TU 501 Paper Source None LU 403 LU 404 ...

Page 216: ...e window depends on OS Re fer to About Properties window on Page 9 1 about how to open the Printing Preference window Orientation Sets the orientation to output paper in Portrait Landscape or Rotated Landscape Page Order Selects the output order Front to Back outputs paper starting with the first page Back to Front outputs paper starting with the last page ...

Page 217: ...educed for printing based on the printable area of the output paper Advanced Opens the KONICA MINOLTA 920 PS P Advanced Options window For more information refer to Advanced Options windows on Page 9 21 ABCD ABCD 2 in 1 ABCD ABCD ABCD ABCD 4 in 1 ABCD ABCD ABCD ABCD ABCD ABCD 6 in 1 ABCD ABCD ABCD ABCD ABCD ABCD ABCD ABCD ABCD 9 in 1 16 in 1 ABCD ABCD ABCD ABCD ABCD ABCD ABCD ABCD ABCD ABCD ABCD A...

Page 218: ...rence window Paper Source Selects and set the paper tray to be used from the list When the Automati cally Select is set the printer automatically selects and prints from a suitable paper tray Feed Tray paper size that can be used Tray 1 to Tray 3 11 x 17 Wide 16K 5 1 2 x 8 1 2Wide 8 1 2 x 11 Tab 8 1 2 x 11 Wide 8 1 2 x 13 8 1 4 x 13 8 1 8 x 13 1 4 8K 8 x 13 A3 A3 Wide A4 A4 Tab A4 Wide A5 A5 Wide ...

Page 219: ...an be selected No Setting Plain Paper Thick 1 This is set when printing coated paper such as pamphlet Thick 2 This is set when printing thick paper such as a post card Fine This is set when printing fine paper such as memo paper User This is set when printing the user specified paper set on the copier Blank Insert This is set when printing blank paper such as cover sheet Thin This is set when prin...

Page 220: ... Printing Preference window depends on OS Re fer to About Properties window on Page 9 1 about how to open the Printing Preference window Paper Output Paper Size You can select a paper size from the list shown by clicking Document size that can be selected 11 x 17 Wide 16K 5 1 2 x 8 1 2 Wide 8 1 2 x 11 Tab 8 1 2 x 11 Wide 8 1 2 x 13 8 1 4 x 13 8 1 8 x 13 1 4 8K ...

Page 221: ... Copy Count Collate Prints the first one set of copies in one lot and then the second set of copies the third set of copies when printing multiple sets of pages Graphic Scaling Prints by specifying the enlargement or reduction ratio in the range from 1 to 1000 8 x 13 A3 A3 Wide A4 A4 Tab A4 Wide A5 A5 Wide A6 B4 B4 Wide B5 B5 Wide B6 Japanese Postcard Legal Letter Statement Tabloid Document size t...

Page 222: ...r Features Offset Selects to shift the exit position of each set of print out back and forth when printing multi set of copies Print Position Selects the print position Top print using the top of the paper Center print using the center of the paper Bottom print using the bottom of the paper Paper Color Selects the colors of the output paper as shown below No Setting White Clear Yellow Pink Blue Gr...

Page 223: ...paper with the printed side facing down Face Up outputs paper with the printed side facing up Image order Selects the printing order of documents 1 to N outputs the first page N to 1 outputs the last page Binding Position Sets the binding position for the document to be printed The position select ed here will be the position of stapling punching and base position of the im age shift Duplex Prints...

Page 224: ...gle paper twice as big as a paper se lected in the output paper ABCD 1 ABCD 2 ABCD 1 ABCD 2 ABCD 1 ABCD 2 ABCD 1 ABCD 1 ABCD 2 ABCD 2 2 in 1 Booklet 2 Repeat Example 2 A4 size papers are aggregated on 1 A3 size paper ABCD 1 ABCD 1 ABCD 1 ABCD 2 ABCD 1 ABCD 1 ABCD 1 ABCD 2 2 Repeat Reversal L 2 Repeat Reversal R ...

Page 225: ... Finisher is not available in the Device Settings tab Install able Options When the Transparency is selected in the Paper Quality tab Media When the Auto or Main Tray is not selected in the Output Tray When any item other than Z fold is selected in the Fold ABCD ABCD ABCD ABCD ABCD 1 Staple Left Binding Portrait 1 Staple Top Binding Portrait ABCD 2 Staples Top Binding Portrait 1 Staple Right Bindi...

Page 226: ...ecified The position will be changed according with the Binding Position setting The Punch cannot be set in the following cases When the Punch Z Fold Unit is not available in the Device Settings tab Installable Options When the other than Z fold is selected in the Fold 2 Holes Left Binding Portrait 2 Holes Left Binding Landscape 2 Holes Right Binding Landscape 2 Holes Right Binding Portrait ABCD A...

Page 227: ...taple Punch only Z fold can be selected When any item other than Off is selected for the Front Cover Page Back Cover Page PI Front Cover and PI Back Cover The setting of Fold is available when the following unit is installed Image Shift Adjusts the details of the printing position to the output paper Z Fold Center Staple and Fold Multi Letter Fold in Multi Letter Fold Out Multi Half Fold Punch Z F...

Page 228: ...y for the front cover Back Cover Page Sets a back cover type When the Blank is selected a blank sheet is inserted after the last page When the Printed is selected the last page of the document is printed with the specified sheet as the back cover The Back Cover Page cannot be set in the following cases When the Transparency is selected in the Paper Quality tab Media When any item other than Off or...

Page 229: ...s When the Cover Sheet Feeder is not selected in the Device Settings tab Installable Options When any item other than Off is selected for the Fold Stitch Trim Transparency Interleave Set this item when using the transparency interleave as the paper Select either Printed or Blank Paper Tray Transparency Interleave Uses to select the paper tray for Transparency Interleave Paper Tray Transparency Int...

Page 230: ...s window Select Wait Mode to wait before printing the document to check the current setting from the control panel of copier Select Proof and Print to print the one copy as a test to check the output and the current setting from the control panel of copier 4 Click OK to close the Printing Preferences 5 Click Print to perform printing from the application When the Wait Mode is selected it stops wit...

Page 231: ...tored 10 Press START to resume the rest of the print job Smoothing Prints the curved section of characters and images smoothly when this printing system is used Type1 is suitable for printing the diagonal lines of normal characters and graphics Type2 is suitable for printing the curved sections of normal characters Type3 is suitable for printing the curved sections of ornamental writings and fine ...

Page 232: ...is printed in all the pages Front Cover Only Date Time is printed in the 1st page only Item Print density Feature Normal 100 Print with normal density Heavy 102 You can adjust printing density while maintaining print quality Light 1 98 Light 2 96 Light 3 90 Light 4 80 Light 5 70 Toner Save 95 Reduce toner consumption Draft Print 90 Data other than characters are roughly printed ...

Page 233: ...nting job instruction func tions as the master copier and the other one is the sub copier For the tandem printing the two copiers should be connected by either method as follows Connect the two copiers directly with a cross cable In this case the net work functions cannot be used Connect them with a straight cable via HUB 2 Note Use a cross cable or straight cable higher than the category type 5 T...

Page 234: ...der right click the printer icon and select Properties Windows NT4 0 2000 Select Start Settings Printers to open the Printers folder right click the printer icon and select Properties Windows XP Server 2003 Select Start Printers and Faxes to open the Printers and Faxes folder right click the printer icon and select Proper ties Operating System Method Windows 98 Me Select Start Settings Printers to...

Page 235: ...rties of the Printers and Faxes folder are ap plied to print outs from any application How to setup with application Settings can be made in the print dialog indicated by selecting the print com mand in the application In this case the settings are effective only when the application is in use 2 Note This chapter is described by using the printer window of Windows XP The properties window may diff...

Page 236: ...licked all tab settings are saved with the close of the properties window Cancel When the Cancel is clicked all tab settings are cancelled with the close of the properties window Apply When the Apply is clicked the present tab settings are saved This button is usefull when you want conduct other settings in other tabs and the present tab settings are registered before using other tabs ...

Page 237: ...hen you select a function which causes a confliction with the settings al ready configured the message will be displayed This is a confirmation message to decide which setting will be turned off When this message is displayed select OK or Cancel In case of OK the conflict setting will be turned OFF ...

Page 238: ...the printer is located For example 2nd floor Room 101 Domain ABC and so on Comment Enters information about the printer For example User documentation team Maintenance 123 456 789 and so on Printing Preference Displays the property window of the selected printer You can change the setting of the printer driver with the property window Print Test Page Prints a test page of Windows You can print a t...

Page 239: ...gs of a printer Detail The method to open the Properties window depends on OS Refer to About Properties window on Page 10 1 about how to open the Proper ty window By using this Sharing tab you can make the printer available to network us ers 2 Note For more information refer to the manual of the Windows ...

Page 240: ...w Add Port Using this button enables you to add a new port for Vendor specific port monitor TCP IP or Unix printers using the LPR port and so on Delete Port Deletes the selected port from above list Configure Port Using this button enables you to configure the selected port from above list Enable printer pooling Enables printing to two or more identical print devices by using one logical printer D...

Page 241: ...Proper ty window Always available Available from Configures how many hours the printer is available You can choose from 24 hours or specified hours Priority Configures the priority of the current setting Driver Displays the installed printer driver name New Driver Clicks to install a new or updated printer driver Spool print documents so program finishes printing faster Sets to spool the documents...

Page 242: ... the printer setup Print spooled documents first Sets to print the spooled document irrespective of a priority settings Keep printed documents Sets to hold the spooled data of the documents after printing Enable advanced printing features Enables the advanced printing features Detail For more information refer to the manual of the Windows ...

Page 243: ...0 10 10 8 Color Management tab Performs settings related to color management Detail The method to open the Properties window depends on OS Refer to About Properties window on Page 10 1 about how to open the Proper ty window It is not used in this printing system ...

Page 244: ...ueType fonts to the printer Threshold Units Selects between Points 1 100inch and Pixels as the setting unit for the threshold Threshold Specifies the threshold in the range from 1 to 3000 TrueType Font Displays a list of TrueType fonts installed in the system Printer Font to Use Displays a list of printer fonts The selected TrueType Fonts is substituted with the selected Printer Font When reselect...

Page 245: ... Fonts Checking this item substitutes printer fonts for all TrueType fonts for output Use Substitution Table Checking this item to use the TrueType font and printer font substitution ta ble Default Substitution Clicking the button to restore the TrueType font and printer font substitution relationship ...

Page 246: ...stem the following options are installable Option Information By entering the printer name or IP address option information can be auto matically obtained Option Information Printer Name or IP Address Inputs the printer name or IP Address Paper Source None LU 403 LU 404 Finisher None FS 509 FS 516 FS 604 Punch Unit None PK 503 PK 504 PK 505 2 3 Hole Type PK 505 2 4 Hole Type Cover Sheet Feeder Non...

Page 247: ...the password cannot be transmitted from the printer driver to the printing system through the net work Secure Print page 10 29 User Authentication Account Track page 10 34 To print using these functions you should enter the password on the control panel of the copier after transmitting the print data Refer to User s Guide Security for more information Scaling linked with Application If you want to...

Page 248: ...roperties window on Page 10 1 about how to open the Printing Preference window Copies Sets the number of copies to be printed Paper Orientation Sets the orientation to output paper in Portrait or Landscape The default is Portrait Paper Original Size You can select a original size from the list shown by clicking Original size that can be selected 11 x 17 8 1 2 x 14 8 x 13 8 1 2 x 13 8 1 4 x 13 8 1 ...

Page 249: ...Wide paper When Custom Size is selected it is possible to set and register the orig inal size 8 1 2 x 11 5 1 2 x 8 1 2 A3 A4 A5 A6 B4 B5 B6 8K 16K Japanese Postcard 11 x 17 Wide 8 1 2 x 11 Wide 5 1 2 x 11 Wide 5 1 2 x 8 1 2 Wide A3 Wide A4 Wide A5 Wide B4 Wide B5 Wide 8 1 2 x 11 Tab A4 Tab Custom Size Original size that can be selected ...

Page 250: ...ault is the Same as Original Size Original size that can be selected Same as Originals Size 11 x 17 8 1 2 x 14 8 x 13 8 1 2 x 13 8 1 4 x 13 8 1 8 x 13 1 4 8 1 2 x 11 5 1 2 x 8 1 2 A3 A4 A5 A6 B4 B5 B6 8K 16K Japanese Postcard 11 x 17 Wide 8 1 2 x 11 Wide 5 1 2 x 11 Wide 5 1 2 x 8 1 2 Wide A3 Wide A4 Wide A5 Wide B4 Wide B5 Wide 8 1 2 x 11 Tab A4 Tab ...

Page 251: ...Set the width of the selected custom size in the list 1000 3140 mm Length Set the length of the selected custom size in the list for the current tray 1400 4600 mm Unit Select the units for setting Width and Length Feed Tray paper size that can be used Tray 1 to Tray 3 11 x 17 8 1 2 x 14 8 1 2 x 13 8 1 4 x 13 8 1 8 x 13 1 4 8 1 2 x 11 5 1 2 x 8 1 2 A3 A4 A5 A6 B4 B5 B6 8K 16K Japanese Postcard 11 x...

Page 252: ...from the list and Edit is pressed the Edit Paper Type dialog appears Paper Type Settings Edit Paper Type Paper Type Sets various types of paper sizes as the output paper as shown below Types of paper that can be selected No Setting Plain Paper Fine This is set when printing fine paper such as memo paper Thick 1 This is set when printing coated paper such as pamphlet Thick 2 This is set when printi...

Page 253: ...hed or not Transparency Interleave If you use Transparency Interleave as the Paper type check this checkbox Thin This is set when printing thin paper Recycled This is set when printing recycled paper Label This is set when printing the paper such as label Transparency This is set when printing OHP sheet Trace This is set when printing trace paper User This is set when printing the user specified p...

Page 254: ...Note Transparency Interleave can be used only by setting the Paper Source to Bypass Tray Layout Normal Performs the Normal printing without using the Layout function Printed This is set when inserting the printed interleaf for the transparent sheet Blank This is set when inserting the blank interleaf for the trans parent sheet Paper Source Uses to select the paper tray for Transparency Interleave ...

Page 255: ...a blank space occurs consequent to the laying out of pages Layout N up Border Determines whether a border is printed between laid out pages and if it is also the types of the border is selectable The default is None Full Size Layout N up Advanced Layout N up Advanced Layout Type Decides the allocation order of each page ABCD ABCD 2 in 1 ABCD ABCD ABCD ABCD 4 in 1 ABCD ABCD ABCD ABCD ABCD ABCD 6 in...

Page 256: ... that can be folded and bound into a booklet It is usually used in the Defaults condition Layout Booklet Gutter When folding paper as a booklet between 2 pages specify in the range of 0 to 150 the margin to be set uniformly in dots Layout Booklet Creep When folding paper as a booklet specify in the range of 0 to 20 the page in tervals at the center of paper to be broadened in dots to the inside pa...

Page 257: ...dles is OFF When Bundle Size is set to 8 and Fill Bundles is ON Layout Booklet Advanced Size Orientation change handling Determines the output method when a mixture of pages with different paper sizes and printing orientations is used Layout Fit Enlarges or reduces the paper size by the application to adjust it to the actual paper size to be printed Layout Scale Scale Factor Sets the scaling rate ...

Page 258: ... zoom in ratio at the Scale Factor Layout Poster Poster Style Determines how a page is divided for enlargement Layout Poster Position This is a fine adjustment to adjust the printing position on the output paper Layout Poster Scale Factor When selecting Poster Style Custom set the scale factor in the range from 101 to 400 Layout Poster Advanced Poster 3 x 3 ...

Page 259: ... Position This is a fine adjustment to adjust the printing position on the output paper Binding Binding Position Sets the binding position for the document to be printed The position select ed here will be the position of stapling punching and base position of the im age shift Binding Print Type Selects the print type among Single Sided Double Sided and Booklet Single Side prints on one side of th...

Page 260: ... will be changed according with the Binding Position setting The Staple cannot be set in the following cases When the Finisher is not available in the Option tab ABCD ABCD ABCD ABCD ABCD 1 Staple Left Binding Portrait 1 Staple Top Binding Portrait ABCD 2 Staples Top Binding Portrait 1 Staple Right Binding Portrait 2 Staples Right Binding Portrait 2 Staples Left Binding Portrait ...

Page 261: ...Hole Punch cannot be set in the following cases When the Punch Unit or Punch Z Fold Unit is not available in the Op tion tab Binding Center Staple and Fold Folds the paper into half and staple at the center of the output paper on the folded line The Center Staple and Fold cannot be set in the following cases When the Booklet is not available in the Option tab Print Type 2 Holes Left Binding Portra...

Page 262: ...ntil you input the Secure Print ID and the password on the copier s control panel To perform the Secure Print you need to configure the settings for Confiden tial output on the copier For more information on the Confidential output re fer to User s Guide Network Scanner 0 The Secure Print cannot be set in the following cases 0 When Tandem Mode is available in Special Functions tab 1 Open the file ...

Page 263: ...d select Recall 9 Press Confidential 10 Select a box and press OK Password Input screen appears 11 Enter Password 12 Press OK to close Password Input screen 13 Select the file to print and press 14 Select AutoOutput and press OK Confidential file is printed Detail To confirm the settings for Confidential Output select WaitOutput or Proof Output and press OK For more information refer to User s Gui...

Page 264: ...cannot be set in the following cases 0 When Tandem Mode is available in Special Functions tab 1 Open the file to be printed and select File Print of application 2 Click Properties to open Printing Preferences window 3 Select Save in User Box or Save in User Box and Print in the Output Method Selecting Save in User Box stores the print job on the internal hard disk Selecting Save in User Box and Pr...

Page 265: ...inting a large volume document such as multi ple sets of pages 1 Open the file to be printed and select File Print of application 2 Click Properties to open the Print ing Preferences window 3 Select Wait Mode or Proof and Print in the Output Method 4 Click OK to close the Printing Preferences window 5 Click Print to perform printing from the application When Wait Mode is selected it stops without ...

Page 266: ...inisher on the Option tab respective ly When Staple is available in Setup tab items other than Auto and Main Tray cannot be set Output Output Order Changes the output order Face Down outputs paper with the printed side facing down Face Up outputs paper with the printed side facing up 1 to N means to output paper starting with the first page N to 1 means to output paper starting with the last page ...

Page 267: ...ion Account Track is clicked the Authentication Ac count Track dialog appears Authentication Selects to use the Authentication mode Public User Select when you access as Public user to the print controller Recipient User Select when you access as Recipient user to the print controller User Name Enter the Recipient User Name when the Recipient User is selected Password Enter the Recipient Password ...

Page 268: ...dows 10 IC 203 10 35 Account Track Selects to use the Account Track mode Detail Refer to the Copier s User s Guide for more information about Authen tication and Account Track Department Name Enter the Department Name Password Enter the password ...

Page 269: ...ndow depends on OS Re fer to About Properties window on Page 10 1 about how to open the Printing Preference window Front Cover Page Sets a front cover type When the Blank is selected a blank sheet is inserted before the 1st page When the Printed is selected the 1st page of the document is printed with the specified sheet as the front cover ABCD ABCD ABCD ABCD ABCD ABCD ABCD ABCD ABCD ABCD ABCD ABC...

Page 270: ...paper tray for the back cover PI Cover Sheet PI Front Cover Sets a front cover for which paper is from the PI Tray 1 or PI Tray 2 The PI Cover Sheet cannot be set in the following cases When the Cover Sheet Feeder is not selected in the Option tab PI Cover Sheet PI Back Cover Sets a back cover for which paper is from the PI Tray 1 or PI Tray 2 The PI Cover Sheet cannot be set in the following case...

Page 271: ...s ON in Special Functions tab Regular duplex printing Duplex printing when edited by chapter function If a page specified as an opening page of a chapter comes to a back side insert a blank page to shift the location of the specified page to the front side of the next paper Regular pamphlet printing Pamphlet printing when edited by chapter If a page specified as an opening page of a chapter does n...

Page 272: ...settings and to use Tab Paper Per Page Setting Save as Saves the configuration file for Per Page Setting as a new file Per Page Setting Load Opens the existing configuration file for Per Page Setting Per Page Setting Staple Settings Sets to use staple in the Per Page Settings When click this button the Staple Settings dialog appears Staple Set the number of stapling ...

Page 273: ...ndow header characters and other details can be set for the tab sheet Paper Size Select the tab paper size Number of Tabs Select the number of tabs Position Adjustment Space Above Set the top space above the first tab Position Adjustment Space Below Set the top space under the last tab Position Adjustment Gap Set the space between each tab Position Adjustment Text Position Set the text position in...

Page 274: ...e Settings specify either Insert Blank Sheet Print Single Sided or Print Double Sided Paper Source Specifies the paper feed tray to be used in the Per Page Settings Selecting Same as Body sets the same one as that set in Paper source of the Setup tab Staple A setting is made to decide if the Per Page Settings are stapled or not When Same as Body is selected the setting is the same one as that set ...

Page 275: ... list and click this button the Per Page Setting dialog mentioned above appears Per Page Setting Delete Deletes Per Page Setting When select the Per Page Setting from the list and click this button the se lected setting is deleted Per Page Setting Clear All Deletes All Per Page Settings from the list Details When this button is clicked the Tab Text Details dialog appears You can configure the orie...

Page 276: ...ies the pages to print the date and time All pages Date Time is printed in the all pages Front Cover Only Date Time is printed in the front cover only Page Number Pages to Print Specifies the pages to print the page numbers All pages Page number is printed in the all pages Not Front Cover Page number is printed except front cover Not Front Back Cover Page number is printed except front back cover ...

Page 277: ...n Number Stamping Starting Number Specifies the initial copy number to print Combination No Reduction 2 in 1 2 repeat or 2 repeat reversal setting is available which prints out two page data on one sheet of paper Two page data is printed out on a sheet of paper twice as large as the selected size of paper ABCD 1 ABCD 2 ABCD 1 ABCD 2 ABCD 1 ABCD 1 ABCD 2 ABCD 1 ABCD 1 ABCD 1 ABCD 2 ABCD 2 2 in 1 2 ...

Page 278: ...n be setup The setting of Fold is available when the following unit is installed Image Shift Adjusts the details of the printing position to the output paper Z Fold Multi Letter Fold in Multi Letter Fold Out Multi Half Fold Punch Z Fold Unit FS 604 Z Fold o Multi Letter Fold In Out o Multi Half Fold o ...

Page 279: ...inding Selects when doing adhesive binding using an adhesive binder Switch Setup It specifies whether the Image Shift sets up by the driver side or the printer side Front Side Set the shift amount for the front side Back Side Set the shift amount for the back side Outside Offset Outside Offset is a function to adjust so that the print image is shifted toward the outside as the pages ad vance accor...

Page 280: ...uction func tions as the master copier and the other one is the sub copier For the tandem printing the two copiers should be connected by either method as follows Connect the two copiers directly with a cross cable In this case the net work functions cannot be used Connect them with a straight cable via HUB 2 Note Use a cross cable or straight cable higher than the category type 5 Tandem printing ...

Page 281: ...rence window Output To Printer Outputs print data to the printer Output Encapsulated PostScript Outputs print data as a file in the EPS format Output File Name Allows you to specify a file name when outputting data as a file in the EPS format Settings Job Compression Offers a choice of None LZW or Flate as a print job compression method Settings Flate Compression When Flate is selected for the Job...

Page 282: ...Settings Gamma Level Specifies the correction of the gamma value of the printer in the range of 0 000 2 000 The default is 1 000 Settings Tokenised PS Windows NT4 0 2000 XP Server 2003 only Checking this box enables Tokenised PS Watermark Option Print Watermark On Logical Page Checking this box causes a watermark to be printed on every original sheet when N Up or Booklet is selected Unchecking thi...

Page 283: ...porting the PostScript Adobe applications Quark Xpress etc prepares drawing data so that the original drawing quality can be secured However the function to process the image N up Booklet etc cannot be used When the check box is turned OFF drawing data is prepared on the printer driver side However when the data is printed with an application supporting the PostScript the drawing quality may be in...

Page 284: ...er while in the printing process Selectable in the range from 0 300 sec Print Enhance Print Enhance Checking this box makes the adjustment of the halftone frequency and angle enable Print Enhance Halftoning Sets the halftone frequency in the range from 8 0 to 600 0 Print Enhance Screen Angle Sets the halftone angle of degree in the range from 0 0 to 360 0 Use Bitmap Smoothing Checking this item en...

Page 285: ...en the Printing Preference window Overlay Displays a list of stored overlay files When None is selected the overlay function is disabled For the overlay printing procedure refer to Overlay Printing Procedure on Page 10 54 Add Overlay Opens the Load Page Overlay File dialog box that is used to select an over lay file Create Overlay Opens the Create Page Overlay dialog box that is used to save an ov...

Page 286: ...ure 1 Create an overlay with the application in use 2 Select Print from the File menu The selected menu may differ depending on the application used 3 Select KONICA MINOLTA 920 PS V 4 Click Properties 5 Click Overlay tab 6 Click Create Overlay The Create Page Overlay dialog box appears 7 Input the file name in File Name Use esp as the extension 8 Click Save The Create Page Overlay dialog box close...

Page 287: ...lected menu may differ depending on the application used 2 Select KONICA MINOLTA 920 PS V 3 Click Properties 4 Click Overlay tab 5 Select overlay file to be printed 6 Click OK The Properties dialog box closes 7 Click OK and print the overlay Along with the overlay data the document to be printed is printed on top of the overlay data Select Overlay None after printing has been completed ...

Page 288: ...ge Rotation Sets the rotation of the printing data to 0 90 180 or to 270 counterclock wise Effects Mirror Image Prints a mirror image of the printing data Effects Negative Image Prints a negative image of the printing data Adjustment Slider A If the graphic appears too bright slide the brightness slider to the left If the graphic appears too dark slide the brightness slider to the right Adjustment...

Page 289: ...table for printing the diagonal lines of normal characters and graphics Type 2 is suitable for printing the curved sections of normal characters Type 3 is suitable for printing the curved sections of ornamental writings and fine characters When Off is selected no smoothing operation is made Monochromatic Convention By Driver By Printer Makes a choice whether you change the graphic mode to monochro...

Page 290: ...termark that you want to print You can choose from None CONFIDENTIAL COPY DRAFT FILE COPY DO NOT COPY FINAL PROOF TOP SECRET URGENT CIRCULAR WITHDRAW NO RE PRODUCTION INTERNAL USE and IMPORTANT The default is None Watermark Add Adds an edited watermark When you input text on Edit Text the Add becomes active Watermark Update Updates a watermark while it is being edited Watermark Delete Deletes the ...

Page 291: ...rmines the unit of the coordinates displaying the location Position Center Watermark Arranges the watermark in the center of the page 1st Page Only When this item is checked a watermark is printed on the first page only When not checked the watermark is printed on all pages Transparent Text When this item is checked characters are printed with a net pattern back ground that looks transparent When ...

Page 292: ... To Save Setting Current setting can be saved by the following method 1 Click Save Restore Setting Save Save Setting window appears 2 Input Name and click OK Setting is saved and the name entered is displayed on the Save Re store Setting pull down menu To restore the setting in storage Setting in storage can be restored when required 1 Click Save Restore Setting to display menu 2 Select the settin...

Page 293: ...out View Area Setting of the printer driver and status of the optional unit can be checked 2 Note The Printer View cannot be displayed with the Watermark tab To Check the Status of the Optional Unit Status of the optional unit can be checked by the image 1 Click Printer View ...

Page 294: ...ystem to ensure it is turned on Then turn on the computer 2 Select Adobe PS and select printer name for your printing system from the Chooser dialog Refer to Selecting the printer with the Chooser on Page 5 23 for detailed information on selecting this printing system from the Chooser dialog 3 Open the file to be printed 4 Select File Page Setup of the application You can configure the functions o...

Page 295: ...hat the printer name is the name of this printing sys tem If the printer name is not the name of this printing system click at the side of the Printer box to select the printing system 8 Make settings in the Print dialog You can set the function of the printing system further by opening the screen from the Print 9 Click Print The file is printed ...

Page 296: ... when you print a file from a Macintosh with this printing system Configure dialog box This dialog box is opened from the Chooser dialog You can set the printer driver to recognize optional devices in this printing system Page Setup dialog box This dialog box is opened from an application You can set paper size ori entation scaling watermarks visual effect alternate font smoothing and custom page ...

Page 297: ...PostScript PPD Printer Driver setting Mac OS 9 11 IC 203 11 4 Print dialog box This dialog box is opened from an application You can set various functions ...

Page 298: ...that Active is selected in the AppleTalk box 3 Click AdobePS icon 4 Click the printer name for your PS3 printing system from the Select a PostScript Printer list 5 Click Setup if you are using the printing system for the first time A dialog box appears 6 Click Configure The Configure dialog box appears 7 Click OK to close the Configure dialog ...

Page 299: ...lect File Page Setup of the application The Page Attributes dialog box in the Page Setup dialog box ap pears 2 Click button upper left corner the dialog box to select each menu as required Page Setup Watermark dia log box Page Setup PostScript Op tions dialog box Page Setup Custom Page Default dialog box ...

Page 300: ...t File Print of the application Print General dialog box The General dialog box in the Print dialog box appears 2 Click button below the Printer box to select each menu as re quired Print Background Printing dialog box Print Cover Page dialog box Print Layout dialog box Print Error Handling dialog box ...

Page 301: ...PostScript PPD Printer Driver setting Mac OS 9 11 IC 203 11 8 Print PostScript Setting dia log box Print Printer Specific Op tions dialog box 1 Print Printer Specific Op tions dialog box 2 ...

Page 302: ...es described earlier as necessary For example Open Configure Displaying the Configure dialog box on Page 11 5 Open Page Setup Cover Page Displaying the Page Setup dialog box on Page 11 6 Open Print Printer Specific Options dialog box 1 Displaying the Print dialog box on Page 11 7 This chapter mainly describes information on the functions inherent in this printing system Refer to the manual for the...

Page 303: ...x Performs settings of the page attributes Detail Refer to the Displaying the Page Setup dialog box on Page 11 6 Paper You can select a paper size from the list shown Paper size that can be selected A3 A4 A5 A6 B4 B5 B6 Tabloid Legal Letter Statement 8 x 13 8 1 2 x 13 8 1 4 x 13 8 1 8 x 13 1 4 ...

Page 304: ...ects the orientation to output paper in Portrait or Landscape Click on the button for Portrait left of Orientation Click on the button for Landscape right of Orientation Scale Prints by specifying the enlargement or reduction ratio in the range from 25 to 400 The Scale cannot be set in the following cases When the Print Layout Pages per sheet is set to any item other than 1 8K 16K Japanese Postcar...

Page 305: ... IC 203 11 12 Booklet Checks to print on both sides of the paper and fold them Booklet prints in order which every folded page appears in their original order when gathered at the end Select the type of the booklet after checking the Booklet check box ...

Page 306: ...to watermark the first page only turn on the First radio but ton If you want to watermark all pages turn on the All radio button Types of Watermark Sets the type of watermark as follows If you want to use the PICT file for watermark turn on PICT radio button If you want to use the EPS file for watermark turn on EPS radio button If you want to use the TEXT file for watermark turn on TEXT radio but ...

Page 307: ...int a document Edit If you selected TEXT type you can edit the text you print as watermark If you click Edit Watermark Specification screen appears Watermark File You can specify watermark that is stored by default Watermark Font Size Style You can specify a font size style of the text you want to print as watermark Watermark Text If you want to print the input text as watermark input the text Col...

Page 308: ... units for setting Width Height and so on Paper Size Sets the height width horizontal vertical offset from the paper edge to the printing region of the output paper Margins Sets the margins of the output paper PPD Limits When you select the item form the list display the device limitation Custom Page Name Enters the custom page name with 31 characters or less Remove You can enter the stored custom...

Page 309: ...PostScript PPD Printer Driver setting Mac OS 9 11 IC 203 11 16 Add Stores the custom page settings with the entered custom page name ...

Page 310: ... the order pages are printed Pages Selects the page to be printed All Prints all pages of the document From To Enters the initial page number and the ending page number If you want to print one page enter the page number to the both boxes Paper Source Selects the paper source All pages from Prints all pages from the same tray Select the tray in the right box First page from Prints the first page f...

Page 311: ... be used Tray 1 to Tray 3 A3 A4 A5 A6 B4 B5 B6 Tabloid Legal Letter State ment 8 x 13 8 1 2 x 13 8 1 4 x 13 8 1 8 x 13 1 4 8K 16K Japanese Postcard A3 Wide A4 Wide A5 Wide B4 Wide B5 Wide 11 x 17 Wide 8 1 2 x 11 Wide 5 1 2 x 8 1 2 Wide 8 1 2 x 11 Tab A4 Tab Custom LCT LU 403 LU 404 Manual Feed ...

Page 312: ...oreground no spool file Prints the document immediately without spooling In this case you cannot use the other application during the printing Background Prints the document after spooling In this case you can use the other application during the printing Print Time Selects the time to be printed Urgent Prints the document by interruption Normal Prints the document normally Print at Prints at the ...

Page 313: ...n Page 11 7 Print Cover Page Cover Page Paper Source Selects the paper source to print a cover page The Cover Page Paper Source cannot be set in the following cases When the Print Cover Page is not available in the Cover Page dialog Selects the method to print a cover page None Prints no cover page Before Document Prints a cover page first After Document Prints a cover page last ...

Page 314: ...nting The allocated pages are automatically reduced for printing based on the printable area of the output paper Selecting the 2 x 2 sheet page 6 x 6 sheet page enables to divide the page to be output Layout direction Selects the layout direction the pages allocated onto a single paper ABCD ABCD 2 in 1 ABCD ABCD ABCD ABCD 4 in 1 ABCD ABCD ABCD ABCD ABCD ABCD 6 in 1 ABCD ABCD ABCD ABCD ABCD ABCD AB...

Page 315: ...PostScript PPD Printer Driver setting Mac OS 9 11 IC 203 11 22 Border Selects whether to draw a frame or line as the border between pages Print on Both Sides Checks to print on both sides ...

Page 316: ...ialog box 1 Performs settings of the finishing options Detail Refer to the Displaying the Print dialog box on Page 11 7 Collate Sets ON to print the required number of the first page and then the required number of the second pages the third page collectively when printing multiple sets of pages ...

Page 317: ...hen printing coated paper such as pamphlet Thick 2 This is set when printing thick paper such as a post card Fine This is set when printing fine paper such as memo paper User This is set when printing the user specified paper set on the copier Blank Insert This is set when printing blank paper such as cover sheet Thin This is set when printing thin paper Trace This is set when printing trace paper...

Page 318: ...each set of print out back and forth when printing multi set of copies Print position Selects the print position The Left print uses the left side of the paper The Center print uses the center of the paper The Right print uses the right side of the paper Paper Color Selects the colors of paper as the output paper as shown below No Setting White Clear Yellow Pink Blue Green Pre Punched Paper Select...

Page 319: ... with the printed side facing up Image order Select the image order The 1 to N outputs paper starting with the first page The N to 1 outputs paper starting with the last page Binding Position Sets the binding position for the document to be printed The position select ed here will be the position of stapling punching and base position of the im age shift Duplex Prints continuous multiple pages on ...

Page 320: ...lected for Media in the Print Printer Specific Options dialog box 1 When any item other than Off is selected for Front Cover Page Back Cover Page Paper Tray Front Cover Page or Paper Tray Back Cover Page ABCD 1 ABCD 2 ABCD 1 ABCD 2 ABCD 1 ABCD 2 ABCD 1 ABCD 1 ABCD 2 ABCD 2 2 in 1 Booklet 2 Repeat Example 2 A4 size papers are aggregated on 1 A3 size paper ABCD 1 ABCD 1 ABCD 1 ABCD 2 ABCD 1 ABCD 1 A...

Page 321: ...ld of the Configure When the Transparency is selected for Media in the Print Printer Specific Options dialog box 1 When any item other than Z fold is selected for Fold Detail Refer to User s Guide Copy for more information about staple and punch ABCD ABCD ABCD ABCD ABCD 1 Staple Left Binding Portrait 1 Staple Top Binding Portrait ABCD 2 Staples Top Binding Portrait 1 Staple Right Binding Portrait ...

Page 322: ...the Configure dialog When the Transparency is selected for Media in the Print Printer Specific Options dialog box 1 When any item other than Z fold is selected for Fold 2 Note Punch holes which can be specified vary depending on the destinations USA Either 2 or 3 holes can be specified Others Either 2 or 4 holes can be specified 2 Holes Left Binding Portrait 2 Holes Left Binding Landscape 2 Holes ...

Page 323: ... item other than Off is selected for the Staple Punch only Z fold can be selected When any item other than Off is selected for the Front Cover Page Back Cover Page Paper Tray Front Cover Page and Paper Tray Back Cover Page The setting of Fold is available when the following unit is installed Z Fold Center Staple and Fold Multi Letter Fold in Multi Letter Fold Out Multi Half Fold Punch Z Fold Unit ...

Page 324: ...f the document is printed with the specified sheet as the front cover The Front Cover Page cannot be set in the following cases When the Transparency is selected for Media in the Print Printer Specific Options dialog box 1 When any item other than Off is selected for the Fold Paper Tray Front Cover Page Specifies the paper tray for the front cover ABCD ABCD ABCD ABCD ABCD ABCD ABCD ABCD ABCD ABCD ...

Page 325: ...back cover PI Front Cover Sets a front cover for which paper is from the PI Tray 1 or PI Tray 2 The PI Front Cover cannot be set in the following cases When the None is selected for Cover Sheet Feeder in the Installable Options field of the Configure dialog When any item other than Off is selected for the Fold PI Back Cover Sets a back cover for which paper is from the PI Tray 1 or PI Tray 2 The P...

Page 326: ...est print and checks the current setting from the control panel of copier You can use this when printing a large volume document such as multiple sets of pages 1 Open the file to be printed and select File Print of application the Printing dialog box will appear 2 Select Printer Specific Options 2 of optional menu 3 Click Wait Mode to display the list Then select Wait Mode or Proof and Print Selec...

Page 327: ... you do not change any setting proceed to the step 9 7 If necessary press the Change to change settings 8 Change the settings and press the OK Mode Check screen will be restored 9 Press START to resume the rest of the print job Resolution Displays the resolution of the printer 600 dpi Smoothing Prints the curved section of characters and images smoothly Type 1 is suitable for printing the diagonal...

Page 328: ...e is printed in the all pages Front Cover Only Date Time is printed in the 1st page only Item Print density Feature Normal 100 Print with normal density Heavy 102 You can adjust printing density while main taining print quality Light 1 98 Light 2 96 Light 3 90 Light 4 80 Light 5 70 Toner Save 95 Reduce toner consumption Draft Print 90 Data other than characters are roughly printed ...

Page 329: ...rinting job instruction func tions as the master copier and the other one is the sub copier For the tandem printing the two copiers should be connected by either method as follows Connect the two copiers directly with a cross cable In this case the net work functions cannot be used Connect them with a straight cable via HUB 2 Note Use a cross cable or straight cable higher than the category type 5...

Page 330: ...isplaying the Configure dialog box on Page 11 5 Printer memory Sets the printer driver to recognize the printer memory Finisher Selects an installed Finisher Punch Z Fold Unit Selects an installed Punch Z Fold Unit Cover Sheet Feeder Selects an installed Cover Sheet Feeder Trimmer Selects an installed Trimmer Unit Paper Sources Selects an installed paper source ...

Page 331: ...ndow In Mac OS X printer driver is set up using the Printer Info window the Page Setup window and the Print window Here how to open the window of Mac OS X is explained The method to open the Printer Info window 1 Double click Applications Utilities Printer Setup Utility in a hard disk with system The Printer List window appears 2 Select the printer and then select Show Info from Printers menu Prin...

Page 332: ...om File menu The Page Setup window appears The method to open the Print window 1 Open the file to print 2 Select Print from File menu The Print window appears Detail To perform printing click Print Clicking Save As PDF creates a PDF file Selecting Save As on the Pre sets pop up menu enables you to save the settings you configured in the Print window ...

Page 333: ...n the Settings pop up menu in the Page Setup window Detail Refer to the The method to open the Page Setup window on Page 12 2 Format for Selects the printer you want to use Paper Size You can select a paper size from the list shown Paper size that can be selected A3 A4 A5 A6 B4 B5 B6 11 x 17 8 1 2 x 14 8 1 2 x 11 5 1 2 x 8 1 2 ...

Page 334: ...Orientation Sets the orientation to output paper Scale Prints by specifying the enlargement or reduction ratio in the range from 25 to 400 The Scale cannot be set in the following cases When the Pages per Sheet is set to any item other than 1 8 x 13 8 1 2 x 13 8 1 4 x 13 8 1 8 x 13 1 4 8K 16K Japanese Postcard A3 Wide A4 Wide A5 Wide B4 Wide B5 Wide 11 x 17 Wide 8 1 2 x 11 Wide 5 1 2 x 8 1 2 Wide ...

Page 335: ...lects Custom Paper Size on the Settings pop up menu in the Page Set up window Detail Refer to the The method to open the Page Setup window on Page 12 2 New You can register a new Custom Paper Size Paper Size Sets the height and width of the output paper Printer Margins Sets the margins of the output paper ...

Page 336: ...ies Sets the number of copies to be printed Collated It is possible to print the required number of the first page and then the re quired number of the second pages the third page when printing multiple sets of pages Pages Selects the page to be printed All Prints all pages of the document From To Enters the initial page number and the ending page number If you want to print one page enter the pag...

Page 337: ...e page for printing The allocated pages are automatically re duced for printing based on the printable region of the output paper Layout Direction Selects the layout direction the pages allocated onto a single paper Border Selects whether draw a frame or line as the border between pages ABCD ABCD 2 in 1 ABCD ABCD ABCD ABCD 4 in 1 ABCD ABCD ABCD ABCD ABCD ABCD 6 in 1 ABCD ABCD ABCD ABCD ABCD ABCD A...

Page 338: ...2 2 Paper Feed Selects the paper source All pages from Prints all pages from the same tray Select the tray in the right box First page from Prints the first page from the specified tray in upper box and remaining pages from the specified tray in lower box Detail If you use Auto Select a paper feed tray is automatically selected The paper specified in Page Attributes of this printing system is set ...

Page 339: ...late It is possible to print the required number of the first page and then the re quired number of the second pages the third page collectively when printing multiple sets of pages Offset Selects to shift the exit position of each set of print out back and forth when printing multi set of copies The Offset cannot be set in the following cases When the Japanese Post Card or Custom is selected for ...

Page 340: ...ction func tions as the master copier and the other one is the sub copier For the tandem printing the two copiers should be connected by either method as follows Connect the two copiers directly with a cross cable In this case the net work functions cannot be used Connect them with a straight cable via HUB 2 Note Use a cross cable or straight cable higher than the category type 5 Tandem printing s...

Page 341: ...t Order Selects the output order Face Down outputs paper with the printed side facing down Face Up outputs paper with the printed side facing up Image Order The 1 to N outputs paper starting with the first page The N to 1 outputs paper starting with the last page Binding Position Sets the binding position for the document to be printed The position select ed here will be the position of stapling p...

Page 342: ...he Finisher is not available in the Printer Info Installable Op tions When the Transparency is selected for Print Setup Paper Type When any item other than Z Fold is selected for Fold ABCD ABCD ABCD ABCD ABCD 1 Staple Left Binding Portrait 1 Staple Top Binding Portrait ABCD 2 Staples Top Binding Portrait 1 Staple Right Binding Portrait 2 Staples Right Binding Portrait 2 Staples Left Binding Portra...

Page 343: ...ted for Page Setup Paper Size When the Transparency is selected for Print Setup Paper Type When any item other than Z Fold is selected for Fold 2 Note Punch holes which can be specified vary depending on the destinations USA Either 2 or 3 holes can be specified Others Either 2 or 4 holes can be specified 2 Holes Left Binding Portrait 2 Holes Left Binding Landscape 2 Holes Right Binding Landscape 2...

Page 344: ... is selected for the Staple Hole Punch only Z Fold can be selected When any item other than Off is selected for the Front Cover Page Back Cover Page Paper Tray Front Cover Page and Paper Tray Back Cover Page The setting of Fold is available when the following unit is installed Z Fold Center Staple and Fold Multi Letter Fold in Multi Letter Fold Out Multi Half Fold Punch Z Fold Unit FS 604 Z Fold o...

Page 345: ...r setting Mac OS X 12 IC 203 12 15 12 8 Security Print window Selects Security on the pop up menu in the Print window Detail Refer to the The method to open the Print window on Page 12 2 Output Method Off Sets the normal printing ...

Page 346: ...annot be set in the following cases 0 When Tandem Mode is available in Finishing window 1 Open the file to be printed and select File Print of application 2 Select Security from pop up menu 3 Select Secure Print in the Output Method Secure Print Settings field becomes active 4 Enter Secure Print ID and Password Secure Print ID Enter the confidential box name Password Enter the password 5 Click Pri...

Page 347: ... Select the file to print and press 12 Select AutoOutput and press the OK The Confidential file is printed Detail To confirm the settings for Confidential Output select WaitOutput or Proof Output and press OK For more information refer to User s Guide Network Scanner ...

Page 348: ...t File Print of application 2 Select Security from pop up menu 3 Select Save in User Box or Save in User Box and Print in the Output Method Selecting Save in User Box stores the print job in the internal hard disk Selecting Save in User Box and Print stores the print job in the in ternal hard disk and prints one copy The Save in User Box Settings field becomes active 4 Enter File Name and User Box...

Page 349: ...form printing from the application When the Wait Mode is selected it stops without being printed When the Proof and Print is selected only one part is printed and it stops On the copier s control panel the Mode Check screen appears 5 In case of Proof and Print Proof Stop blinks on the left above the copier touch panel screen Press Proof Stop Mode Check screen appears on the control panel of copier...

Page 350: ...e transmitted from the printer driver to the printing system through the net work Secure Print page 12 16 User Authentication Account Track page 12 20 To print using these functions you should enter the password on the control panel of the copier after transmitting the print data Refer to User s Guide Security for more information Public User Select when you access as Public user to the print cont...

Page 351: ...Types of paper that can be selected No Setting Plain Paper Fine This is set when printing fine paper such as memo paper Thick 1 This is set when printing coated paper such as pamphlet Thick 2 This is set when printing thick paper such as a post card Thin This is set when printing thin paper Recycled This is set when printing recycled paper Label This is set when printing the paper such as label Tr...

Page 352: ...nt than the text paper The Front Cover Page cannot be set in the following cases When the Transparency is selected in the Print Setup Paper Type When the Collated is not available in the Print Copies Pages When the Pages per Sheets is selected in the Print Layout User This is set when printing the user specified paper set on the copier Blank Insert This is set when printing blank paper such as cov...

Page 353: ...s a front cover for which paper is from the PI Tray 1 or PI Tray 2 PI Back Cover Sets a back cover for which paper is from the PI Tray 1 or PI Tray 2 The PI Front Cover or PI Back Cover cannot be set in the following cases When the None is selected for Cover Sheet Feeder in the Printer Info window When the Transparency is not set in Print Setup Paper Type Transparency Interleave Sets this when you...

Page 354: ...arency Interleave Sets this when you want to use the paper feed tray for Transparency Inter leave Paper Tray Transparency Interleave cannot be set in the following cases Transparency is not set in Paper Type of the Setup window Transparency Interleave is not set in the Setup window ...

Page 355: ... to open the Print window on Page 12 2 Combination Prints a document of 2 pages onto a single paper twice as big as the original documents ABCD 1 ABCD 2 ABCD 1 ABCD 2 ABCD 1 ABCD 2 ABCD 1 ABCD 1 ABCD 2 ABCD 2 2 in 1 Booklet 2 Repeat Example 2 A4 size papers are aggregated on 1 A3 size paper ABCD 1 ABCD 1 ABCD 1 ABCD 2 ABCD 1 ABCD 1 ABCD 1 ABCD 2 2 Repeat Reversal L 2 Repeat Reversal R ...

Page 356: ...ack Cover in the Print Setup Image Shift Adjusts the details of the printing position to the output paper Print Position Selects the print position Top print using the top of the paper Center print using the center of the paper Bottom print using the bottom of the paper Date Time Specifies the pages to print the date and time All pages Date Time is printed in all the pages Front Cover Only Date Ti...

Page 357: ... the curved sections of normal characters Type 3 is suitable for printing the curved sections of ornamental writings and fine characters When Off is selected no smoothing operation is made Item Print density Feature Normal 100 Print with normal density Dark 102 You can adjust printing density while main taining print quality Light 1 98 Light 2 96 Light 3 90 Light 4 80 Light 5 70 Toner Save 95 Redu...

Page 358: ...The method to open the Printer Info window on Page 12 1 Printer memory Sets the printer driver to recognize the printer memory Finisher Selects an installed Finisher Punch Z Fold Unit Selects an installed Punch Z Fold Unit Cover Sheet Feeder Selects an installed Cover Sheet Feeder Trimmer Selects an installed Trimmer Unit Paper Sources Selects an installed paper source ...

Page 359: ...nt trouble 3 Make a print of Configuration Page Print from Report Type of Con troller in the Utility Mode of the copier and check to see if it is set cor rectly Refer to Test Page Print on page 4 26 for more information about Test Page 4 Check the current status of the print controller Check the current status shown on the LCD of the control panel Touch the Job List on the touch panel of the copie...

Page 360: ...de Cannot select any media other than Plain paper from Media 1 For the PCL6 Driver select Restore Defaults from the Paper tab or Cover tab to restore the default setting 2 Set Paper Source to a setting other than Auto A message requesting a paper size you did not specify is displayed 1 Cancel the job to change the paper size in the Page Paper Setup di alog on your application 2 Touch and select th...

Page 361: ...d Per Page Setting tab and return to the state of default 2 Check that any item other than Custom Size or Japanese Post Card is selected in Output Tray 3 Check that Paper Type setting is not Transparency Transparency Interleaving Blank Sheet or Transparency Interleaving Printed 4 In the case of the PCL printer driver check that the Print type setting is not Booklet Memory Overflow 1 Depending on t...

Page 362: ...rint out a simple test file If this also does not succeed reinstall the application in question A PostScript Error message displays when attempting to get a printout from a specific file Response It is possible that the print setting for the file is wrong that graphics con tained in the file are damaged or that bad elements are contained in the file Find a print setting that does not cause any Pos...

Page 363: ...or more switch it back on and then try downloading fonts again For details on how to download fonts refer to the User s Guide that comes with the fonts Non fixed size paper can not be printed correctly Macintosh Response The direction in which non fixed size paper is loaded in the copier may be incorrect Rotate the paper direction 90 degrees and then try printing after changing the settings of the...

Page 364: ... are not printed you can check them on the Non complete Job List screen To get the Non complete Job List screen to appear 1 Press Job List on the LCD panel 2 Press Incomplete 3 Check the Incomplete job Detail For more information about job list consult your system administrator ...

Page 365: ...Font 14 IC 203 14 1 14 Font This chapter describes the font 14 1 Font List PCL ...

Page 366: ...Font 14 IC 203 14 2 ...

Page 367: ...Font 14 IC 203 14 3 ...

Page 368: ...Font 14 IC 203 14 4 14 2 Font List PostScript ...

Page 369: ...Font 14 IC 203 14 5 ...

Page 370: ...Font 14 IC 203 14 6 ...

Page 371: ...Font 14 IC 203 14 7 ...

Page 372: ... use Windows XP Server 2003 click Appearance and Themes and then click Fonts under See Also Fonts window appears 5 Select File menu 6 Select Install New Font Add Fonts dialog appears 7 Select a font to be added from the Screenfont folder of IC 203 CD ROM or EN Screen Fonts PS Screen Fonts TrueType Core OS fold er of PS 503 CD ROM 8 Turn on Copy fonts to Fonts folder check box 9 Click OK PostScript...

Page 373: ...lation procedure A How to install PostScript Type1 fonts under Windows 98 Me NT 4 0 In order to use PostScript Type 1 fonts in Windows 98 Me NT 4 0 you must first install Adobe Type Manager ATM and then install the fonts through ATM ATM version 4 0 or higher is required for Windows 98 Me NT4 0 If ATM is not installed you will need to install an ATM compliant to your OS using the PS 503 CD ROM Refe...

Page 374: ... 2 In ATM click Font tab 3 Choose Browse For Fonts from the Source pop up menu 4 Select to EN Screen Fonts PS Screen Fonts Type 1 Fonts folder on the PS 503 CD ROM 5 Select the fonts you want to install You can click to select one font Ctrl click to select several fonts or Shift click to select a contiguous group of fonts 6 Press Add button to install the fonts ...

Page 375: ...Font 14 IC 203 14 11 7 Exit ATM ...

Page 376: ...s tem level just like TrueType fonts You do not need to install ATM 1 Choose Start Setting Control Panel 2 Double click on the Fonts icon 3 Go to the File menu select Install new font 4 In the folders pane at the lower left navigate to the location EN Screen Fonts PS Screen Fonts Type 1 Fonts folder on the PS 503 CD ROM 5 Click on Select all 6 Click on OK ...

Page 377: ...der of the PS 503 CD ROM The setup program starts running and an installation window appears 3 Click Next 4 Select your country then click Next 5 Click Yes Use of Adobe Type Manager ATM is subject to the terms and con ditions of the Software License Agreement If you agree by them click Yes The User Information window appears 6 Type in user information Name Company then click Next You are asked to ...

Page 378: ... appears 10 Click Finish When the Display Adobe Type Manager Read Me file check box is checked clicking Finish opens the ReadMe file After closing the ReadMe file or unchecking Display Adobe Type Manager Read Me file check box the Setup Com plete window will appear when you click Finish 11 Click Finish and Windows restarts When Windows is restarted Adobe Type Manager ATM goes into effect ...

Page 379: ...ler Downloaded to disk1 the fonts are not available for use Downloading fonts to disk1 might result in the Print Controller not func tioning Properly 2 Note After having downloaded fonts turn the copier off wait 10 seconds at least then turn it back on If you don t do so you cannot use the down loaded fonts Properly For details on how to download fonts refer to the User s Guide that comes with the...

Page 380: ...ed by non adminis trator of the print controller About the functions used by the administra tor refer to the Copier s User s Guide for POD Administrator for more information about copier When the Enhanced Security is ON the PageScope Web Connection function cannot be used When the Enhanced Security is turned from ON to OFF the PageScope Web Connection function is kept at OFF To enable the PageScop...

Page 381: ...n You can display the status of the print controller by using PageScope Web Connection The status you can display are as follows Summary Device Information Detail Input Tray Detail Output Tray Detail Hard Disk Detail Interface Information Detail Consumables Counter Online Assistance Active Job List Prin Active Job List Scan Send Done Job List Print Done Job List Scan Send Default Setting General S...

Page 382: ...er application 2 Enter the IP address of the print controller in the Address and press the Enter Return key The top page of the PageScope Web Connection appears Detail Contact your administrator about IP address of the print controller Display the variable status Summary 1 Click System from the top navigation The System page appears 2 Click Summary from the left navigation The Summary page appears...

Page 383: ...Utility Tool 15 IC 203 15 4 Device Information 1 Click System from the top navigation The System page appears 2 Click Device Information from the left navigation The Device Information page appears ...

Page 384: ...etail Input Tray 1 Click System from the top navigation The System page appears 2 Click Detail from the left navigation The Sub navigation of the Detail appears 3 Click Input Tray from the sub navigation The Input Tray page appears ...

Page 385: ...ail Output Tray 1 Click System from the top navigation The System page appears 2 Click Detail from the left navigation The Sub navigation of the Detail appears 3 Click Output Tray from the sub navigation The Output Tray page appears ...

Page 386: ...Detail Hard Disk 1 Click System from the top navigation The System page appears 2 Click Detail from the left navigation The Sub navigation of the Detail appears 3 Click Hard Disk from the sub navigation The Hard Disk page appears ...

Page 387: ...nformation 1 Click System from the top navigation The System page appears 2 Click Detail from the left navigation The Sub navigation of the Detail appears 3 Click Interface Information from the sub navigation The Interface Information page appears ...

Page 388: ...ail Consumables 1 Click System from the top navigation The System page appears 2 Click Detail from the left navigation The Sub navigation of the Detail appears 3 Click Consumables from the sub navigation The Consumables page appears ...

Page 389: ...Utility Tool 15 IC 203 15 10 Counter 1 Click System from the top navigation The System page appears 2 Click Counter from the left navigation The Counter page appears ...

Page 390: ...Utility Tool 15 IC 203 15 11 Online Assistance 1 Click System from the top navigation The System page appears 2 Click Online Assistance from the left navigation The Online Assistance page appears ...

Page 391: ...ve Job List Print 1 Click Job from the top navigation The Job page appears 2 Click Active Job List from the left navigation The Sub navigation of the Active Job List appears 3 Click Print from the sub navigation The Print page appears ...

Page 392: ...ransmission 1 Click Job from the top navigation The Job page appears 2 Click Active Job List from the left navigation The Sub navigation of the Active Job List appears 3 Click Scan Transmission from the sub navigation The Scan Transmission page appears ...

Page 393: ... from the top navigation The Job page appears 2 Click Done Job List from the left navigation The Sub navigation of the Done Job List appears 3 Click Print from the sub navigation The Print page appears 4 Select job from the list and click The Detail page appears ...

Page 394: ...the top navigation The Job page appears 2 Click Done Job List from the left navigation The Sub navigation of the Done Job List appears 3 Click Scan Transmission from the sub navigation The Scan Transmission page appears 4 Select job from the list and click The Detail page appears ...

Page 395: ...al Setting 1 Click Print from the top navigation The Print page appears 2 Click Default Setting from the left navigation The Sub navigation of the Default Setting appears 3 Click General Setting from the sub navigation The General Setting page appears ...

Page 396: ...PCL Settings 1 Click Print from the top navigation The Print page appears 2 Click Default Setting from the left navigation The Sub navigation of the Default Setting appears 3 Click PCL Settings from the sub navigation The PCL Settings page appears ...

Page 397: ... PS Settings 1 Click Print from the top navigation The Print page appears 2 Click Default Setting from the left navigation The Sub navigation of the Default Setting appears 3 Click PS Settings from the sub navigation The PS Settings page appears ...

Page 398: ...FF Settings 1 Click Print from the top navigation The Print page appears 2 Click Default Setting from the left navigation The Sub navigation of the Default Setting appears 3 Click TIFF Settings from the sub navigation The TIFF Settings page appears ...

Page 399: ...Click Print from the top navigation The Print page appears 2 Click Report Types from the left navigation The Report Types page appears 3 Select the report type to be printed 4 Click Print The report is printed 2 Note About the report type refer to Report to be printed on page 15 2 ...

Page 400: ...Windows 98 Me computers that perform peer to peer printing it is necessary to set up TCP IP install and set up KONICA MINOLTA Peer to Peer Printing Tool included in the accompanying CD ROM and set up the printer driver Installation of IP Peer to Peer To install the KONICA MINOLTA Peer to Peer Printing Tool double click Set up exe in the Peer2Peer folder of the accompanying CD ROM The installer wil...

Page 401: ...o Peer Printing Tool from the Printers folder 2 Delete the KONICA MINOLTA Peer to Peer Printing Tool by using Add Delete Applications from the Control Panel Perform Peer to Peer Printing To perform Peer to Peer Printing add a port on the printer driver by the fol lowing steps 1 Select Start Settings Printers and display the Printers window 2 Right click the printer icon in use and select Propertie...

Page 402: ...rt is not on the list and it needs to be created manually Device List Select either TCP IP or IPX SPX as the network on which you have the printer you want to use If this device is connected to the network it is automatically searched and displayed on the list Status When you click the printer on the network is searched Add Port When you select the printer on the list and press this button a port ...

Page 403: ...reate Print Server Name Specify a print server name of the printer on the IPX SPX network Network Address Specify a network address of the printer on the IPX SPX network Add Port Create a port with the specified details 6 Confirm the details of the setup on the setup screen If it is OK close the setup screen by clicking the close box on the upper right of the win dow 7 Click OK to close properties...

Page 404: ...ed to the Internet or an in tranet With this protocol this printing system will produce outputs as re quested via Internet or intranet Settings on the Copier To run a print job over IPP TCP IP settings must have been previously es tablished You can also set IPP attributes To do this contact your network administra tor about network setting Computer Internet Copier ...

Page 405: ...t 4 Choose Network printer and click Next 5 Choose Connect to a printer on the Internet or your intranet 6 Enter the copier s URL in the URL field like this http printer s IP address 631 ipp In the printer s IP address column enter the IP address assigned to your Network Interface Card Alternatively you can enter the host name of the printer s NIC s host name if DNS is set up on your network If yo...

Page 406: ...e task bar Then select Printers and Faxes of the Start menu 2 Double click Add a printer to run the Add Printer Wizard 3 Click Next 4 Choose Network printer and click Next 5 Choose Connect to a printer on the Internet or your intranet 6 Enter the copier s URL in the URL field like this http printer s IP address 631 ipp In the printer s IP address column enter the IP address assigned to your Networ...

Page 407: ...3x v10 4x you can set it up when you add a printer to the printer list after installing the printer driver 0 For more information on installing the printer driver refer to Installing to Macintosh Mac OS X on Page 5 24 1 Open System Preference and select Print Fax 2 Select Set Up Printers 3 Select Add 4 Select IP Print as a connection method for a printer 5 Select IPP Internet Printing Pro tocol an...

Page 408: ... up PCONSOLE and select the file server to use Refer to the manual of Novell NetWare for setting up with PCON SOLE 2 Generate and assign a print queue 3 Define the network interface card as the print server 4 Define the notification list password as necessary 5 Set up the primary file server as necessary On completion of setup turn off the main power of the print controller and the main body print...

Page 409: ... a different more advanced approach to network management than previous NetWare versions Generally it stores and tracks all network objects All 4 x 6 servers must have NDS loaded in order to function In this way eve ry NetWare 4 x 6 server is a Directory server because it services named Di rectory objects such as printing systems print server and print queues With the appropriate privileges you ca...

Page 410: ...be stored in the server since the Directory is a partitioned and distributed data base Even though the NetWare 4 x 6 server is not operating from a Bindery the applications making Bindery requests will not know the difference NDS setup PageScope Web Connection See your system administrator about PageScope Web Connection Novell NWADMIN Novell NWADMIN NetWare Administration is used to generate a dir...

Page 411: ...OEXEC NCF file to add an adequate SET command and restart the NetWare server or enter a SET command from the console prompt to make changes Note that any command entered following the console prompt is effective immediately but the definition of the autoexec ncf file becomes effective only after turning off power and on again Setup with PCONSOLE in Bindery mode If you are sure that the bindery con...

Page 412: ...ne printer daemon is run on one or more workstations and print data is communicated to the network interface card via a TCP IP port Printer based lpd where the print controller appears as a host running a line printer daemon Many operating systems provide the option of using host resident printing or printer resident printing In general printer based lpd is easier to use on BSD UNIX systems This r...

Page 413: ...ersion 10 IBM AIX Version 3 2 5 and Version 4 0 SCO UNIX Version 3 2 AS400 2 Note If the systems you are using do not run lpd refer to Installing UNIX TCP IP programs The UNIX TCP IP Programs on accompanying CD ROM also include source code so that you can recompose host based code for configuring on other System V platforms Configuring IP address to the network interface card Regardless of the pri...

Page 414: ...system by looking at the remote rm entry in the etc printcap file for that printer lpr handles a print job for a remote printer by opening a connection with the lpd process on the remote system and sending the data file followed by the control file containing control information for this job to the remote system The printer based lpd then filters the data and prints the job according to in formati...

Page 415: ...r example type mkdir usr spool lpd printer_name 3 To print via the spooler use the lpr command Type lpr P printer_name file_name Installation and testing are done You are now ready to print Setting Up an AIX version 2 5 Remote Printer to Use lpd Use the following procedure to set up a remote printer on the host that sends jobs to the network interface card using the lpd of the network interface ca...

Page 416: ...rface Card for the Remote System 8 Use PRINT for the queue on the remote system 9 Add a description optional 10 Press Enter to generate Installation is complete Test your printer by executing the following command lp d queue_name file_name Data Requested Example Data Description Name of queue to ad print1 Name of local printer queue Destination Host printfast NIC IP hostname Short Form Filter usr ...

Page 417: ...ow appears add values to configure the network interface card 7 At the bottom of the screen select Remote Printer is on BSD system from the three choices available 8 Click on the OK 9 Ping the unit to test communications Type ping IP address of the network interface card 10 Ping should confirm your IP address with the message IP address of the network interface card is alive 11 If the connection i...

Page 418: ...ming SCS to ASCII type YES to allow the AS 400 do the character translation 7 Manufacturer type and model must be the print driver that goes with your print controller Setting Up a DEC ULTRIX 4 3 RISC or OSF1 Remote Printer Use the following procedure to set up a remote printer on the host that sends jobs to the network interface card 1 At the prompt type lprsetup then select add 2 Enter a name fo...

Page 419: ...pe Y or N and press Enter An example is shown below 11 Add comments to the printcap file For example you can type Lois printer down the hall Enter 12 Select exit to save your configuration then press Enter You are now prepared to print Printer 7 Symbol Type Representative Value lp line printer STR rm remote host STR Network Interface Card_host rp remote printer STR PRINT sd spooler directory STR u...

Page 420: ...red use the rlpconf command 2 You are now asked a series of questions Respond as follows shown in bold type Please enter a printer name lprprinter1 Is lprprinter1 a remote printer or a local printer R Enter remote host name lprprinter Confirm the information you entered Y Confirm the preceding connection as your system default Y Enter another printer name or quit setup Q 3 If necessary stop and re...

Page 421: ...dmin p local printername s remote host name or IP address PRINT Your system may want its IP address instead of the remote host name 3 Enable local printername 4 Accept local printername 5 Printing on Linux Printing on Linux 1 Start x terminal 2 At the command prompt enter the printtool command The Red Hat Print System Manager window opens 3 The Red Hat Print System Manager window opens 4 Click the...

Page 422: ...Utility Tool 15 IC 203 15 43 An input filter optional When you finish click OK 6 Restart the daemon by choosing lpd Restart lpd in the Print Server Manager ...

Page 423: ...dows No of colors from black white binary to full color 16 777 216 colors image can be designated Basically the image is saved without being compressed BOOTP Abbreviation of BOOTstrap Protocol A protocol for a client machine on the TCP IP network to automat ically read the setting for the network from a server Currently however DHCP which was partially im proved on the basis of BOOTP is mainly use...

Page 424: ...t One of the file formats for illustration extension eps Data for both low and high resolution is contained Data for low resolution can be edited on the screen at a high speed At the time of printing output of the highest performance of the printer can be obtained with the data for high resolution Ethernet Standard for the LAN transmission line Extension A string attached to a file name to disting...

Page 425: ...inters Install To incorporate the hardware OS application printer driver etc to a computer system IP address A code address to identify individual network devic es on the Internet Comprises 4 sets of figures of 3 digits at the maximum such as 192 168 1 10 An IP address is allocated to all computers and other de vices connected to the Internet IPP Abbreviation of Internet Printing Protocol A protoc...

Page 426: ...put from a desired printer automatic download of a new driver when in troducing it etc can be simplified and automated In addition affairs related with the networks and print ers can be integrally controlled NetWare Network OS developed by Novel Uses NetWare IPX SPX as the communication pro tocol Number of lines A number of density of dots forming image OHP OHT A transparent sheet for OHP Overhead...

Page 427: ...tc Represents the number of pixels per inch ppm Abbreviation of Pages Per Minute Unit to indicate the number of sheets which can be printed in one minute Preview A function to display the processed image before printing or scanning Print queue Software system to memorize printing job generated in the spooler Print job Request for printing transmitted from PC to a print ing device Printer buffer Me...

Page 428: ...ingle page TIFF TIFF file of one page only SMTP Abbreviation of Simple Mail Transfer Protocol A pro tocol to transmit or transfer the electronic mails SNMP Abbreviation of Simple Network Management Proto col A control protocol using TCP IP in the network environment Spool Abbreviation of Simultaneous Peripheral Operation On Line In the printer output data is not directly transmitted to the printer...

Page 429: ...ween the image input devices such a scanner or digital camera and appli cations such as graphic software To use devices supporting TWAIN a TWAIN driver is required Uninstall To delete installed software USB Abbreviation of Universal Serial Bus General use interface standard for connecting a computer and a mouse printer etc Web browser Software to access web pages Internet Explorer Netscape Navigat...

Page 430: ...ront Cover Page 8 33 9 29 10 36 11 31 12 22 H Hole Punch 8 23 10 28 12 13 I Image Rotation 10 55 Image Shift 10 45 11 31 12 26 Installable Option 9 16 Installer 3 1 K KONICA MINOLTA PS Printer Driver 10 1 L Local printing 4 1 Log Phys 10 26 M Media 11 24 N Network printing 5 1 N up 10 22 O Offset 9 23 Option 10 13 Optional memory 2 3 Original Size 8 13 10 15 Output Size 8 15 10 17 Output Tray 11 2...

Page 431: ...8 2 9 2 10 2 Punch 9 27 11 29 Punch Unit 8 11 Punch Z Fold Unit 8 11 11 37 S Save in User Box 8 27 12 18 Save Restore Setting 8 57 10 59 Secure Print 8 25 10 29 12 16 Smoothing 8 53 9 32 10 56 11 34 12 27 Specifications 2 6 Staple 8 22 9 26 10 27 11 28 12 12 T Tab Paper Settings 8 39 Test Page Print 4 26 Transparency Interleave 8 19 9 30 10 20 11 33 Trim 10 29 Trimmer 8 11 11 37 Troubleshooting 13...

Page 432: ...Copyright 2005 www konicaminolta com 2005 11 920_prt_ug_eng_v20 ...

Reviews: