Vehicle Starting and Driving
S-1
Preparatives for vehicle operation start up:
Check daily, before turning engine on:
1. Check oil level of the engine
The warning “Engine oil pressure” is displayed as a signal
item on the combination instrument when the oil pressure
is too low, the alarm buzzer sounds, the warning light
STOP comes on, stop the engine and check engine oil level
at the dipstick. Provide immediately for the oil
replenishment to its correct level.
The oil level should always be checked with the vehicle
parked on level ground, before starting the engine up, or at
least 5 minutes after having shut it down.
Open the engine compartment hood.
Take out the oil dipstick, and clean it with a clean cloth
without loose threads, and put it back into its place fitting it
in completely.
Once again pull out the dipstick and check the oil level.
a.
The oil should not exceed the maximum level.. drain
the excess.
b.
If the oil is at operational level, do not add more oil to
the crankcase.
c.
If the oil is at or below the minimum level, add the
same type and brand of oil to the crankcase as that
already there, until reaching the maximum level..
After the checking, replace and fit the dipstick completely
back into its place.
If the oil level is checked after the engine has been run for
a period of time, then it should take at least five minutes
before the measure to ensure the oil back flow to the oil
sump in full.
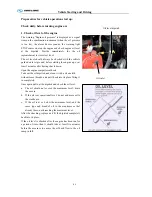
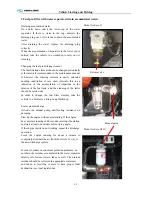
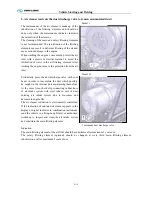
Oil level dipstick
Oil inlet
Summary of Contents for XMQ6127 series
Page 18: ...Operation Instruction CI 1 Figure 17 Set MotPPR Figure 18 Clear Trip A Figure 19 Clear Trip B...
Page 32: ...Operation Instruction P A 1 2 Control panel operation...
Page 33: ...Operation Instruction P A 1...
Page 34: ...Operation Instruction P A 1...
Page 35: ...Operation Instruction P A 1...
Page 36: ...Operation Instruction P A 1...
Page 41: ...Operation Instruction 0 G 1 1 1 2 2 Pushbutton Settings...
Page 42: ...Operation Instruction 0 G 1 1 2 Starting the Engine 1 3 Selecting the Gear...
Page 43: ...Operation Instruction 0 G 1 1 4 Setting Off 1 5 Driving Ranges...
Page 44: ...Operation Instruction 0 G 1 1 5 1 Downhill Travel 1 5 2 Downhill Travel 1 5 3 Kickdown...
Page 46: ...Operation Instruction 0 G 1 1 6 Stopping Parking...
Page 51: ...Operation Instruction 0 G 1 1 11 1 Limp Home Mode 1 12 Auxiliary Control Unit...
Page 52: ...Operation Instruction 0 G 1 1 12 1 Operating Instructions for the Auxiliary Control Unit...
Page 53: ...Operation Instruction 0 AB 1 WABCO ABS BASIC INTRODUCTION...
Page 54: ...Operation Instruction 0 AB 1...
Page 55: ...Operation Instruction 0 AB 1...
Page 56: ...Operation Instruction 0 AB 1...
Page 57: ...Operation Instruction 0 AB 1...
Page 58: ...Operation Instruction 0 EC 1 ECAS System Introduction 1 System introduction...
Page 59: ...Operation Instruction 0 EC 1 3 System function...
Page 60: ...Operation Instruction 0 EC 1...
Page 77: ...Operation Instruction 0 E 1 CAN bus module...
Page 158: ...Appendix A 4 Air braking schematic diagram...
Page 159: ...A 5 Electric schematic diagram of the complete vehicle 1...
Page 160: ...A 6 Electric schematic diagram of the complete vehicle 2...
Page 161: ...A 7 Electric schematic diagram of the complete vehicle 3...
Page 162: ...A 8 Electric schematic diagram of the complete vehicle 4...


