background image

37

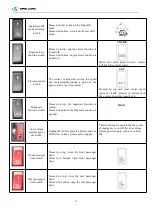
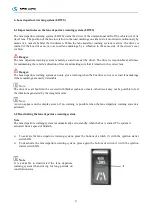
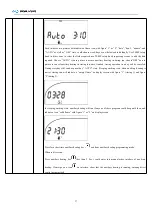
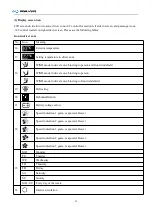
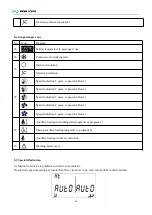
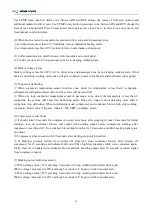
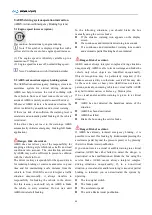
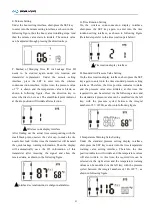
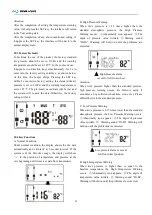
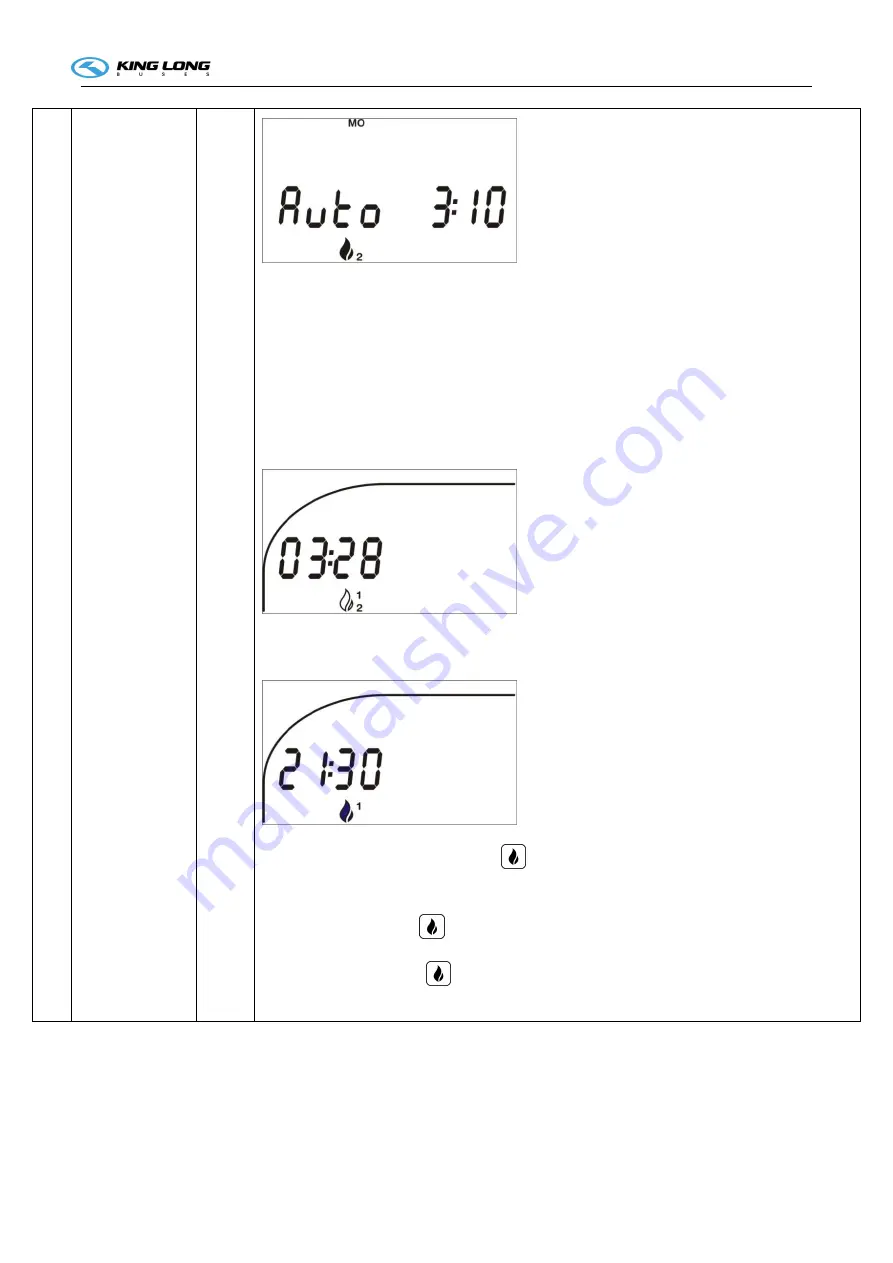
Each in theses two pictures both indicate a flame icon, with figure” 1” or “2”, “date”, “hour”, “minute”, and
“ AUTO” as well as “ OFF” state, could choose week/days or a whole week individually. Use TEMP rotary
knob in driver zone to select the fields required, use TEMP rotary knob in passenger zone to add the data
required. Choose “AUTO” icon in picture to assure auxiliary heating in timing run, choose“OFF”icon in
picture to cancel auxiliary heating in timing run, once finished, timing operation in a day will be canceled.
Timing everyday still can keep next day “ AUTO” state. Sleeping working state: when auxiliary heating is
not set timing run, will indicate a “empty flame” on display screen with figure “1” (timing 1) and figure
“2”(timing 2).

In sleeping working state, auxiliary heating will run if anyone of these programs could keep until then, and
indicate a icon “solid flame” with figure “1” or “2” on display screen.

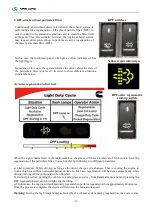
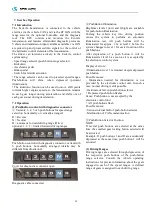
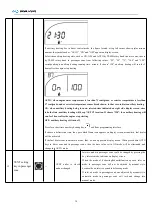
Press for a short time auxiliary heating key

, exit from auxiliary heating programming mode.

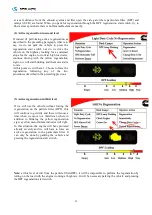
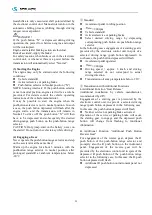
When in direct run:

Press auxiliary heating key

(less than 2 Sec.), could enter into manual order interface of auxiliary

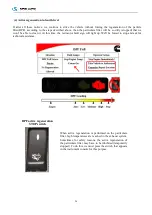
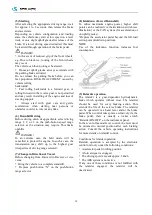
heating. If emerge on a icon

on interface, show that the auxiliary heating is running, entering direct

control not permitted.

Summary of Contents for C12HD Series 2019

Page 1: ...1 OPERATION MANUAL Vehicle Model XMQ6127DYW C12HD Vehicle No KDM00001 Country UK File Version NO 1 Editor Ms Lin Date 21 06 2019 Xiamen King Long United Automotive Industry Co Ltd...

Page 2: ...omplete vehicle and thus the manufacturer Xiamen King Long United Automotive Industry Co Ltd will not takes the responsibility for the damages caused by them Any problem in service please contact our...

Page 3: ...esel particulate filter 24 6 Lane departure warning system LDWS 27 7 Gearbox Operation 28 8 Introduction of KING LONG integrated A C system 33 9 AEBS driving system operation instruction 44 10 Tire pr...

Page 4: ...g play 76 3 Control periodically at least once a week 76 3 1 Check tire for abrasion and pressure and tire nut for fixture 76 3 2 Check air cleaner activate the dust discharge valve to loosen accumula...

Page 5: ...Daily Maintenance Operation 98 18 Maintenance period chart 98 Chapter V Common Trouble and Its Elimination 104 1 Engine common trouble and its elimination suitable for diesel engine 104 2 Propeller sh...

Page 6: ...ront mm 2105 rear mm 1881 Minimum ground clearance mm 180 Approach angle departure angle 9 9 Front overhang rear overhang mm 2600 3350 Rated Seats Number driver included 51 1 1 Mass parameter Kerb mas...

Page 7: ...gine serial number engine model rated power production data and etc Note The right side identification plate is an example for reference only The chassis data plate with vehicle identification number...

Page 8: ...posite construction and covered with anti slip and antifriction leather with favorable sound insulation value 5 4 Windows The front windshield is the hyperboloid triplex glass fixed by the gluing the...

Page 9: ...the entrance of the door and outwardly behind the passenger door respectively Please rotate the switch and throw open the door in emergency c Commonly the door is closed when touch off any electrical...

Page 10: ...t off switch 4 Engine cabin extinguisher operation button 5 Wiper control handle 6 Combination instrument 7 Horn button 8 Steering wheel 9 Light operation handle 10 Reversal monitor 11 Tire Pressure M...

Page 11: ...ound source 2 operation control Bluetooth phone answering and hanging up 3 operation control instrument display menu 4 operate control engine cruise 2 2 Feature details 1 Left buttons The left buttons...

Page 12: ...witching Press it in short time circularly to switch audio sources Radio DVD USB Press it in short time displaying the menu Press and hold 2S to switch the control object between the player and instru...

Page 13: ...or When Right turning hazard switch is turned on 7 Retarder indicator Retarder work warning 8 Parking brake 9 DTCO warning Communication error or without drivers card 10 Engine revolution speed too hi...

Page 14: ...level low steering oil pressure low fuel level low DM1 error light error communication error 3 3 LCD Display Press the page switch button the pages will be displayed by the following sequence Detaile...

Page 15: ...w The bar shows brake circuit 2 pressure Rear flap open can not start the engine The bar shows engine oil pressure Worn brake shoes The bar shows SCR remain Hammer not at right position lamp status de...

Page 16: ...gine ECU Before engine starts the value is 0 Brake system pressure Brake circuits 1 refers to the front brake system pressure Brake circuits 2 refers to the rear brake system pressure The symbol becom...

Page 17: ...brake light turning light Other Error brake circuit pressure open load fuel sensor open load engine cabin too hot worn brake shoes 1 6 fuel level low water in toilet level low air filter block 3 DM1 d...

Page 18: ...High Mid Low Fan_speed OFF High Low 5 Engine cabin temperature high warning page If engine cabin temperature is higher than 85 C this page will appear automatically The temperature will show on the p...

Page 19: ...dow defrosting switch Pressed on top the defrosting is turned off Pressed on bottom the defrosting is turned on Electric parking brake function release switch Pressed on top parking brake function is...

Page 20: ...Daylight lamp switch Pressed on top interior lighting OFF Pressed on bottom interior lighting ON Reading lamp switch Pressed on top the reading lamp OFF Pressed on bottom the reading lamp ON Luggage c...

Page 21: ...seat lamp ON Flip TV set switch Pressed on top folded the TV set Pressed on bottom unfolded the TV set TV LCD screen page up down switch Pressed on top page up starting in LCD screen Pressed on bottom...

Page 22: ...rt descending Only use this button when vehicle is stopping ECAS 2th height switch Pressed on top the airbags will return to the standard height Pressed on bottom the airbags will lift to the second h...

Page 23: ...time cruise speed increase 1 km h pressed on bottom each time cruise speed decrease1km h Diagnosis function switch Pressed on top the diagnosis function is closed Pressed on bottom the diagnosis funct...

Page 24: ...ise and then perform regeneration for approximately40 minutes Once the process is complete the engine will return to the normal idle speed Warning Giving the high temperatures achieved by the exhaust...

Page 25: ...k the vehicle to press the regeneration start switch nor do we drive the vehicle on the highway looking for a sustained slope for the engine to work at high load rate continue driving with the yellow...

Page 26: ...n it At this time the red motor fault sign will light up We ll be forced to stop and ask for technical assistance DPF active regeneration STOP switch When active regeneration is performed on the parti...

Page 27: ...lane departure warning system can only give a warning when the bus drives on or over road lane makings if these markings are easily detectable Note The driver s seat should not be covered with thicker...

Page 28: ...ation Cover for diagnostics connector open Diagnostic cable connected PushButton Illumination Brightness levels 1 low and 2 high are available for push button illumination Turning the vehicle key into...

Page 29: ...the pushbutton range selector in neutral position after prolonged standstill at ambient temperatures below 20 Standard Accelerator pedal in idling position 900 rpm Vehicle standstill Activated servic...

Page 30: ...highest gear irrespective of driving range selected 7 Change in Direction of Travel Before changing from Forward to Reverse or vice versa Bring the vehicle to a complete standstill Depress push butto...

Page 31: ...activated the vehicle may start moving even without actuation of the accelerator pedal Transmission with function Automatic Idle Shift AIS The automatic electronic gear change unit will set the trans...

Page 32: ...ransmission damage Inform ZF Service Center 13 Status Monitoring Warning Lamps The diagnostics system of the electronic control unit monitors the transmission status every time the vehicle system volt...

Page 33: ...engine stops working Wakening working state both battery and ignition switch could supply power ignition switch located in ON place and engine stops working Activity working state both battery and ig...

Page 34: ...C and only set TC 3 centigrade in scope of 17 27 centigrade Once the A C in passenger zone is turn off TC could select freely one value in scope of 17 27 centigrade if temperature is less than 17centi...

Page 35: ...s not given will not choose to blow for person or front windshield location When the defrosting mode is activated air flow will be distributed to front windshield location 8 LCD screen When the lighti...

Page 36: ...zone was not opened however compressor and refrigerant feed liquid solenoid valve in passenger zone was opened The blower in Blower speed value in passenger zone indicates in display screen 12 WIND d...

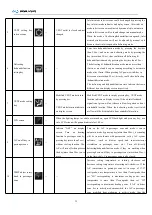
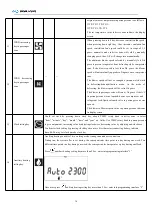
Page 37: ...ng everyday still can keep next day AUTO state Sleeping working state when auxiliary heating is not set timing run will indicate a empty flame on display screen with figure 1 timing 1 and figure 2 tim...

Page 38: ...ion If choose 120 the auxiliary heating will run for 2 hours after the engine stop starting OFF auxiliary heating will turn off Press for a short time auxiliary heating key exit from programming inter...

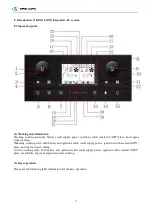
Page 39: ...g to person and front windshield WIND mode in driver zone blowing to person WIND mode in driver zone blowing to front windshield 19 Defrosting 20 Dehumidification 21 Battery voltage is low 22 Speed in...

Page 40: ...eed indication 3 gears evaporator blower Speed indication 4 gears evaporator blower Speed indication 5 gears evaporator blower 29 Auxiliary heating in working state program1 or program 2 Timing auxili...

Page 41: ...erature is less than 2 centigrade the system will enter into defrosting mode Once two loops sensors detecting more than 8 centigrade stop defrosting When in defrosting mode compressor and condenser bl...

Page 42: ...Solenoid valve radiator water loop in driver zone short circuit output CCS Interior and exterior circulation in driver zone short circuit output CEOS WIND mode in driver zone short circuit output CEFS...

Page 43: ...mperature sensor disconnected PTSS Interior temperature sensor short circuit HP High voltage abnormal disconnected LP Low voltage abnormal disconnected CPF Compressor short circuit output LETF Tempera...

Page 44: ...s reason you should rely on AEBS to brake the vehicle in every situation Do not wait until AEBS initiates full braking In the following situations you should brake the bus manually using the service b...

Page 45: ...tected in a different lane and braking could be initiated unnecessarily or too late For these reasons pay even closer attention to traffic conditions when cornering Exit sliproads driving on a differe...

Page 46: ...encroached into the detection range of the sensor There is not enough of a gap between the bus and the vehicle that is cutting in You must be prepared to brake the bus using the service brake in orde...

Page 47: ...se reasons pay even closer attention to traffic conditions when cornering and when approaching standing objects because no automatic braking will be initiated Vehicles on entry and exit sliproads or i...

Page 48: ...anger Unfavourable weather conditions such as snow slush heavy rain or heavy soiling of the windscreen may impair correct functioning of the lane departure warning system Danger Note that the function...

Page 49: ...ransmitter to monitor the pressure and temperature of tires in real time These data sent to receiver and display wirelessly The system will give warnings automatically if the tire is going down by any...

Page 50: ...he setting state and return the normal display state Under the normal display state short press the left and right direction keys to change the pressure and temperature values of tires A Year Setting...

Page 51: ...ata as shown in the following figure Interfaz de visualizaci n de c digo inal mbrico G Tires Rotation Setting On the wireless code connection display interface short press the SET key again to enter i...

Page 52: ...the display will show in the position of temperature and pressure at the very beginning until it receives data from transmitters B High Pressure Warning When tire s pressure is 1 25 times higher than...

Page 53: ...ace short press SET key to enter into transmitter wireless code connection state Both the pressure and temperature values are blank at this time Press the direction key to select the tires to be re se...

Page 54: ...a can be read via the software in upper machine and can also be displayed 10 5 Trouble Shootings Problem Possible Cause Solution Display shows when driving 1 Antenna falls off Parking at the safety pl...

Page 55: ...the tire pressure must be greater than 58Psi 10 7 Tires Rotation When your tires wear to a certain extent the tires rotation will be needed The one to one correspondence between the original display...

Page 56: ...Absolute pressure 199Psi Frequency 433MHz Display Supply Voltage 24V Operating Current 20mA Antenna Sensitivity 80dBm Operating temperature range 20 185 Pressure display accuracy 1Psi Temperature dis...

Page 57: ...irst time ever Reduction of the air consumption none while the vehicle is moving Air savings of approximately 25 were determined using ECAS compared to a conventional air suspension system in low floo...

Page 58: ...Kneeling function is optional 4 Safety concept and diagnostic function Monitor the door status can disable the height adjustment while the door is open If the pressure of air reservoir is below 6bar...

Page 59: ...he hole 1 and clockwise rotate key about 90 then anticlockwise rotate handle 2 after that the door would be locked After unlocking the door lock you can press the button 3 of the door remote controlle...

Page 60: ...2 adjustment of the driver s weight Note Number of handles varies with vehicle model Attention The seat should not be adjusted during driving to ensure driving safety Adjust the driver seat only when...

Page 61: ...ing button 1 in the right picture Adjust the height and the inclination of the steering wheel to the desired position After adjusting press button down to lock the steering column Attention Adjust the...

Page 62: ...e vehicle is in movement And the ignition key should be turned to the LOCK position only after the engine shut down 2 When leaving the vehicle even for a short period take the key out to avoid operati...

Page 63: ...n is the turning indication By up and down motions of the operating handle may control the left and right turning lamp and that on the dashboard is dimming indication Back and forth the operating hand...

Page 64: ...tion 4 Service button 5 Loudhailer 6 Reading lamp 7 Reading lamp button Notice If you vehicle is fitted with a retarder but without a dashboard indicator light it is essential to have one fitted Shoul...

Page 65: ...n easy to hit Operation In case of emergency grasp the safety hammer tap the specific positions of the glass to escape Note Hitting on 4 corners and the edge positions of the glasses is the most effec...

Page 66: ...description ECU receive and deal with the signal from the ABS sensor then transmit to ABS magnetic valve ABS magnetic valve control the brake pressure by this signal Part D Name DC DC convertor Functi...

Page 67: ...67 25 VDO CAN module VDO CAN module located in a tool box at the top of luggage cabin 26 Switch control box Model JKH2028 Switch control box located in side battery cabin...

Page 68: ...shant driven medium extinguishant tank constant pressure release valve conveyor pipe assembly trigger assembly including thermal triggering electric triggering etc A certain concentration extinguishan...

Page 69: ...id guard against the oil contamination and blocking emerged on the nozzle of conveyor in pipe network type extinguisher should clean them at once if it did The automatic starting device in extinguishe...

Page 70: ...mpartment hood Take out the oil dipstick and clean it with a clean cloth without loose threads and put it back into its place fitting it in completely Oil level dipstick Oil inlet 2 Once again pull ou...

Page 71: ...ntil the maximum level indication Only use coolant which is recommended c The compensation tank cover should not be opened when temperature of the coolant is still high to avoid being scalded Place th...

Page 72: ...rior of the fuel tank and the cleaning of the latter should be carried out In order to change the fuel filter element take the vehicle to a dealer or a King Long Workshop Fuel system discharge Activat...

Page 73: ...anger alarm lamp Check the bulb and the switch for their damage To carry out the lamp substitution hands should be very clean If possible handle new lamps with tissue paper Clean the external of all i...

Page 74: ...t of the fuel consumption If the remain volume of AdBlue is less than 12 the lamp 1 will flash and you need add AdBlue If the remain volume of AdBlue is less than 6 this lamp will light and the power...

Page 75: ...an indication that the air pressure is excessively low Do not drive the vehicle if the air pressure gauge displays low air pressure in one or both brake circuits as the service brake could fail resul...

Page 76: ...he tires always correctly calibrated The inflation pressure should be checked with the tires cold at least once a week After driving the vehicle for some time the tires heat and in consequence of the...

Page 77: ...st discharge valve with your hand in order to incomplete the dust which possibly be caught in the internal part maintaining them clear At the same time check clip connecting rubber hose of air intake...

Page 78: ...arly check the windshield wiper blades for dirt or damage Press the lever to activate the windshield washer Caution Do not use the windshield wipers when the windshield is dry Before activating the wi...

Page 79: ...owever in this condition there will be more steering wheel play and the steering will become noticeably heavier Drive the vehicle very carefully and take it to an authorized King Long Dealer or Worksh...

Page 80: ...p Ventilator drive belts If it is necessary to replace the ventilator drive belts in emergency situations adjust their tension in such a way that upon pressing them with one s thumb in the middle of t...

Page 81: ...should lower 10 15mm 2 Adjust tension of cone belt Adjust nut 1until tension of belt is proper Engine belt check 1 2 3 The engine belt should be inspected daily Replace the belt if it has been as fray...

Page 82: ...en the tension on the belt rotate the tensioner to wind the spring tighter Pivot the tensioner in the direction of the spring latch Install the belt Pivot the tensioner in the direction of the spring...

Page 83: ...ght rear side 1 battery 2 main power switch 3 switch control box To access the battery open the switch control box panel After the vehicle has been parked for the day the main power switch should be t...

Page 84: ...therwise stop engine to check e If parking brake indicator lights indicating that parking brake has not be released Attention If on starting up the engine the engine oil pressure indicator continues i...

Page 85: ...raking system pressure has reached 5kg cm2 above and each instrument and indicator lamp is on the proper condition and water outlet temperature exceeds 60 as well as the parking brake has been release...

Page 86: ...ays activate the parking brake when the vehicle is parked Besides activating the parking brake when parking on upward or downward slopes wedge one of the vehicle wheels to avoid the accidental moving...

Page 87: ...e of transmission and front rear axle please refer to relative users guide For use and maintenance of other parts of chassis if without special user s guide or maintenance period please refer to this...

Page 88: ...ntenance and service 1 When battery is charged by external power supply disconnect ECU control box to prevent outer high voltage damage ECU electric control unit 2 When vehicle needs to weld disconnec...

Page 89: ...y when depressing pedal The value should be between 8mm and 12mm After adjustment lock the locknut 9 Bus cleaning Don t pollute the environment when washing vehicle at washing shop Be careful to use t...

Page 90: ...an and dry napery when cleaning the filter cartridge prevent the water from entering the air filter 3 Exclude dust in unloading valve 4 The filter element may be cleaned by hand or by tapping the end...

Page 91: ...system perennially to avoid sediment frost oxidation and increase boiling point Note When adding coolant please choose the same model as much as possible in case of sediment If coolant is degenerative...

Page 92: ...ting the piston will be burnt out consumed during the engine running Engine oil must be replaced in certain period because of high temperature effect and the oil combustion product interfusing in the...

Page 93: ...id gear oil defined by API and the ambient temperature requirement Chassis grease Grease added in each part should use 2 lithium base lubricant suitable for temperature within the range of 30 120 Vehi...

Page 94: ...nuckle kingpin front brake self adjusting arm in front axle 3 Rear brake self adjusting arm in rear axle 4 Propeller shaft 5 Engine bin Part 1 Lubricate points in the steering drag link There are five...

Page 95: ...uckle kingpin lubricating the other two are for front brake adjusting arm lubricating Right side front tire Left side front tire Part 3 Lubricate points in the rear brake self adjusting arm in rear ax...

Page 96: ...icate points in the propeller shaft Part 5 Lubricate points in engine bin You may find 2 lubricating points when open the engine cabin one si for A C bracket anohter is for A C middle idle pulley shaf...

Page 97: ...den while engine stop Emergency brake should occur as few as possible 3 Speed limitation during breaking in period first gear 10km h second gear 20km h third gear 30km h fourth gear 50km h fifth gear...

Page 98: ...ture is less than 50 Engine oil level Check correct Do not start engine when oil level less than L or more than H Vehicle parking level check the oil after engine stops for 5 minutes Drive belt Check...

Page 99: ...ir filter element C C C C C C R C C C C C R C C C C Check adjust belt I I I I I I I I I I I I I I I I I Check adjust engine idle speed I I I I I I I I I I I I I I I I I Fixing every bolt and connectio...

Page 100: ...I I I I I I I I I I I I I I I I I Selector mechanism I I I I I I I I I I I I I I I I I Lubricant oil R I I I R I I I R Vent hole C I I I C I I I C I I I C I I I C Propeller shaft Drive shaft connecti...

Page 101: ...ine exhaust brake I I I I I ABS unit checking I I I Brake valve other valves I I I Axle Tire Tire steel ring I I I I I I I I I I I I I I I I I Checking fixing RR axle housing differential housing RR c...

Page 102: ...rber working condition I I I Steel plate suspension bush I I I Left right steel plate suspension flexibility I I I Fixing suspension U type bolt I I I I I I I I I Valves function I I I Bracket lifting...

Page 103: ...55 60 65 70 75 80 Month 1 3 5 7 8 9 10 11 12 Electrical system All lights I I I I I I I I I Battery electrolyte surface connector I I I I I I I I I Wire box installation I I I I I I I I I I I I I I I...

Page 104: ...choked 4 Replace the screw on filter element of the fuel filter oil water separator assembly 5 Fuel supply pump does not apply fuel or applies fuel irregularly 5 Check for leakage in the fuel inlet p...

Page 105: ...of turbine and compressor impellers 6 Clean it 7 Middle cooler mangle leave out 7 Check and replace it 8 Fuel line blocked or leaky 8 Check the seal of fuel line and fuel filter choking or replace sc...

Page 106: ...djust the valve timing 5 The driving gear is abrased and get too large gap There is knocking sound at the timing gear box cover 5 Check the gear side clearance and change the gear or not according to...

Page 107: ...cooler damaged and leaked 8 Repair or replace it Exhaust with white and blue smoke Possible causes Remedies 1 Poor quality fuel and too much water in fuel 1 Replace the fuel 2 Too low coolant temperat...

Page 108: ...e Possible causes Remedies 1 Too low ambient temperature and too high oil viscosity 1 Use the required grade engine oil Operate at low speed after starting and then check it when the oil temperature i...

Page 109: ...ber damp piece material is aging 1 Remove and let the sliding yoke and the fixing yoke on the same plane 2 Adjust or replace the propeller shaft 3 Replace the bearing 4 Tighten propeller shaft to spec...

Page 110: ...nsmission gear is off the engaging position Transmission 1 Shift fork distorted or worn 2 Abrasion of lthe lockup ball or the ball on the gear shifter shaft 3 Breakdown or fatigue of the lock spring 4...

Page 111: ...rear axle improper sound When the vehicle is running 1 Excessive clearance between the driving and the driven gear 2 Abrasion or damage of the bearing 3 Abrasion or damage of the gear 4 Too low oil l...

Page 112: ...g 1 Adjust the pre tightening force 2 Intensify the lubrication or replace the grease 3 Clean and intensify the lubrication 4 Replace the sealing ring 5 Front axle and steering system common trouble a...

Page 113: ...e and damage in the front plate spring 3 Bending of the front axle 4 Unsmooth of the braking 5 Looseness of the front hub bearing nut 6 Inequality of the tire pressure 7 Tires with different dimension...

Page 114: ...ure and repair or replace the pipeline in case of the set value exceeded 6 Measure the oil pressure and the flow volume disassemble and repair the hydraulic pump if the set value belowed 7 Bleed air a...

Page 115: ...d parts 6 Disassemble and clean the braking valve and replace the faulted parts as needed There has abnormal sound when troddening the brake pedal 1 The clincher or the bolt is projected because of ab...

Page 116: ...camshaft doesn t rotate the bushing is lack of lubricant 3 Improper adjustment of the braking chamber pusher stroke 4 Improper sliding contact of the relay valve 5 Overheat or deterioration of the br...

Page 117: ...d of the solenoid 3 Starter pinion is clogged in the flywheel ring gear Furthermore engine bearing is burnt water on external of the combustion chamber and the consumption frozen may also caused the b...

Page 118: ...gh pressure is lower than the normal value No refrigerate in the system The front or the rear part of the expansion valve has fog expansion valve blocked expansion valve temperature sensor damaged or...

Page 119: ...trouble and remedy Fault symptom Possible cause Eliminating method the power lamp on the control panel not light 1 no power supply 2 D not connected well 3 harness not tight 4 control unit failure 1...

Page 120: ...aged 3 malfunction lamp light up 4 refrigerant light not lighting up 5 relay out of work 6 no harness connection to the battery 1 reconnect the cable 2 change the clutch or repair 3 refer to the above...

Page 121: ...ination wrench 18 32 Socket wrench for wheel nut 41 hexagon 11 Combination wrench 19 32 Socket wrench for wheel nut 21 foursquare 12 Combination wrench 21 33 Torque bar 315X25X25 13 Combination wrench...

Page 122: ...exagon North Benz Front axle 70mm hexagon 1 60 mm hexagon Dong Feng portal axle 55mm hexagon 1 41 mm fork hexagon Hunan axle Wrench for rear wheel hub bearing nut 110 mm hexagon 1 4 03 or102 mm hexago...

Page 123: ...Connecting nut between upper knuckle and steering knuckle 280 350 Nut trapeziform arm of Steering left and right 350 450 King pin Cuniform lock nut 25 40 Adjusting nut front wheel hub bearing Min200 S...

Page 124: ...e bolt M14X1 5 120 140 Differential house bolt M16 X1 5 220 280 Bolt stopper shim 31 41 Bolt between final drive and rear axle house M12 X1 5 130 150 Wheel bolt M24X1 5 420 490 Conneting nut wheel hub...

Page 125: ...50 774 1480 1092 1774 1308 M30 1420 1047 2010 1482 2400 1770 Torques for bolts with metric fine threads Dimension of bolt Torques N m ft lb 8 8 10 9 12 9 M8 1 26 19 37 27 48 35 M10 1 25 52 38 76 56 88...

Reviews: