DN1237-0003 © 1997-2000 Kantech Systems Inc.
2 5
2 5
2 5
2 5
2 5
SECTION 4
SECTION 4
SECTION 4
SECTION 4
SECTION 4 - - D e f i n i n g S y s t e m U s e r
- - D e f i n i n g S y s t e m U s e r
- - D e f i n i n g S y s t e m U s e r
- - D e f i n i n g S y s t e m U s e r
- - D e f i n i n g S y s t e m U s e r sssss
Card Definition
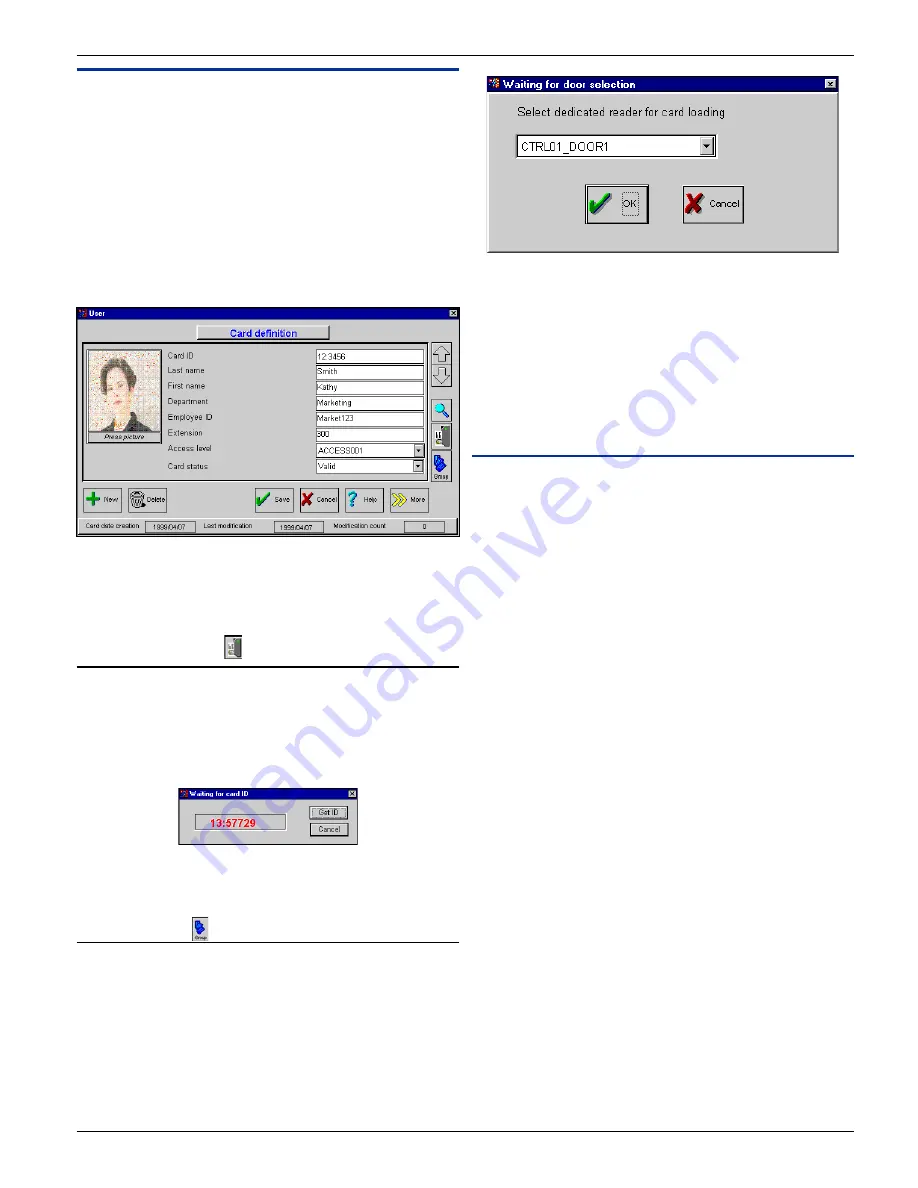
This screen is used to define new cards, modify or delete existing
cards, assign pictures to cardholders, define multiple cards (group
feature) and obtain a card ID number.
A card number usually consists of two elements: the family or site
code and the card’s own identification number. The card family
code usually has a hexadecimal value between 00 and FF. The
card’s identification number is usually in decimal format. When
entering the card number, type all preceding zero(s) for numbers
shorter than 5 digits. Decimal format range is between 00000 and
65535.
You can use the “up/down arrows” feature - (if you want to scroll
through the defined cards to select one), or you can use the
“More” feature to specify additional information such as: trace the
card, if the user must use a pin number at the keypad, etc. (lets you
enter more information concerning a cardholder).
“Get Card ID” button
You can use the “Get Card ID” button (if you want to define a card
but don’t know its number). To define many cards, use the Group
feature.
To use this feature, click on the “New” button, the sytem will
display a blank new screen. Swipe the card at a reader connected
to the controller. The card number will be displayed:
Click the “GET ID” button to return to the card definition screen
so you may continue to enter the information in the fields.
Note: Only non-existant card numbers will be captured.
“Group” button
You can use the “Group” feature to select a reader at which cards
will be passed (if you have many cards to be defined):
1) Click on the GROUP button, the system will display:
2) Select a dedicated reader. It allows you to select a reader with
which cards will be attributed in the system.
3) As you swipe a card, you can enter the user’s definition in the
fields.
4) You can proceed with step 3 as often as needed.
5) When you are done, press the CLOSE button and the system
will automatically save all the cards you have previously
entered.
Field Definition
Last name / First name
Enter the cardholder’s name, up to 30 characters for each or less.
It is recommended not to use commas as field separators for
importing purposes.
User definable 1, 2 & 3
These user definable fields are 30 characters long and can be used
to store additional information regarding the cardholder. Common
use for these fields are: employee number, department, address,
telephone number, etc...
Access level
Select an access level to which the user will be assigned. Access
levels are usually defined before entering a new card. The access
levels determine which doors according to a specified schedule
the cardholder will be permitted access to.
Card status
The usual setting is “valid”. Setting the card status to invalid, lost,
stolen, status #4 or status #5 , will disable the card and the system
will deny access to this card. The system will also generate the
appropriate event such as “access denied-invalid”, “lost”, etc.
When a card is lost, it is better to set it to “lost” than deleting the
card from the system. This way, all the data concerning the user
can be kept within the system and if anyone ever attempts to use
the card, the card will be denied access and the event will identify
the actual card’s previous owner. The system automatically sets
card status to “expired” or “pending” according to the card’s
validity dates.
Picture selection
This feature lets you assign a picture to the cardholder. Follow
these steps to assign a picture:
1) Double-click on the picture area,
2) Select a picture from the pick list,
3) Click on the ARROW button to return to the card definition
screen.


