W
W
W
W
W i n P a s s R e f e r e n c e M a n u a l
i n P a s s R e f e r e n c e M a n u a l
i n P a s s R e f e r e n c e M a n u a l
i n P a s s R e f e r e n c e M a n u a l
i n P a s s R e f e r e n c e M a n u a l
DN1237-0003 © 1997-2000 Kantech Systems Inc.
1 4
1 4
1 4
1 4
1 4
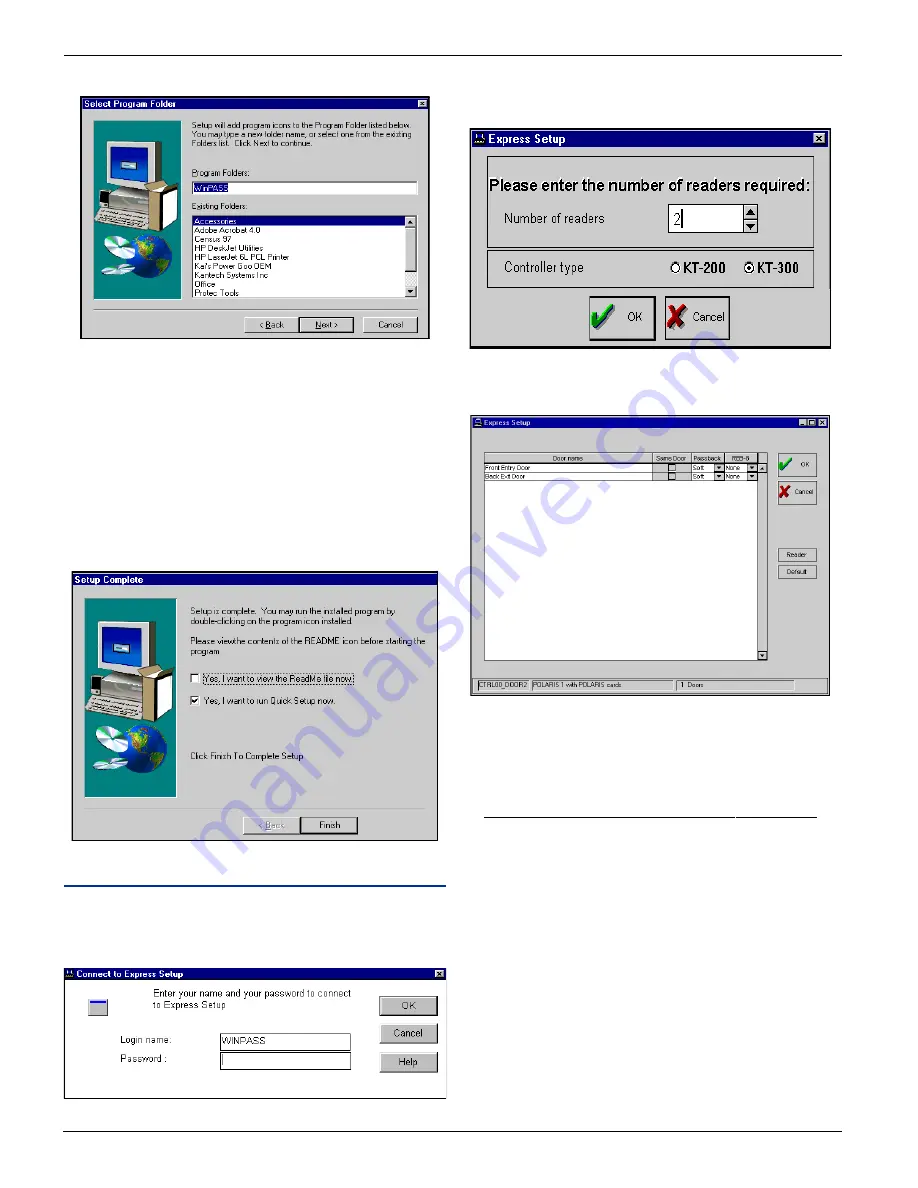
11) You will be asked to confirm the program folder,
12) Click on Next to continue, or type a new folder name or select
one from the displayed list,
13) Once the setup is complete, you will be prompted to view the
ReadMe file and run ExpressSetUp. Make your selections (it
is recommended to view the ReadMe file and run ExpressSetUp
before starting the program), click on Finish to complete the
installation.
WinPass is now installed on your computer. To save instal-
lation and configuration time, we strongly recommend that
you use ExpressSetUp so that the system is fully functional
and ready to test the hardware and wiring.
Using ExpressSetUp
ExpressSetUp configures the system. Usually, if you do not
require special options, the system will be ready to be used after
you define the schedules, user access levels and cards.
1) When you use ExpressSetUp, the system will display the login
window. Enter your login name and password (default:
WINPASS (not case sensitive) and click on OK to continue,
2) Enter the number of readers required and specify the controller
type and click on OK to continue,
3) You can modify the door names. Select (check box) the doors
(readers) on which Anti-Passback is required (see Controller
Definition Section for more on Anti-Passback). Specify the
type of Anti-Passback (soft or hard). Click on OK to continue
the installation, *
“S
EE
SECTION
11
IF
YOU
ARE
USING
KT-200
CONTROLLERS
”


