


96
C L E A N I N G A N D M E R G I N G . P L Y F I L E S :
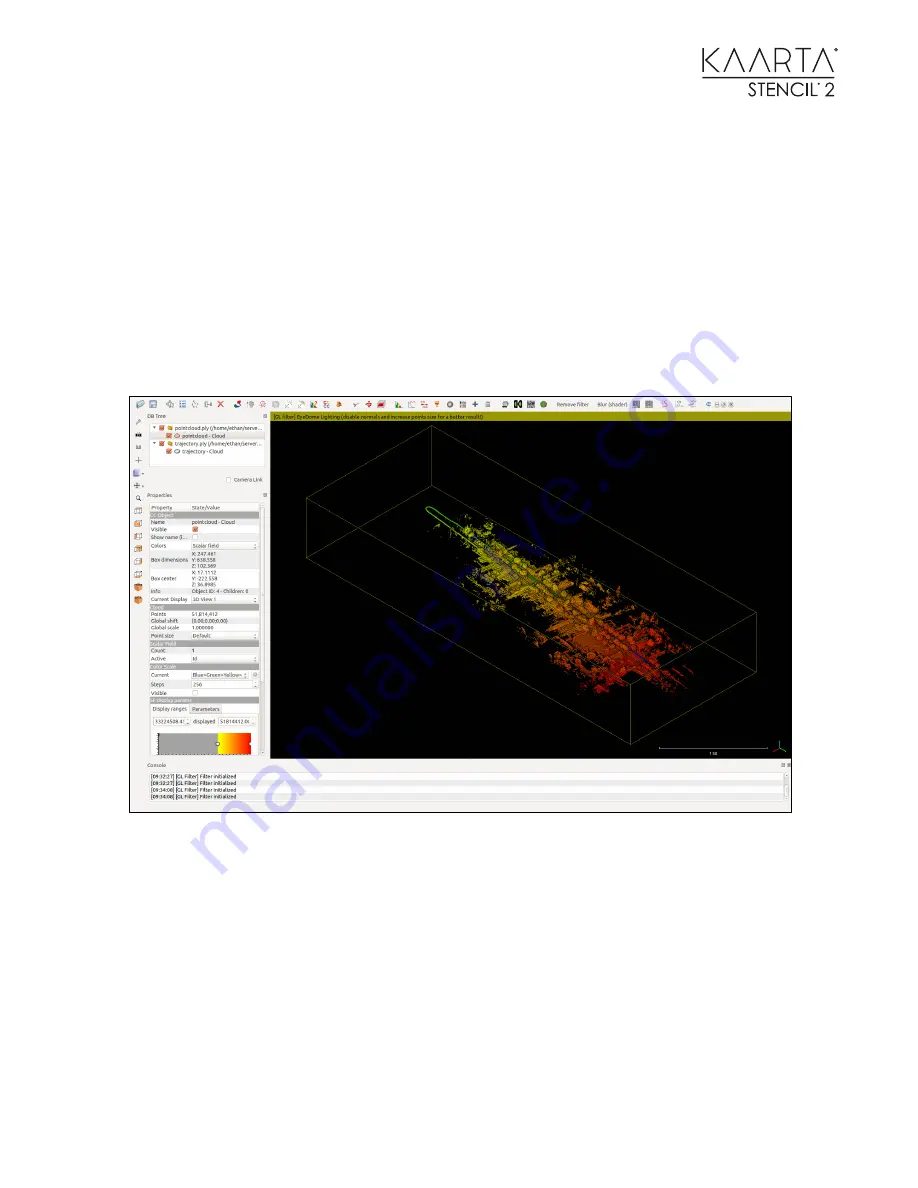
P O I N T C L O U D C L E A N U P
1.
Open the .ply file in CloudCompare.
2.
Press the EDL shader button on the top right for better visualization.
3.
Select the point cloud on the left-hand menu bar, and then select Edit>Scalar
Fields>Add Point Indexes as SF from the top menu bar. The point cloud will be
colored based on the order each point was added to the point cloud starting at blue
and ending in red.
19.
4.
Go to the Properties Box. Scroll Down until you reach the SF display params section.
Under the parameters tab, de-select the show NaN values in grey.
5.
Go to the Display Ranges tab. Here, you can use the markers to drag the start and
end points. Do this to select the part of the point cloud that looks correct.
6.
Once you have selected a section, go to Edit>Scalar Fields>Filter By Value.
7.
The interval you selected will be shown in box. Click Split to generate two clouds at
the split point.
8.
Select the second point cloud. When selected you will not see it as you will need to
open up the Display range til you see the complete second half. You can then modify
the Display range to remove the twist portion.


