Page 18
Configuring the TM-4100GE Camera
TM-4100GE Software
3.4.12 White Balance Control (Color Versions Only)
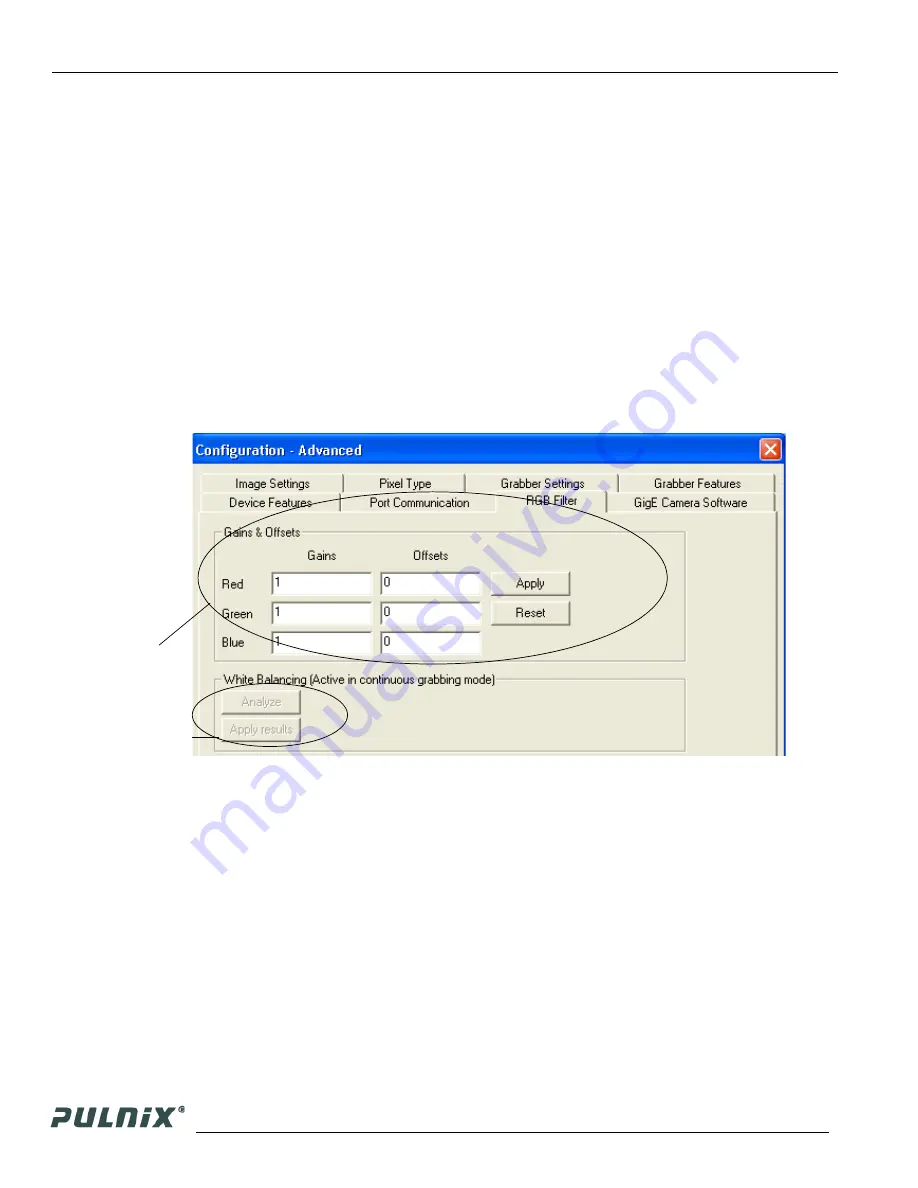
To determine white balance, use the following steps:
1.
Select scan mode A and no binning in the GigE Camera Software tabbed dialog. shown in
Figure 11 on page 11.
2.
Start the live video by clicking
Start
in the Acquisition tab of the Camera Interface Application dia-
log box.
3.
Select “Color Adjustment” under tools in the main menu. Show the camera a piece of white paper
to make sure that the image is not saturated.
4.
Click
Analyze
to automatically calculate the white balance.
5.
Once white balance has been calculated, click
Apply Results
to apply white balance. You can also
assign custom gain and offset values to the R, G, and B channels. If you choose to assign custom
values, click
Apply Results
.
FIGURE 20.
White Balance Control Settings.
3.4.13 Main Menu: “Option”
3.4.13 (a) Test Pattern
The Grabber Settings tabbed dialog box has a check box to enable the test pattern that is internally
generated by the integrated camera software.
3.4.14 Version
View the version number of the Cam2Net camera interface application by clicking on
Help--> About.
The version number of the integrated GigE camera software is seen in a text box control called
“Version” in the GigE Camera tabbed dialog box.
Custom white
balance.
Gain/Offset
Automatic white
balance control.
Summary of Contents for PULNiX TM-4100GE
Page 2: ......
Page 4: ......
Page 8: ...vi ...
Page 10: ...viii ...
Page 40: ...Page 30 GigE Series Camera Serial Commands TM 4100GE Software ...


