


Page 4
Software Introduction
TM-4100GE Software
system. A dialog box asks for verification of the selected install. Click “Yes”. Follow the instruc-
tions on any additional dialog boxes.
9.
For information on other network card installs click “Start”-->”JAI A.S”-->”Cam2Net”-->”Docu-
mentation”-->”Cam2Net IP Device Drivers”. An Acrobat file has instruction to help guide you
through the proper install.
10.
Go to “
Start” --> “Programs” --> “JAI AS” --> “Cam2Net
” -->
“Launch Coyote application”
to launch the camera control tool.
11.
1.4.4 Uninstalling the Software
To uninstall the JAI PULNiX GigE camera-control software from the control panel, use the following
steps:
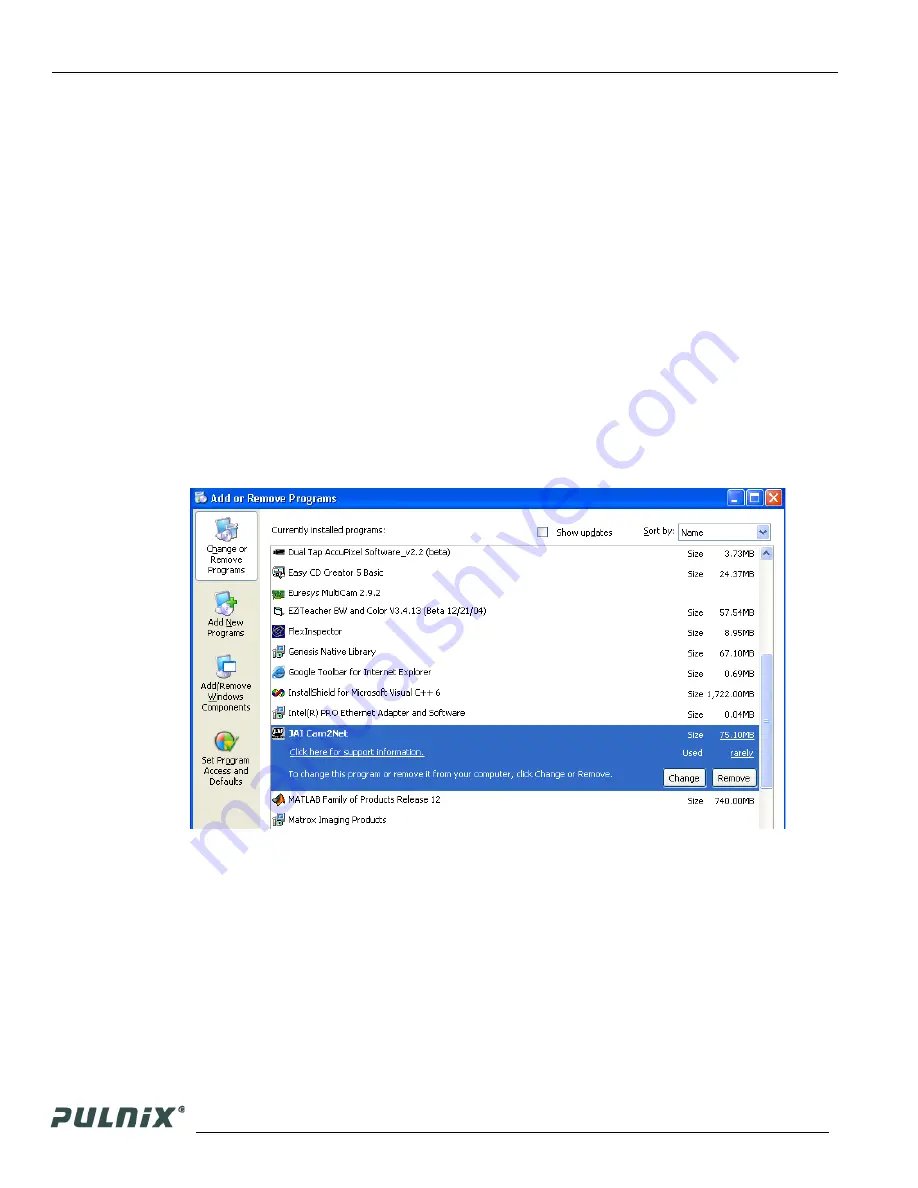
1.
Open “Add or Remove Programs” in the control panel.
2.
Select “JAI Cam2Net” from the lists of the installed software.
3.
Click the “Change or Remove” button as shown in Figure 1.
FIGURE 3.
Change and Remove Buttons
1.4.5 Quick-Start
Use the following quick-start process when the Camera Interface Application is installed on your PC.
1.
Connect the camera. The Hirose pin layout is shown in Table 1 on page 7. Both the Hirose and the
network cable (RJ-45) are illustrated in Figure 6.
2.
Run the Camera Interface Application.
3.
Click “Detect.” Assign a suitable IP address to the camera. The window shown in Figure 2 appears.
Summary of Contents for PULNiX TM-4100GE
Page 2: ......
Page 4: ......
Page 8: ...vi ...
Page 10: ...viii ...
Page 40: ...Page 30 GigE Series Camera Serial Commands TM 4100GE Software ...