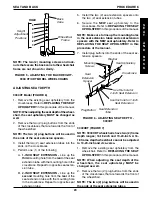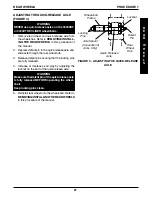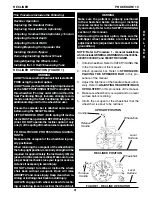
22
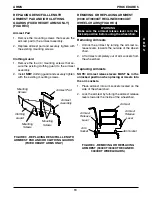
6. Slide the loose back cane through the
NEW
back
upholstery.
7. Secure the back cane to the wheelchair frame
with the two (2) allen screws and locknuts.
8. Secure the
NEW
back upholstery to the back
canes with the existing mounting screws and
washers.
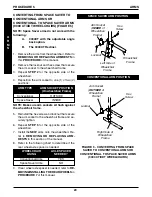
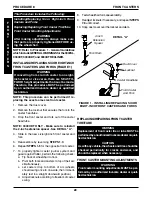
5. Line up mounting holes in the wheelchair frame,
NEW
back canes and arm brackets.
NOTE: Make sure mounting holes in the inserts
line up with the mounting holes in the back
canes.
6. Securely tighten the
NEW
back canes and arm
bracket to the wheelchair frame with the exist-
ing mounting screw and locknut. Refer to
FIG-
URE 4
for mounting screw and locknut orienta-
tion.
7. Securely tighten the
NEW
back upholstery to
the back canes with the eight (8) mounting
screws and washers.
8. Flip the swing-back arms down for use. Refer
to
SWING-BACK ARMS
in
PROCEDURE 5
of
this manual.
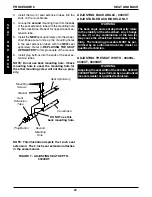
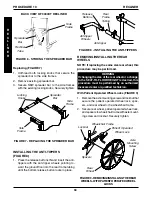
Locknut
Rear
Seat
Guide
Insert
Back Cane
Arm Bracket
Wheelchair
Frame
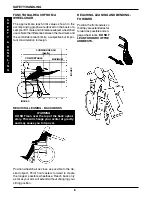
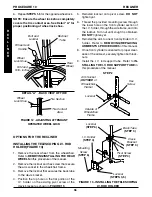
FIGURE 4 - ADJUSTING THE BACK HEIGHT -
9000 SL MODEL WHEELCHAIRS
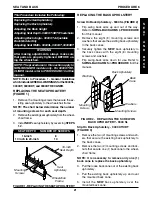
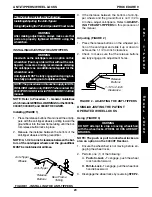
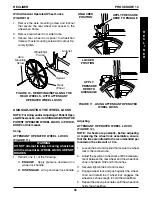
9000 XT/XDT Model Wheelchairs (FIGURE 5)
1. Remove the two (2) mounting screws and lock-
nuts that secure the two (2) back canes to the
wheelchair frame.
2. Reposition the back canes to one (1) of five (5)
height adjustment positions:
Original Back Height (in inches)
K
HOLE # 1 & 2 2 & 3 3 & 4 4 & 5 5 & 6
HEIGHT
15
16
17
18
19
K
Holes numbered from bottom to top for refer-
ence only. (There are no numbers on the back
canes.)
3. Reinstall the two (2) allen screws and locknuts
that secure the back canes to the wheelchair
frame and securely tighten.
PROCEDURE 6
SEAT AND BACK
S
E
A
T
A
N
D
B
A
C
K
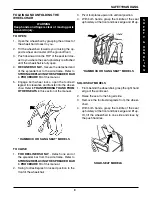
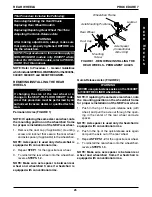
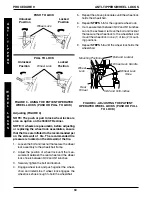
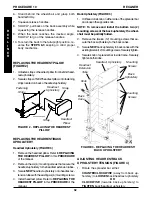
Mounting
Screw
Mounting
Screws
Back Upholstery
Washer
Back Cane
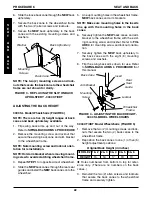
NOTE: The two (2) mounting screws and lock-
nuts that secure the back cane to the wheelchair
frame are not shown for clarity.
FIGURE 3 - REPLACING THE SLIP ON BACK
UPHOLSTERY - 9000 XT/XDT
ADJUSTING THE BACK HEIGHT
9000 SL Model Wheelchairs (FIGURE 4)
NOTE: There are five (5) height ranges of back
canes and back upholstery available.
1. Flip swing back arms up and out of the way.
Refer to
SWING-BACK ARMS
in
PROCEDURE
2. Remove the mounting screw and locknut that
secure the existing back cane and arm bracket
to the wheelchair frame.
NOTE: Note mounting screw and locknut orien-
tation for reinstallation.
NOTE: Hold arm bracket when removing mount-
ing screw to avoid scratching wheelchair frame.
3. Repeat
STEP 1
for opposite side of wheelchair.
4. Slide the
NEW
back canes through the rear seat
guides and install the
NEW
back canes onto the
wheelchair.
Summary of Contents for 9000 SL
Page 42: ...42 NOTES N O T E S NOTES...

