36
RECLINER
PROCEDURE 10
R
E
C
L
I
N
E
R
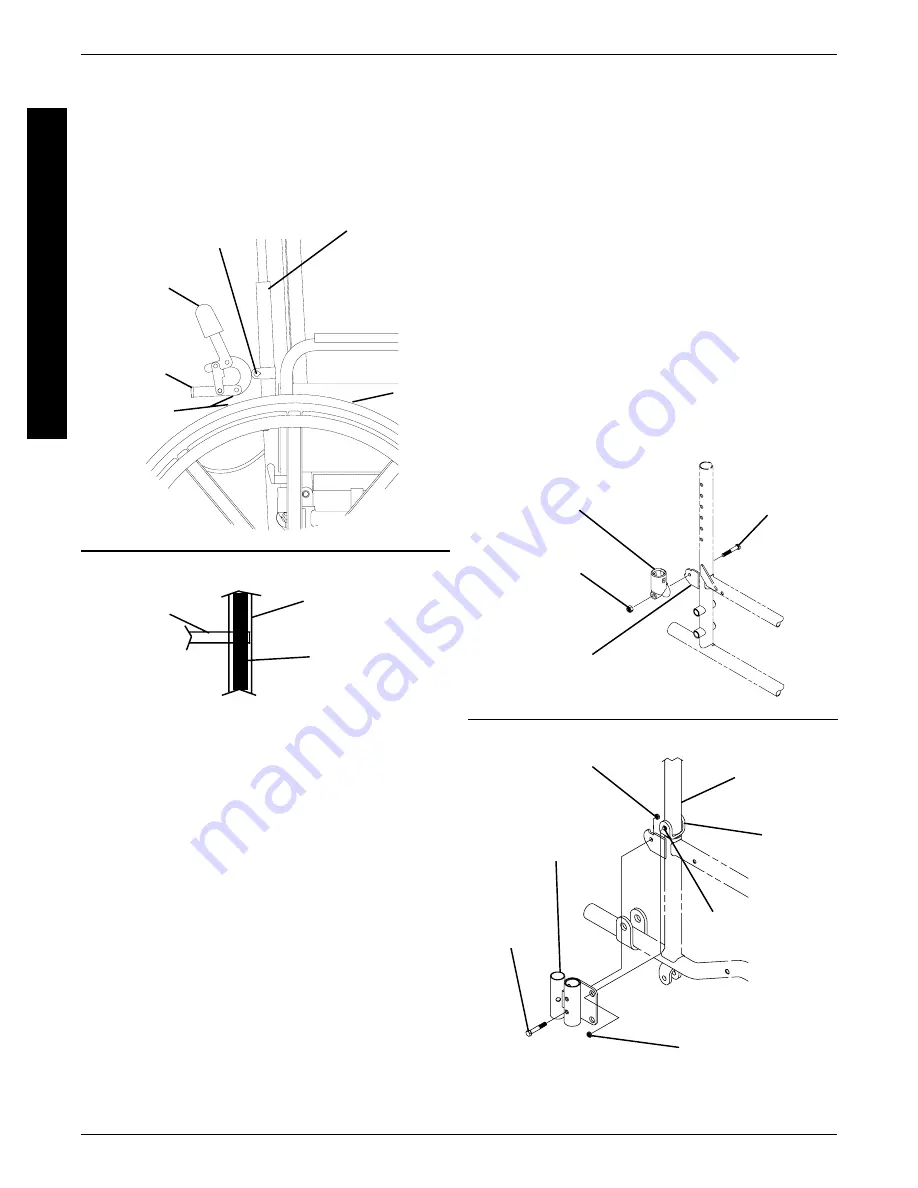
5. Reinstall locknut onto pivot screw.
DO NOT
tighten yet.
6. Thread the provided mounting screw through
the lower hole on the front cylinder section of
the I.V. holder, through the side frame, and into
the locknut. Turn nut until snug fit is obtained.
DO NOT
tighten yet.
7. Reinstall the arm to orient front cylinder of I.V.
holder. Refer to
REMOVING/REPLACING
ARMRESTS
in
PROCEDURE 5
of this manual.
8. Once front cylinder is oriented for proper clear-
ance of the armrest, securely tighten both lock-
nuts.
9. Install the I. V. rod support tube. Refer to
IN-
STALLING THE I.V. ROD SUPPORT TUBE
in
this procedure of the manual.
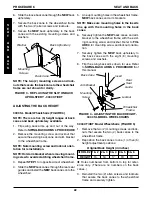
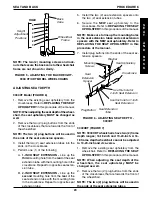
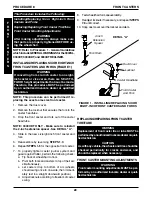
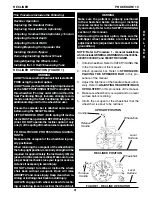
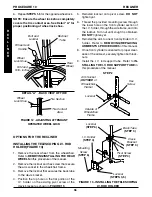
FIGURE 13 - INSTALLING THE TELESCOPING
I.V. ROD HOLDER
Hex
Screw
Arm Socket
(
OUTSIDE
of
Wheelchair
Frame)
Locknut
STEP 2
Outside of
Wheelchair
Frame
Clevis
Bracket
(STEP 3)
Pivot Screw
(STEP 4)
Back Tube
(STEP 3)
Locknut
(STEP 6)
Mounting
Screw
(STEP 6)
I.V. Holder
(STEP 4)
Locknut
(STEPS 3,5 )
OPTIONS FOR THE RECLINER
INSTALLING THE TELESCOPING I.V. ROD
HOLDER (FIGURE 13)
1. Remove the rear wheel from the wheelchair.
Refer to
REMOVING/INSTALLING THE REAR
WHEELS
in
this procedure of the manual.
2. Remove the locknut and hex screw that secure
the arm socket to the wheelchair frame.
3. Remove the locknut that secures the back tube
to the clevis bracket.
4. Position the top hole on the flat portion of the
I.V. holder on the exisitng pivot screw of the
clevis bracket as shown in
FIGURE 13
.
6. Repeat
STEPS 1-5
for the opposite wheel lock.
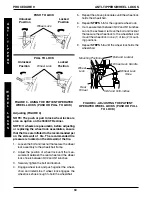
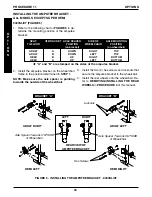
NOTE: Ensure the wheel lock shoe completely
covers the tire contact area. See Detail "A" for
proper positioning of wheel lock shoe.
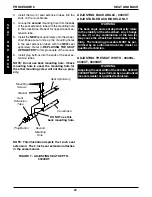
Wheel Lock
Handle
Wheel
Lock Shoe
5/32 and
5/16- inches
Bolt and
Locknut
Rear
Wheel
Recliner
Tube
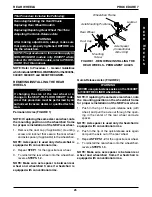
FIGURE 12 - ADJUSTING ATTENDANT
OPERATED WHEEL LOCK
Tire Section
Tire Contact
Area
DETAIL "A" - BACK VIEW OF TIRE
Wheel
Lock Shoe
Summary of Contents for 9000 SL
Page 42: ...42 NOTES N O T E S NOTES...

