OPERATIONS MANUAL – 5750440 – REVISION D
Changing the Printed Dot Size
C5
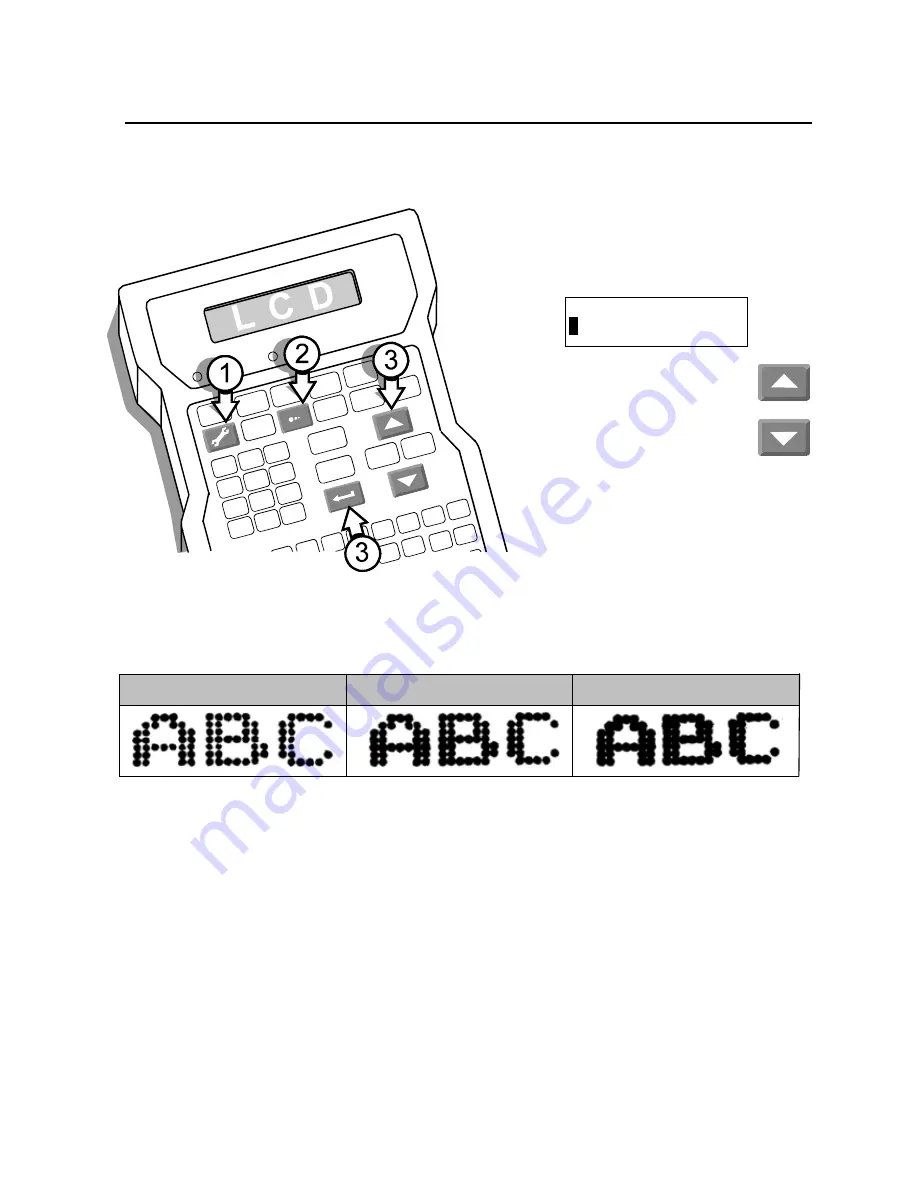
The system allows you to change the diameter of all the dots that form printed characters in a range
from 0.05 inch (1.27mm) to 0.10 inch (2.54mm). The default dot size is 4.
1
1
Press SET-UP.
2
2
Press DOT SIZE. The LCD will prompt
for a dot diameter:
3
3
Scroll to a new dot diameter
and press ENTER.
Try sample prints with the new dot
diameter to see if you have
improved the printing. If not, change
the dot size and run more print
samples.
The scanned samples following show the differences in printed characters when the dot size is 3, then 4
and finally 7.
Dot diameter (1-9):
4
Dot Size 3
Dot Size 4
Dot Size 7
Summary of Contents for 5750-440
Page 4: ...OPERATIONS MANUAL 5750440 REVISION C...
Page 14: ...OPERATIONS MANUAL 5750440 REVISION D...
Page 32: ...OPERATIONS MANUAL 5750440 REVISION D...
Page 38: ...OPERATIONS MANUAL 5750440 REVISION D...
Page 64: ...OPERATIONS MANUAL 5750440 REVISION D...
Page 72: ...OPERATIONS MANUAL 5750440 REVISION D...
Page 74: ...OPERATIONS MANUAL 5750440 REVISION D...
Page 77: ...OPERATIONS MANUAL 5750440 REVISION D Assembly Drawings B3...
Page 78: ...OPERATIONS MANUAL 5750440 REVISION D...
Page 79: ...OPERATIONS MANUAL 5750440 REVISION D...


