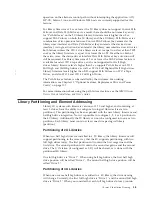
For static IP Addresses only: After establishing a connection to the library, open
any HTML browser and enter the IP address of the library. To configure the Web
User Interface, you must first set the IP address using the Operator Control Panel.
Refer to "Configure: Network" on page 5-23 or "Configure Library: Network" on
page 5-45.
Login
Important:
Some options of the Web User Interface take the library OFFLINE. This
inactive mode can interfere with host-based application software,
causing data loss. Make sure the library is idle before attempting to
perform any remote operations that will take the library OFFLINE.
To login, select the Role type and enter the correct password. There are four levels
of access:
v
User - Normal user level. The User only has access to Monitor Library menus.
v
Superuser - The Superuser has access to the Monitor Library and Manage
Library sections.
v
Admin - Admin user level The Admin user has access to all menus except those
restricted to Service only.
v
Service - Service personnel user level - Access to this level is for Service
personnel only. Service personnel have access to all menus.
Note:
Passwords are case-sensitive.
Use the following password for logging in as an Admin user:
secure
Each level affects which areas you have access to and what actions you can initiate
from those areas.
For DHCP, use the Operator Control Panel to determine the IP Address assigned to
your library. Navigate to
Monitor
>
Library
>
Identity
. Scroll down to
IP Address
and make note of the address. Enter the IP Address in your internet browser
address field to access your library with the Web User Interface.
For IPv4 or Dual Stack IPv4 + IPv6, enter your library's static IP Address using the
0.0.0.0 format (four octets).
For IPv6, enter your library's static IP Address or Router Assigned IP Address
using the following format: http://[0:0:0:0:0:0:0:0]. To determine your Router
Assigned IP Address, navigate to
Monitor
>
Library
>
Network
on the Operator
Control Panel. For the IPv6 Router Assigned Addresses to be displayed on the
Operator Control Panel, the Network must be configured to IPv6 Only and the
Stateless Autoconfig on the must be set to ON.
Chapter 2. User Interfaces
2-5
Summary of Contents for System Storage TS3100
Page 2: ......
Page 12: ...x TS3100 Tape Library and TS3200 Tape Library Setup Operator and Service Guide...
Page 16: ...xiv TS3100 Tape Library and TS3200 Tape Library Setup Operator and Service Guide...
Page 18: ...xvi TS3100 Tape Library and TS3200 Tape Library Setup Operator and Service Guide...
Page 30: ...xxviii TS3100 Tape Library and TS3200 Tape Library Setup Operator and Service Guide...
Page 110: ...4 44 TS3100 Tape Library and TS3200 Tape Library Setup Operator and Service Guide...
Page 190: ...5 80 TS3100 Tape Library and TS3200 Tape Library Setup Operator and Service Guide...
Page 240: ...8 14 TS3100 Tape Library and TS3200 Tape Library Setup Operator and Service Guide...
Page 246: ...9 6 TS3100 Tape Library and TS3200 Tape Library Setup Operator and Service Guide...
Page 318: ...B 8 TS3100 Tape Library and TS3200 Tape Library Setup Operator and Service Guide...
Page 348: ...F 2 TS3100 Tape Library and TS3200 Tape Library Setup Operator and Service Guide...
Page 352: ...H 2 TS3100 Tape Library and TS3200 Tape Library Setup Operator and Service Guide...
Page 372: ...X 4 TS3100 Tape Library and TS3200 Tape Library Setup Operator and Service Guide...
Page 373: ......
Page 374: ...Part Number 35P2859 Printed in USA GA32 0545 12 1P P N 35P2859...


