


Before you begin:
Read the documentation that comes with your drive.
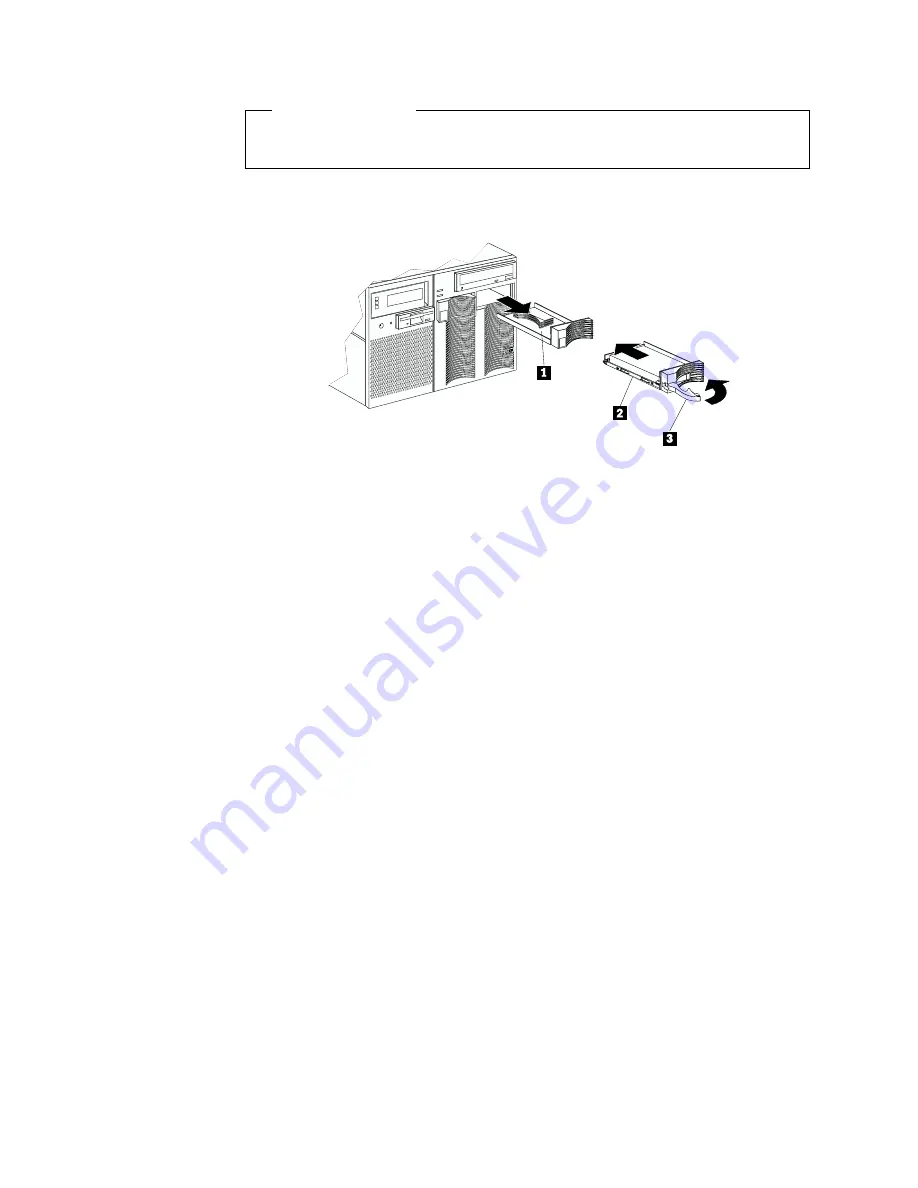
Refer to the following illustration while you perform the steps in this procedure.
1
Filler panel (tray and slim filler bezel)
2
Hot-swap hard disk drive
3
Drive tray handle (open position)
To install or replace a hard disk drive:
1. Read “Safety information” on page 39 through “Handling static-sensitive
devices” on page 43.
2. Determine the bay in which you want to install the drive.
3. If you are removing a defective hard disk drive, do so now. Otherwise,
continue with step 4.
Remove the defective hard disk drive
2
by pressing on the lock to release the
handle
3
, placing the handle in the open position (perpendicular to the drive),
and pulling the hot-swap tray from the bay. Continue with step 5.
4. Remove the filler panel
1
from the empty hot-swap bay by inserting your
finger into the depression at the left side of the filler panel and pulling it away
from the server.
Note:
If you are installing a slim-high drive, you must separate the slim filler
bezel from the tray, and insert the slim filler bezel into the top of the
hard disk drive cage. Otherwise, store the filler panel in a safe place.
5. Install the hard disk drive
2
in the hot-swap bay:
a. Remove the new drive assembly from the static-protective package.
b. Touch the static-protective package containing the drive assembly to any
unpainted metal surface on the server. Then, remove the drive assembly
from the static-protective package.
c. If you are installing a slim-high drive, separate the slim filler bezel from the
tray, and insert the slim filler bezel into the top of the hard disk drive cage.
d. Ensure that the tray handle
3
is open (that is, perpendicular to the drive).
e. Align the drive assembly so that it engages the guide rails in the bay.
f. Gently push the drive assembly into the bay until the drive stops.
82
xSeries 370 User's Reference
Summary of Contents for eServer 370 xSeries
Page 1: ...User s Reference xSeries 370...
Page 2: ......
Page 3: ...IBM xSeries 370 User s Reference...
Page 32: ...16 xSeries 370 User s Reference...
Page 188: ...172 xSeries 370 User s Reference...


