40
POST and BIOS Setup Utilities
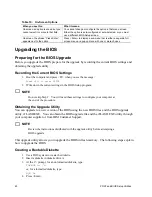
Table 19. On-Screen Options
When you see this:
What it means:
On screen, an option is shown but you
cannot select it or move to that field.
You cannot change or configure the option in that menu screen.
Either the option is auto-configured or auto-detected, or you must
use a different BIOS Setup screen.
On screen, the phrase “Press Enter”
appears next to the option.
Press <Enter> to display a sub-menu that is either a separate full
screen menu or a popup menu with one or more choices.
Upgrading the BIOS
Preparing for the BIOS Upgrade
Before you upgrade the BIOS, prepare for the upgrade by recording the current BIOS settings and
obtaining the upgrade utility.
Recording the Current BIOS Settings
1.
Boot the computer and press <F2> when you see the message:
Press <F2> to enter SETUP
2.
Write down the current settings in the BIOS Setup program.
✏
NOTE
Do not skip Step 2. You will need these settings to configure your computer at
the end of the procedure.
Obtaining the Upgrade Utility
You can upgrade to a new version of the BIOS using the new BIOS files and the BIOS upgrade
utility, iFLASH.EXE. You can obtain the BIOS upgrade file and the iFLASH.EXE utility through
your computer supplier or from IBM Customer Support.
✏
NOTE
Review the instructions distributed with the upgrade utility before attempting a
BIOS upgrade.
This upgrade utility allows you to upgrade the BIOS in flash memory. The following steps explain
how to upgrade the BIOS.
Creating a Bootable Diskette
1.
Use a DOS system to create the diskette.
2.
Insert a diskette in diskette drive A.
3.
At the C:\ prompt, for an unformatted diskette, type:
format a: /s
or, for a formatted diskette, type:
sys a:
4.
Press <Enter>.
Summary of Contents for @server xSeries 343
Page 1: ... TM xSeries 343 Product Guide ...
Page 3: ......
Page 4: ...ii ...
Page 12: ...x Contents This page intentionally left blank ...
Page 32: ...20 Chassis Description Must enter the administrator password to exit secure mode ...
Page 119: ...xSeries 343 Product Guide 107 TP00472 Figure 37 Removing the Power Supply Cage ...
Page 157: ...xSeries 343 Product Guide 145 ...
Page 158: ...146 Appendix C Safety Information ...
Page 159: ...xSeries 343 Product Guide 147 ...
Page 160: ...148 Appendix C Safety Information ...
Page 161: ...xSeries 343 Product Guide 149 ...
Page 162: ...150 Appendix C Safety Information ...
Page 163: ...xSeries 343 Product Guide 151 ...
Page 164: ...152 Appendix C Safety Information ...
Page 165: ...xSeries 343 Product Guide 153 ...
Page 166: ...154 Appendix C Safety Information ...
Page 167: ...xSeries 343 Product Guide 155 ...
Page 177: ...xSeries 343 Product Guide 165 ...
Page 178: ...166 Appendix C Safety Information ...
Page 179: ...xSeries 343 Product Guide 167 ...
Page 180: ...168 Appendix C Safety Information ...
Page 181: ...xSeries 343 Product Guide 169 ...
Page 182: ...170 Appendix C Safety Information ...
Page 183: ...xSeries 343 Product Guide 171 ...
Page 189: ...xSeries 343 Product Guide 177 ...
Page 193: ...xSeries 343 Product Guide 181 Part Number 24R9084 Printed in the United States of America ...

