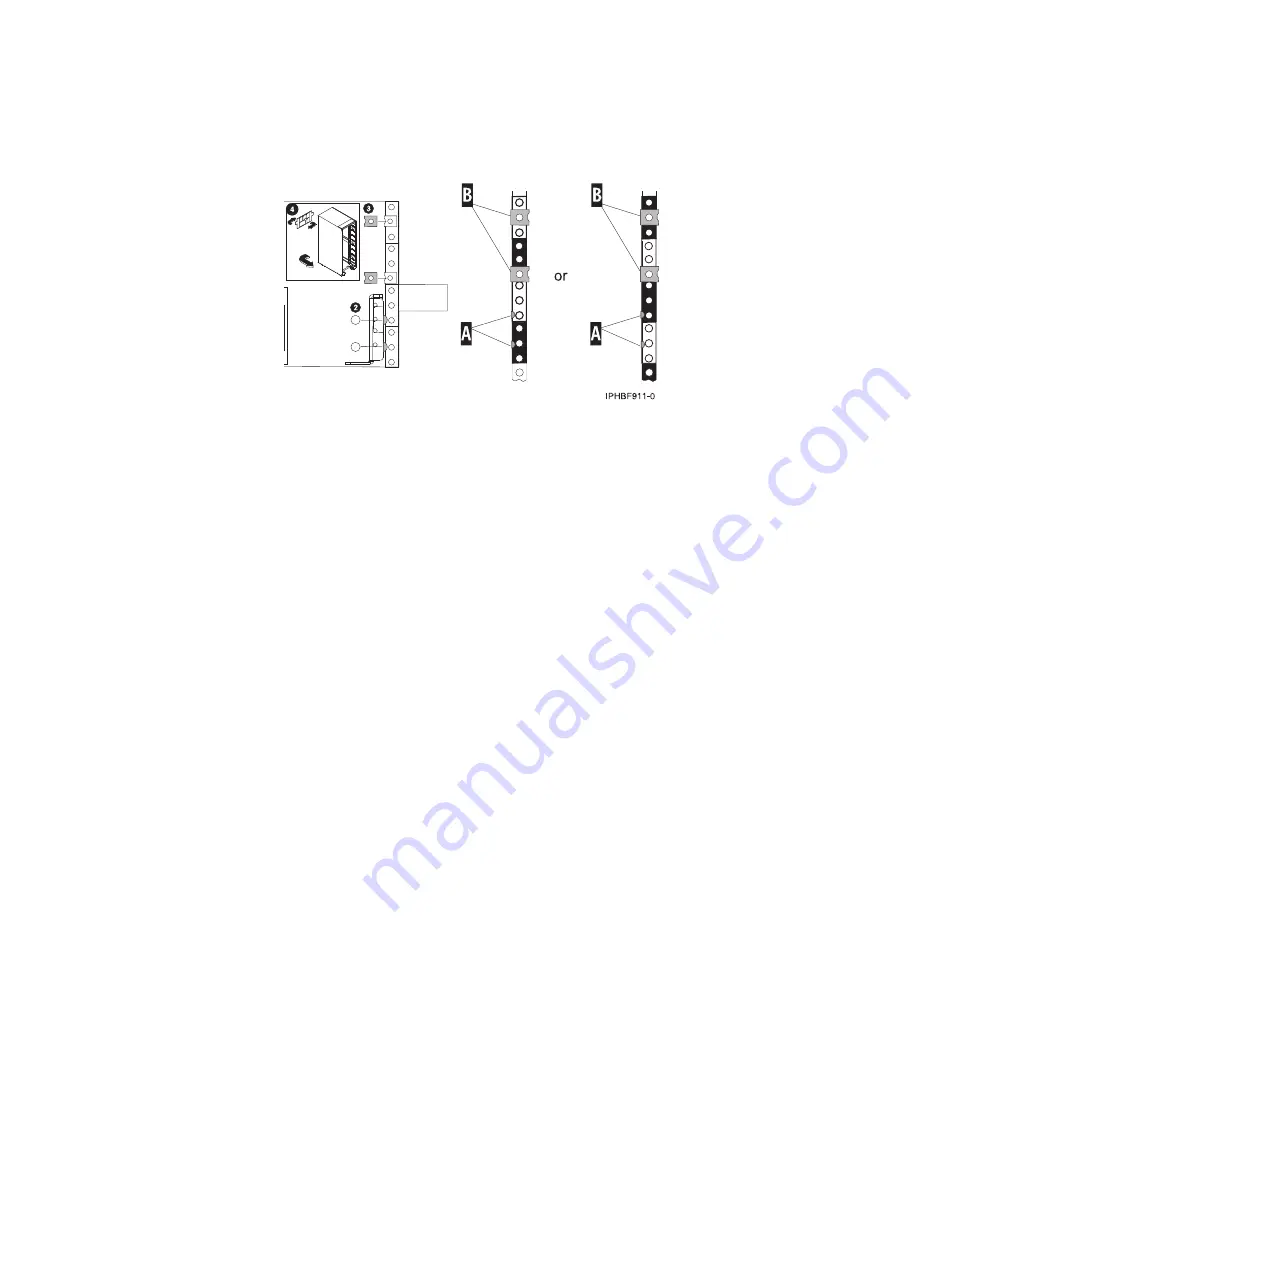
A
Folded self-adhesive dot
B
Nut clip
d.
Attach the nut clips
(B)
directly across from the template's printed nut clips onto the rack's EIA
strip.
e.
Remove the rack-mounting template from the front of the rack. The four self-adhesive dots and
two nut clips have been placed on the front of the rack.
f.
Go to the back of the rack.
g.
Facing the back of the rack, remove the protective coating from each adhesive strip, and attach the
backside of the rack-mounting template to the back of the rack. Place the template on the
corresponding EIA locations that were noted from the front of the rack.
Note:
The steps on the back of the rack-mounting template begin with number 7.
h.
Note the four dots
(A)
printed on the backside of the template. Attach a self-adhesive dot directly
across from the template's printed dots onto the rack's EIA strip.
Note:
These dots indicate where the rail retaining screws will be attached.
i.
Attach the nut clips
(B)
directly across from the templates printed nut clips onto the rack's EIA
strip.
Marking the location without a rack-mounting template
You might need to mark the location without a template. Use the procedure in this section to perform
this task.
To mark the installation location and install the nut clips into a rack without using the rack-mounting
template, complete the following steps:
1.
Determine where in the rack to place the drawer and make note of the location numbers.
This drawer is four Electronic Industries Alliance (EIA) units high. An EIA unit is 1.75 in. (44.45 mm)
in height. The rack contains three mounting holes for each EIA unit of height. This drawer therefore
is 7 in. (177.8 mm) high and covers 12 mounting holes in the rack.
The following illustration shows a 1-EIA unit and a 4-EIA unit. Depending on the rack manufacturer,
the EIA units may be separated either by color or by a line. The holes along the EIA strip are not
evenly spaced. If your rack has no color or line separation between EIAs, assume that each EIA
section begins where the hole spacing is closest together.
Figure 80. Attaching the dots and nut clips for the expandable rails
80
Installing into a rack
Summary of Contents for 0551
Page 1: ...Power Systems Rack rack features and installing systems or expansion units into a rack ...
Page 2: ......
Page 3: ...Power Systems Rack rack features and installing systems or expansion units into a rack ...
Page 8: ...vi Installing into a rack ...
Page 12: ...2 Installing into a rack ...
Page 34: ...24 Installing into a rack ...
Page 118: ...108 Installing into a rack ...
Page 126: ...116 Installing into a rack ...
Page 130: ...120 Installing into a rack ...
Page 148: ...138 Installing into a rack ...
Page 164: ...154 Installing into a rack ...
Page 174: ...3 Close the front rack door 164 Installing into a rack ...
Page 181: ......
Page 182: ... Printed in USA ...


