2.
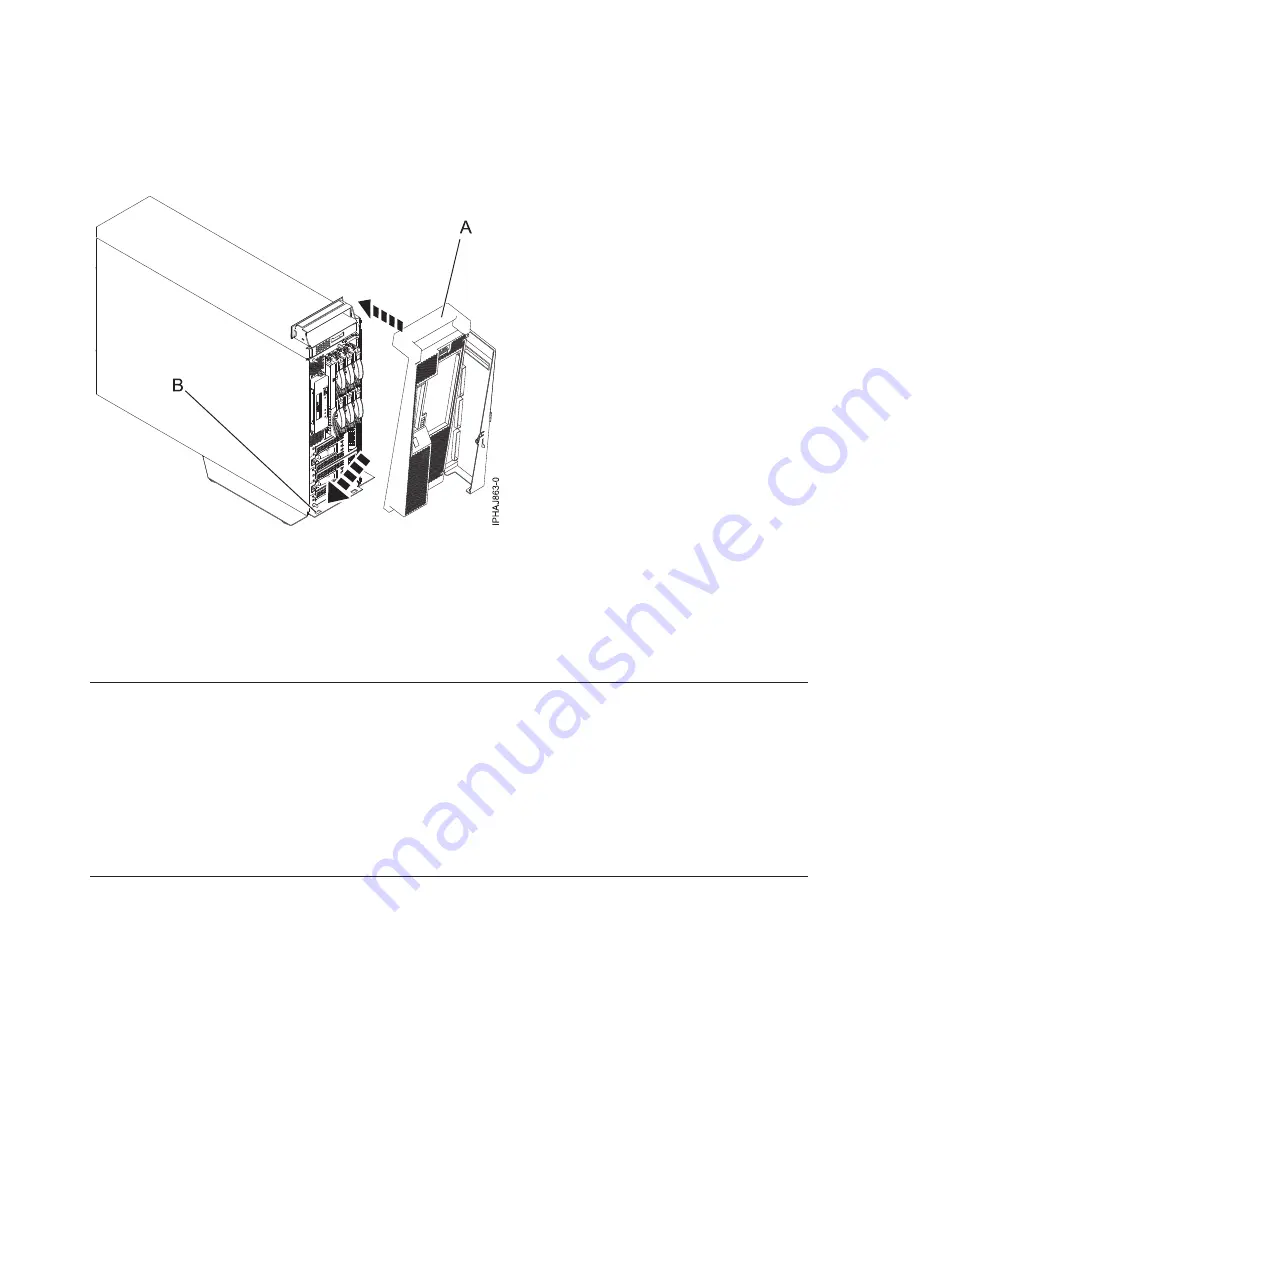
Push the cover up toward the top of the system
(A)
, ensuring that the aligning pins are aligned with
their matching slots
(B)
located on the system.
3.
Gently push the cover in until the cover-release tab snaps into place.
4.
Close and secure the door.
Installing the front cover on a 7311-D11, 5791, or 5794 expansion unit
Use this procedure to install the cover after accessing components or performing service.
To install the front cover, follow these steps:
1.
Position the cover on the front of the expansion unit so that the pins on the cover line up with the
slots on the front of the expansion unit.
2.
Insert the tabs on the bottom of the cover into the slots at the front of the expansion unit.
3.
Push the cover up and forward until the tabs on the top secure the cover in place.
Installing the front cover on the 7314-G30 or 5796
Use this procedure to install the front cover after installing the system or performing a service action.
If you only have one side of the chassis populated, ensure that the airflow block is present on the
unpopulated side.
1.
Insert the posts on the bottom of the cover
(A)
into the hooks on the chassis of the enclosure.
2.
Press in on the two latches
(C)
on the right and left of the front cover.
Figure 141. Replacing the cover on the model
150
Installing into a rack
Summary of Contents for 0551
Page 1: ...Power Systems Rack rack features and installing systems or expansion units into a rack ...
Page 2: ......
Page 3: ...Power Systems Rack rack features and installing systems or expansion units into a rack ...
Page 8: ...vi Installing into a rack ...
Page 12: ...2 Installing into a rack ...
Page 34: ...24 Installing into a rack ...
Page 118: ...108 Installing into a rack ...
Page 126: ...116 Installing into a rack ...
Page 130: ...120 Installing into a rack ...
Page 148: ...138 Installing into a rack ...
Page 164: ...154 Installing into a rack ...
Page 174: ...3 Close the front rack door 164 Installing into a rack ...
Page 181: ......
Page 182: ... Printed in USA ...


