6.
Secure the rear of the unit to each rail assembly with one M4 pan-head screw in the slotted hole on
the outside of the storage enclosure chassis wall.
7.
Reverse the procedures in step 1 and step 2 to reinstall the power supplies and hard disk drives.
8.
Connect a power cord to each power supply. Use the power-cord guide for strain relief to prevent the
power cord from disconnecting accidentally.
9.
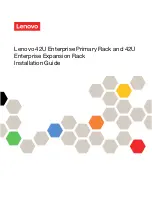
Install the left bezel (it has the LEDs) and the right bezel. Fit the cutout on the top of the bezel over
the tab on the chassis flange and then rotate the bezel down until it snaps into place. Make sure that
the inside surface of the bezel is flush with the chassis.
For instructions on how to connect and configure the system when you have completed installing the
system into the rack, see Enclosures and expansion units.
Installing the 5790, 5796, 7311-D11, or 7314-G30 expansion unit in a
rack
You might need to install an expansion unit into the rack. Use this procedure to perform this task. In
addition to information intended to promote safety and reliable operation, illustrations of the related
hardware components are provided to show how these components relate to each other.
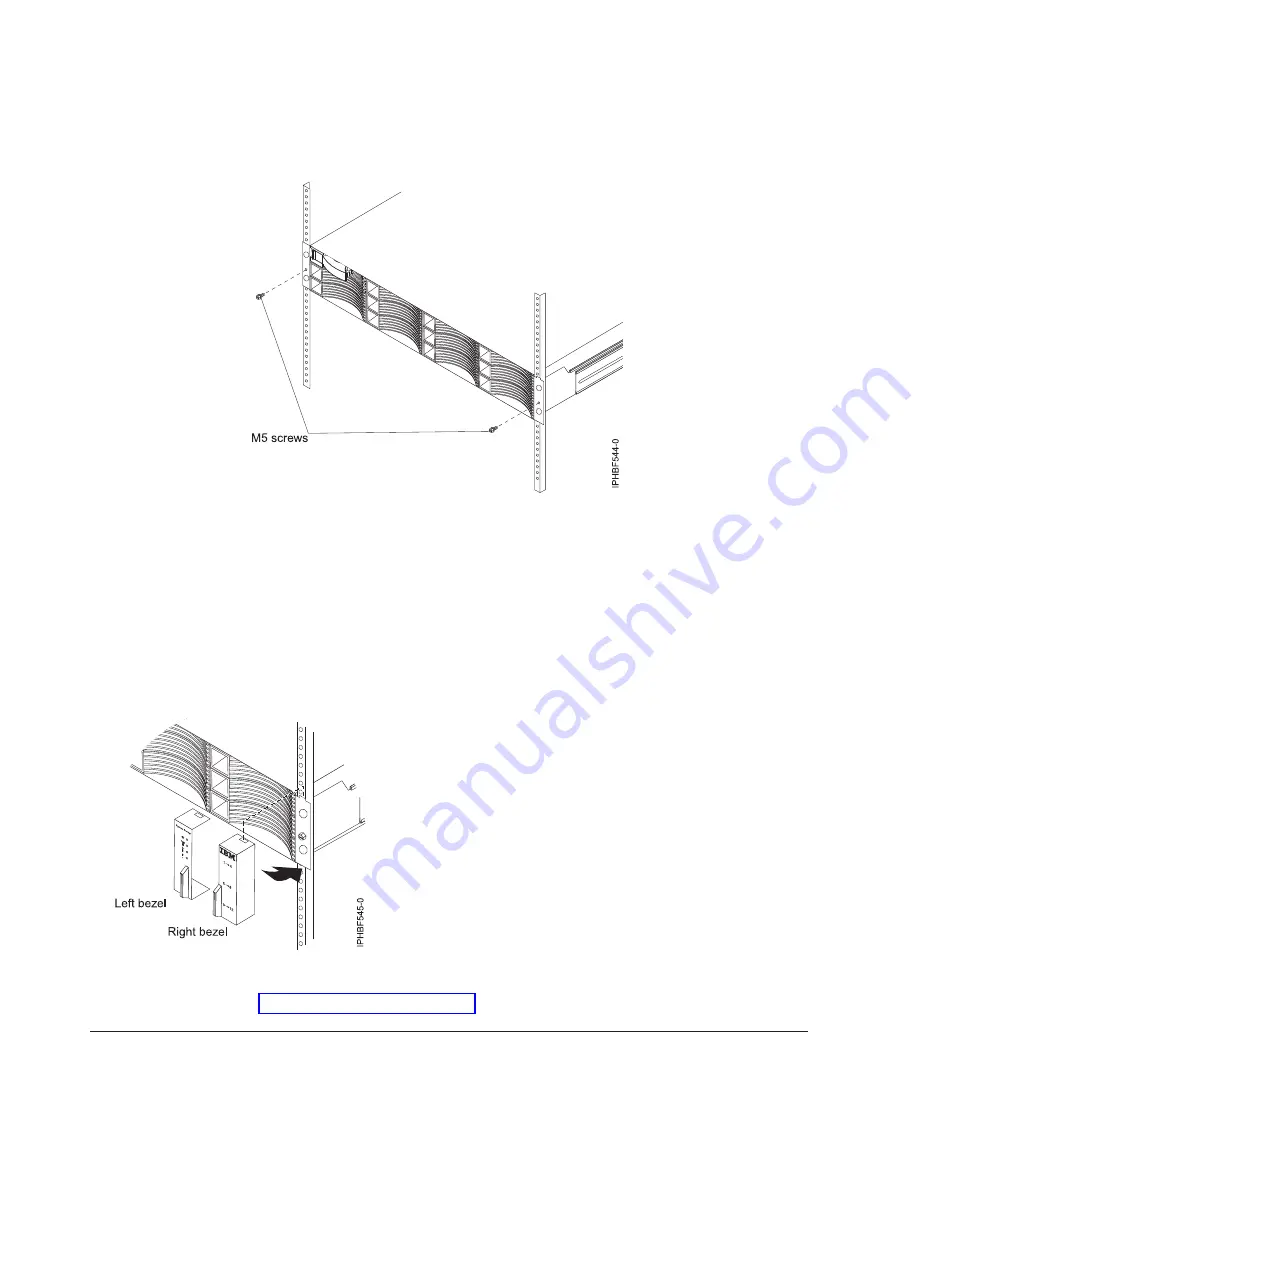
Figure 73. Installing the securing screws
76
Installing into a rack
Summary of Contents for 0551
Page 1: ...Power Systems Rack rack features and installing systems or expansion units into a rack ...
Page 2: ......
Page 3: ...Power Systems Rack rack features and installing systems or expansion units into a rack ...
Page 8: ...vi Installing into a rack ...
Page 12: ...2 Installing into a rack ...
Page 34: ...24 Installing into a rack ...
Page 118: ...108 Installing into a rack ...
Page 126: ...116 Installing into a rack ...
Page 130: ...120 Installing into a rack ...
Page 148: ...138 Installing into a rack ...
Page 164: ...154 Installing into a rack ...
Page 174: ...3 Close the front rack door 164 Installing into a rack ...
Page 181: ......
Page 182: ... Printed in USA ...


