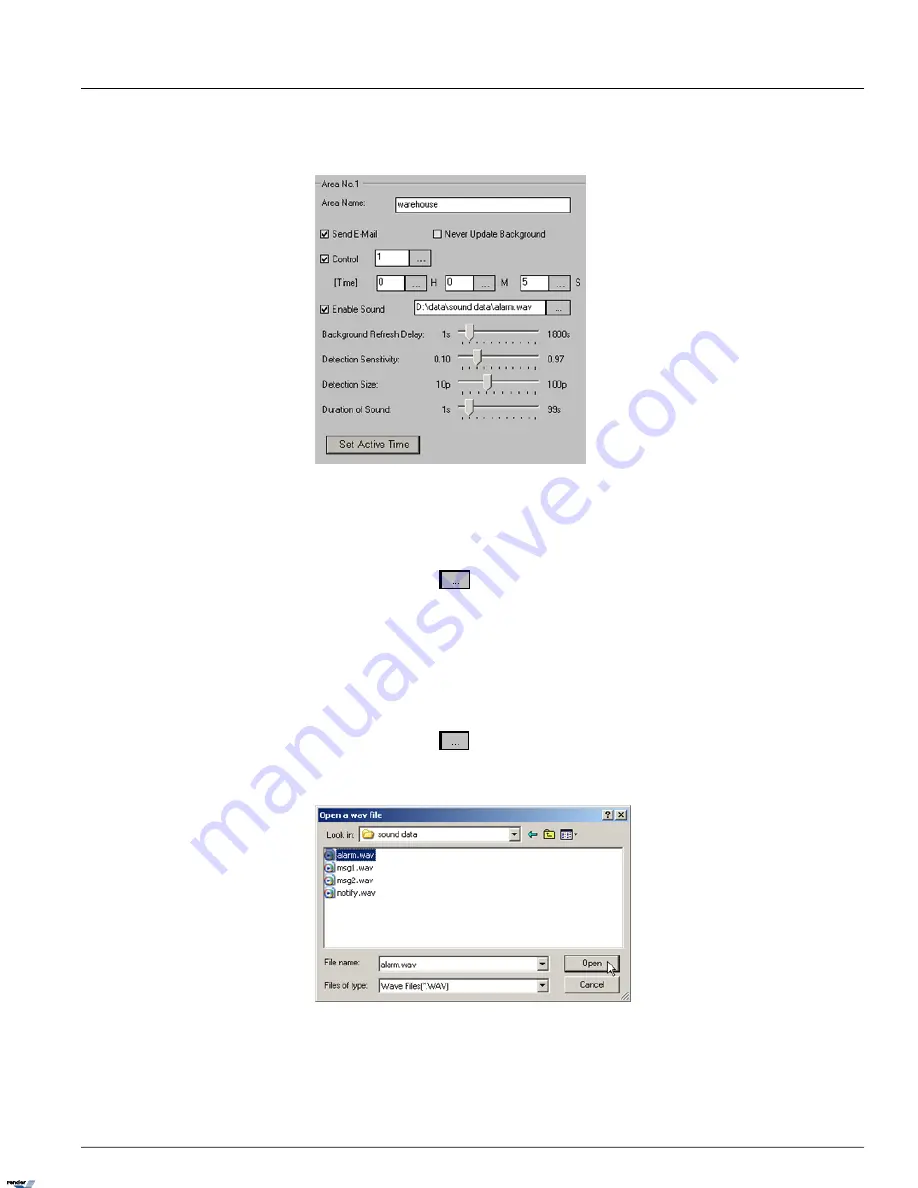
2. Enter a descriptive name for the selected detection area in the Area Name: field. In the example below, Area No. 1
is called "warehouse".
3. Check off
Send E-Mail
checkbox to have an emergency Email sent every time an alarm is triggered in this Area.
The email address is taken from the Email Setup tab. Make sure to configure E-Mail setup tab.
4. Check off
Control
checkbox to activate selected control every time an alarm is triggered in this Area.
5.
Click the
Browse
button
to select the desired control from the list. Only controls activated in the Hardware
Setup tab will be displayed.
6. Set the working
[Time]
for the selected control. After the control has been activated, it will remain on for the set
period of time. In the example above, Control 1 will remain on for 5 seconds after the motion has been detected in
the Area No. 1.
7. Check off
Enable Sound
checkbox to enable custom audio alarm for the selected area.
8.
Click the
Browse
button
to select the desired *.wav sound file from the hard drive.
9. Locate the *.wav sound file and click
Open
10. Set
Duration of Sound
by adjusting the slider (1 sec - 99 sec) to determine how long the *.wav file will play.
11. Set
Background Refresh Delay
(1s - 1800s). If Intelli-Guard™ detects no changes in the monitored area, it will
update the area picture according to the selected schedule. This will decrease the cumulative image difference caused
104
Intelli-Guard™ Setup
Chapter 1. SRX-Pro Server
XML to PDF by RenderX XEP XSL-FO Formatter, visit us at
http://www.renderx.com/


