ST16135-00C
1
1
Introduction
1
Introduction
IMPORTANT !
BEFORE INITIAL START-UP, ENSURE THAT THE
COMPRESSOR IS FILLED WITH A HYDROVANE APPROVED
OIL. DO NOT OVERFILL.
1.1
Support
Full support is available from your Hydrovane Distributor. If you
need any specialist help or service, please contact your
Distributor quoting the MODEL TYPE and SERIAL NUMBER.
1.2
Customer Warranty Terms
All compressors, which are serviced by an authorised Hydrovane
Distributor, are guaranteed for 12 months from commissioning or
18 months from the date of shipment.
The warranty excludes normal service parts, oil and wear items,
dirt ingress, cleaning of filters and fluid drain devices and the
tightening of electrical or other connections. Also excluded is
adjustment of the Controller settings. Consequential damage of
any nature is not covered by the warranty.
An ‘Advance’ 10 year warranty is available for approved
installations, contact your Hydrovane Distributor for details.
1.3
Product Development
Hydrovane adopt a policy of continual product development. The
information in this Handbook, whilst fully up to date when issued,
may be subject to change without notice.
1.4
Quality Standards
CompAir UK Ltd Quality Management Systems are approved to
BS EN ISO 9001.
These instructions comply with the latest European Directives
regarding content and are valid for machines carrying the
CE mark.
CompAir UK Ltd
Claybrook Drive
Washford Industrial Estate
Redditch, Worcestershire
B98 0DS, England
Web:
www.hydrovane.co.uk
[email protected]
www.CompAir.com
E-mail:
Telephone:
(01527) 525522
Fax:
(01527) 521140
1.5
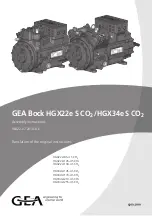
Model Range
This Handbook relates to all ACE HV11 - HV22 vertical range
compressors and hypac models.
V11ACE08-4035S300
50Hz model
V11ACE10-4035S300
50Hz model
V11ACE08-2336D305
60Hz model
V11ACE10-2336D305
60Hz model
V11ACE08-5736D305
60Hz model
V11ACE10-5736D305
60Hz model
V11ACE08-4035V300
50/60Hz model
V15ACE08-4035S300
50Hz model
V15ACE10-4035S300
50Hz model
V15ACE08-2336D305
60Hz model
V15ACE10-2336D305
60Hz model
V15ACE08-5736D305
60Hz model
V15ACE10-5736D305
60Hz model
V15ACE08-4035V300
50/60Hz model
V15ACE08-2035V300
50/60Hz model
V18ACE08-4035S000
50Hz model
V18ACE10-4035S000
50Hz model
V18ACE08-2336D005
60Hz model
V18ACE10-2336D005
60Hz model
V18ACE08-5736D005
60Hz model
V18ACE10-5736D005
60Hz model
V22ACE08-4035S000
50Hz model
V22ACE10-4035S000
50Hz model
V22ACE08-2336D005
60Hz model
V22ACE10-2336D005
60Hz model
V22ACE08-5736D005
60Hz model
V22ACE10-5736D005
60Hz model
V22ACE08-4035V000
50/60Hz model
V22ACE08-2035V000
50/60Hz model
1.6
Product Terminology
The product code segments signifies:
V
Vane
11, 15, 18, 22
kW motor
ACE
Air Centre Electronic
08, 10
Delivery pressure in bars
20
200V
23
230V
40
400V
57
575V
3
3 phase
5, 6
50 Hz, 60Hz
D, S, V
Direct On Line, Star/Delta, Variable
Speed
000,100,200,300
European Specification (50 Hz)
005,105,205,305
US Specification (60 Hz)
This publication refers to compressors with serial numbers from:
V11-000301-0706
-300 first build
V15-000352-0705
-300 first build
V18-000013-0705
-35040 sheet metal kit
V22-000041-0705
-35040 sheet metal kit