background image


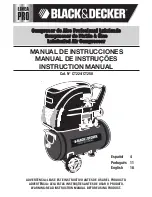
8-gallon Air Compressor 


58-7914-8 

Owner’s Manual 


If any parts are missing or damaged, or if you have any questions concerning 

this product, please contact the toll-free helpline, at 1-800-689-9928 


6106-0170-03 


Summary of Contents for 58-7914-8

Page 1: ...gallon Air Compressor 58 7914 8 Owner s Manual If any parts are missing or damaged or if you have any questions concerning this product please contact the toll free helpline at 1 800 689 9928 6106 0170 03 ...

Page 2: ...el 58 7914 8 Peak horsepower 2 Tank size 8 US gal 30 3litres Air delivery SCFM 40 PSI 4 3 Air delivery SCFM 90 PSI 3 5 Cut in pressure PSI 95 Maximum pressure PSI 125 Pump design Cast iron cylinder oil lubricated direct drive single phase Motor 3 400 RPM Power 120 V 60 Hz 12 A Weight 60 lb 10 oz 27 5 kg Power cord STW 14 AWG 96 2 4 m Extension cord SJT 14 AWG Maximum 50 15 m NOTE Avoid the use of ...

Page 3: ...et pressure must be regulated so that it does not exceed the maximum pressure rating Relieve all pressure in the hose before removing or attaching accessories 5 RISK OF BURSTING Do not adjust the pressure switch or relief valve for any reason They have been preset at the factory for this compressor s maximum pressure Tampering with the pressure switch or the relief valve may cause personal injury ...

Page 4: ...TRIC MOTOR B AIR COMPRESSOR PUMP C PRESSURE SWITCH D PRESSURE RELIEF VALVE E AIR PRESSURE REGULATOR F TANK PRESSURE GAUGE G REGULATED PRESSURE GAUGE H AIR LINE OUTLET I AIR TANK DRAIN VALVE J AIR TANK K POWER CORD B A C D E F G H I J K ...

Page 5: ... to decrease the pressure WARNING Do not exceed the tool s maximum working pressure F TANK PRESSURE GAUGE The gauge measures the pressure level of the air that is stored in the tank It cannot be adjusted by the operator and it does not indicate the pressure inside the line G REGULATED PRESSURE GAUGE The gauge measures the regulated outlet pressure H AIR LINE OUTLET The outlet is connected to the 1...

Page 6: ...n the handle align with the holes on the steel sleeves Using the four thumbscrews G securely fasten the handle to the sleeves see Figure 3 6 Determine the location of the compressor according to the following guidelines a Place the compressor near a grounded electrical outlet b The compressor must be at least 12 30 cm away from any wall or obstruction and must be installed in a clean well ventilat...

Page 7: ...28 6 After the compressor has been running for 30 minutes turn the pressure switch to the OFF position 7 Close the tank drain valve by turning it clockwise 8 Turn the pressure switch to the ON position The compressor will start fill the tank to the cut out pressure and then stop NOTE Leaving the pressure switch in the ON position will allow the motor to restart automatically as the compressed air ...

Page 8: ...roperly and in order to clear the valve of any possible obstructions Daily Clean the air filter A dirty filter will reduce the performance and the life of the compressor In order to avoid any contamination of the inside pump the filter should be cleaned frequently and replaced on a regular basis The foam filter should be cleaned using warm and soapy water Weekly Test for leakage Check all connecti...

Page 9: ...e switch to the OFF position If the motor does not shut off unplug the air compressor If the electrical contacts are welded together replace the pressure switch The compressor is not large enough Check the air requirement of the accessory that is being used If it is higher than the CFM and the pressure supplied by compressor a larger compressor is needed Most accessories are rated at 25 of actual ...

Page 10: ...HER 2 20 ADAPT FITTING 1 5 NUT 4 21 REGULATOR 1 6 TANK 1 22 QUICK CONNECTOR 1 7 TRANSFER TUBE 1 23 PLASTIC ANCHOR NUT 2 8 RIGHT ELBOW 1 24 POWER CORD 1 9 INTAKE FILTER 1 25 BOLT 2 10 PUMP ASSEMBLY 1 26 RUBBER FOOT 2 11 MOTOR ASSEMBLY 1 27 CHECK VALVE 1 12 SHROUD 1 28 DRAIN VALVE 1 13 HANDLE 1 29 BOLT 4 14 HANDLE SLEEVE 1 30 WASHER 6 15 THUMBSCREW 4 31 BOLT 2 16 RELIEF VALVE 1 32 PRESSURE GAUGE 1 ...

Page 11: ... sandpaper bits fluids tune ups or adjustments e this warranty will not apply where damage is caused by repairs made or attempted by others i e persons not authorized by the manufacturer f this warranty will not apply to any product that was sold to the original purchaser as a reconditioned or refurbished product unless otherwise specified in writing g this warranty will not apply to any product o...

Reviews: