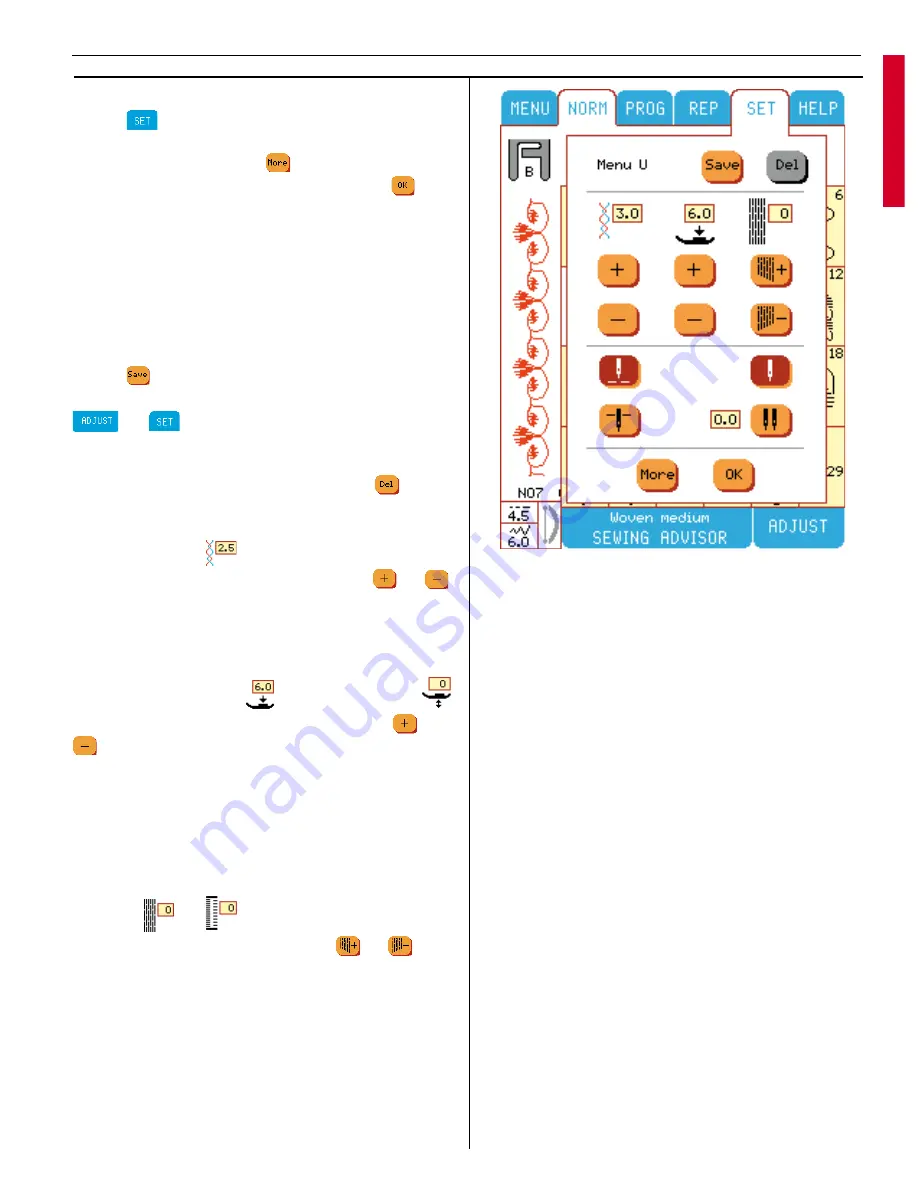
Set Menu
Touch
to override automatic setting and
make manual adjustments. There are four dif-
fe rent set menus. Touch
if you want to jump
between them. To close Set menu touch
When you have made changes in standard set-
tings for thread tension, presser foot pressure,
and balance, the frame around the setting will be
highlighted in red. The changed settings will af-
fect all stitches and the settings remains until the
Designer I
USB
is turned off.
Menu U
Touch
to save a favorite stitch on the ”My
Stitches” menu. Any personal settings from
or (including tension, presser foot
pressure, balance) will be saved together with
the stitch.
To delete a stitch from Menu U, touch
. (For
more information see page 26).
Thread tension
Adjust top thread tension by touching
or
.
The numbers in the window above indicates the
tension setting. The higher the number the more
tension on the thread.
Presser foot pressure
or Pivot position
Adjust presser foot pressure by touching
or
. The number in the window above indicates
the pressure setting. The higher the number the
more pressure the foot puts on the fabric.
When settings changed on stitches in the V Menu
or when embroidering, the height of the pivot
po si tion is set instead of the presser foot pres-
sure.
Balance
or
Adjust stitch balance by touching
or
. The
number in the window above indicates the ba-
lance setting.
When a buttonhole is selected, the balance but-
tons will adjust the density of the right column of
the buttonhole. See page 52, Buttonhole Balance.
29
Learn your Designer I
USB
Summary of Contents for Designer I
Page 1: ...User s Guide KEEPING THE WORLD SEWING ...
Page 39: ...39 Utility Garment Sewing ...
Page 63: ...63 Embroidery ...
Page 68: ...68 Embroidery ...
Page 83: ...83 Decorative Crafting ...
Page 95: ...95 Quilting ...
Page 100: ...100 Quilting ...
Page 101: ...101 Heirloom ...
Page 108: ...108 Heirloom Sewing ...
Page 109: ...109 Care of your Designer I USB ...


