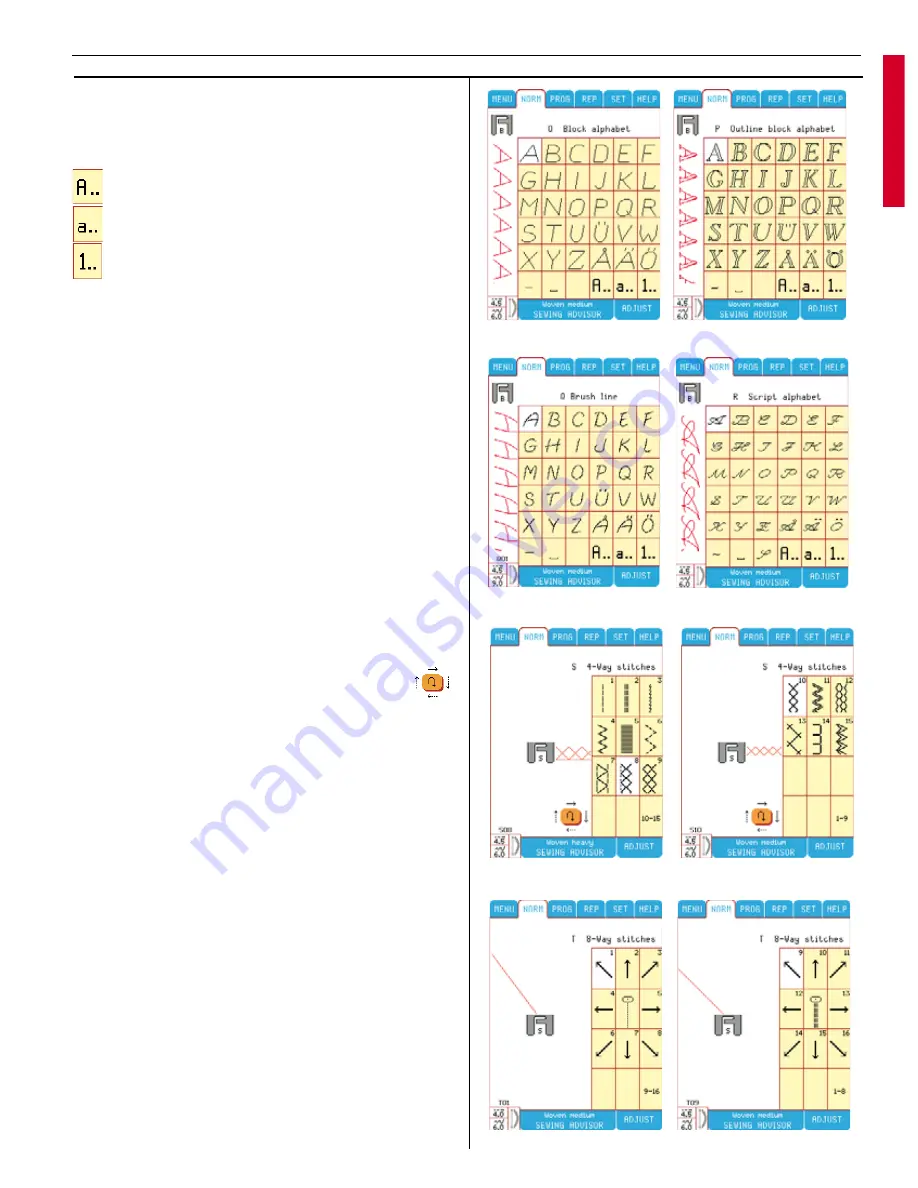
4-Way stitches
Find 4-Way stitches in Menu S in the Main Menu.
4-Way stitches is mainly used to sew one fabric
to another using the free arm. The stitches are
pro gram med at a fi xed width and length.
The selected stitch direction is visible in the
screen beside the presser foot.
If you look at the 4-Way stitch direction icon,
you see 4 different arrows. Each time you touch
the button, the sewing direction changes. You
can also use the reverse button to change se-
wing direction. Your
Designer I
USB
always starts
sewing in direction from left to right.
8-Way stitches
Find 8-Way stitches in Menu T in the Main
Menu. There are 2 different stitches, straight and
re-inforced straight stitch.
The 8-Way stitch touch buttons display 8 dif-
fe rent directional arrows. The selected sewing
direction arrow is highlighted in white. Touch
another direction arrow button to change the
sewing direction.
Note:
By changing the stitch length, and/or stitch
width for a selected stitch, you also chan ges the
sewing angle. Thereby you have the possibility to
sew in whatever direction you want.
Block, Outline block, Brush line and Script
alphabet
Touch Menu O, P, Q or R for letters and num-
bers. There are 3 different menus. Touch
for upper case.
for lower case.
for numbers and special letters.
To change the style menu, simply touch the
desired style button above.
25
Learn your Designer I
USB
Summary of Contents for Designer I
Page 1: ...User s Guide KEEPING THE WORLD SEWING ...
Page 39: ...39 Utility Garment Sewing ...
Page 63: ...63 Embroidery ...
Page 68: ...68 Embroidery ...
Page 83: ...83 Decorative Crafting ...
Page 95: ...95 Quilting ...
Page 100: ...100 Quilting ...
Page 101: ...101 Heirloom ...
Page 108: ...108 Heirloom Sewing ...
Page 109: ...109 Care of your Designer I USB ...


