Removal and replacement procedures 37
6.
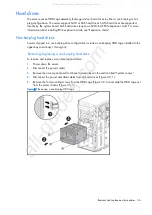
To remove a hard drive from the HDD cage:
a.
Remove the four retaining screws (two on the top, two on the bottom) holding the drive in
place (Figure 3-10, 1).
b.
Slide the drive out from the HDD cage (Figure 3-10, 2).
Figure 3-10
Removing a non-hot-plug hard drive
7.
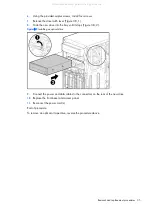
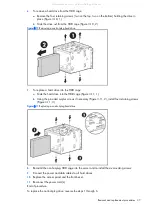
To replace a hard drive into the HDD cage:
a.
Slide the hard drive into the HDD cage (Figure 3-11, 1).
b.
Using the provided surplus screws if necessary (Figure 3-11, 2), install four retaining screws
(Figure 3-11, 3).
Figure 3-11
Replacing a non-hot-plug hard drive
8.
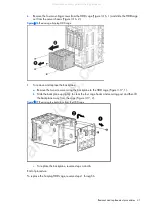
Re-install the non-hot-plug HDD cage into the server and re-install the six mounting screws.
9.
Connect the power and data cables to all hard drives.
10.
Replace the access panel and the front bezel.
11.
Reconnect the power cord(s).
End of procedure.
To replace the non-hot-plug drive, reverse the steps 1 through 6.
All manuals and user guides at all-guides.com
Summary of Contents for ProLiant ML150 G6
Page 12: ...Customer self repair 12 All manuals and user guides at all guides com ...
Page 13: ...Customer self repair 13 All manuals and user guides at all guides com ...
Page 14: ...Customer self repair 14 All manuals and user guides at all guides com ...
Page 15: ...Customer self repair 15 All manuals and user guides at all guides com ...

