Setup 37
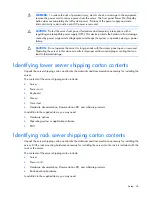
WARNING:
This server is very heavy. To reduce the risk of personal injury or damage to the
equipment:
•
Observe local occupational health and safety requirements and guidelines for manual
material handling.
•
Get help to lift and stabilize the product during installation or removal, especially when the
product is not fastened to the rails. When the server weighs more than 22.5 kg (50 lb), at
least two people must lift the server into the rack together. A third person may be required
to help align the server if the server is installed higher than chest level.
•
Use caution when installing the server in or removing the server from the rack; it is unstable
when not fastened to the rails.
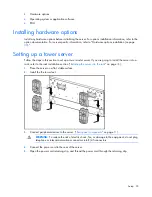
1.
Install the server and cable management arm into the rack. For more information, refer to the
installation instructions that ship with the 3-7U Quick Deploy Rail System (rack installation only).
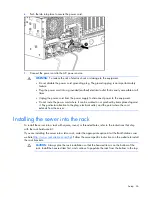
2.
Connect peripheral devices to the server ("
Rear panel components
" on page
11
).
Powering up and configuring the server
To power up the server, press the Power On/Standby button.
While the server boots, RBSU and the ORCA utility are automatically configured to prepare the server for
operating system installation.
To configure these utilities manually:
•
Press the
F8
key when prompted during the array controller initialization to configure the array
controller using ORCA.
•
Press the
F9
key when prompted during the boot process to change the server settings using RBSU.
The system is set up by default for the English language.
For more information on the automatic configuration, refer to the
HP
ROM-Based Setup Utility User Guide
located on the Documentation CD.
Installing the operating system
To operate properly, the server must have a supported operating system. For the latest information on
supported operating systems, refer to the HP website (
http://www.hp.com/go/supportos
).
Two methods are available to install an operating system on the server:
•
SmartStart assisted installation—Insert the SmartStart CD into the CD-ROM drive and reboot the
server.
•
Manual installation—Insert the operating system CD into the CD-ROM drive and reboot the server.
This process may require you to obtain additional drivers from the HP website
(
http://www.hp.com/support
).
Follow the on-screen instructions to begin the installation process.
For information on using these installation paths, refer to the SmartStart installation poster in the HP
ProLiant Essentials Foundation Pack, included with the server.
Summary of Contents for ProLiant DL370
Page 1: ...HP ProLiant DL ML370 G6 Server User Guide Part Number 513482 001 March 2009 First Edition ...
Page 16: ...Component identification 16 SFF hard drives LFF hard drives ...
Page 29: ...Operations 29 6 Remove the hard drive cage blank ...
Page 94: ...Cabling 94 Drive cage bay 2 Drive cage bay 3 ...
Page 95: ...Cabling 95 Six bay LFF backplane cabling Drive cage bay 1 Drive cage bay 2 ...
Page 97: ...Cabling 97 Battery cabling for BBWC DVD ROM drive cabling ...
Page 98: ...Cabling 98 Slimline optical drive cabling ...
Page 123: ...Troubleshooting 123 ...
Page 146: ...Technical support 146 ...
Page 147: ...Technical support 147 ...

