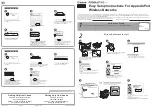
MSM410
Installation
2-8
1.
Disconnect power and take any other needed security
precautions.
2.
Remove the electrical box cover and any contents.
3.
Pull the Ethernet cable down into the box and then
through the hole in the bracket.
4.
Hold the bracket against the box respecting the
UP
indicator, and attach the bracket to the box using
appropriate countersunk screws.
Mounting on a suspended ceiling
The MSM410 can be mounted on a suspended ceiling using the mounting bracket (supplied)
and T-bar clips (supplied only with rev B US J9426B and WW J9427B).
1.
For ease of assembly, pre-position the two T-bar clips on
the bracket as illustrated. Work the clip posts in the
holes of the bracket until the posts can move freely.
Remove the clips from the bracket.
2.
Install the clips on the suspended ceiling T-bar at the
desired mounting position, 7.9 cm (3 1/8 inches) apart on
center.
3.
Mount the bracket on the clips, and secure with a nut on
each clip. The smooth side of the bracket must be facing
the clips.
4.
Once the bracket is firmly attached to the T-bar, cut a
hole in the ceiling through the bracket opening for the
Ethernet cable.
5.
Run the Ethernet cable to the hole and then pull the cable through the hole in the bracket.
Attaching the MSM410 to the mounting bracket
1.
Connect the Ethernet cable to the MSM410 Ethernet port. Push excess cable back
through the hole.
2.
Position the MSM410 against the bracket so that the bracket tabs fit into the tab slots on
the back of the MSM410. Push the MSM410 against the bracket and then slide the
MSM410 firmly so that it snaps into position on the bracket.
1: Mounting holes for electrical box
2: Retention tabs
3: UP indicator
➂
➀
➀
➁
➁
➁
➁
1: T-bar clip
2: Smooth side of bracket
➀
➀
➁
Summary of Contents for msm3 series
Page 2: ......
Page 3: ...HP MSM3xx MSM4xx Access Points Installation and Getting Started Guide ...
Page 18: ...Introduction Online documentation 1 6 ...
Page 32: ...MSM410 Initial configuration autonomous mode 2 14 ...
Page 34: ...MSM422 3 2 Step 6 Test the wireless network 3 13 Step 7 Perform additional configuration 3 14 ...
Page 108: ...MSM335 Initial configuration autonomous mode 8 14 ...
Page 124: ...Regulatory information A 16 ...
Page 131: ......


