


7 - 12
If the total number of characters being stripped is greater than the number of characters in the bar code data, it
becomes a zero byte data string. If, in addition, Strip Code ID is enabled, and no prefix or suffix is configured, the pro-
cessing will return a zero-byte data packet, which will be rejected.
The operation of each type of stripping is defined below:
Leading
This strips the number of characters specified from the beginning of the bar code data (not including Code ID).
The data is stripped unconditionally. This action is disabled by default.
Trailing
This strips the number of characters specified from the end of the bar code data (not including Code ID). The data
is stripped unconditionally. This action is disabled by default.
Code ID
Strips the Code ID based on the type code id specified in the Enable Code ID field in the Barcode tab. By default,
Code ID stripping is enabled for all symbologies (meaning code IDs will be stripped, unless specifically configured
otherwise).
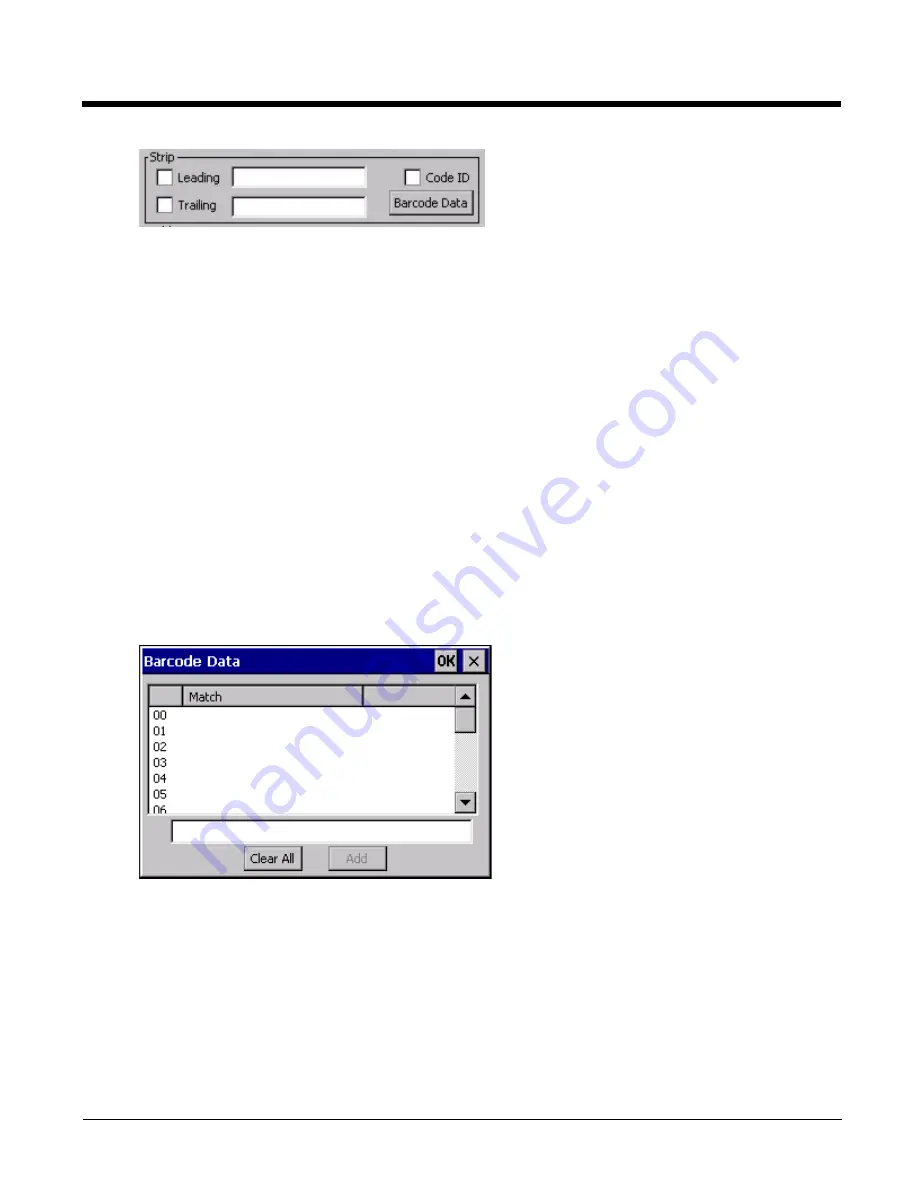
Bar Code Data Match List
The Barcode Data panel is used to strip data that matches the entry in the Match list from the bar code. Enter the data
to be stripped in the text box and tap the Insert or Add button. The entry is added to the Match list.
To remove an entry from the Match list, highlight the entry in the list and tap the Remove button.
Tap the OK button to store any additions, deletions or changes.
Barcode Data Match Edit Buttons
Add
Entering data into the text entry box enables the Add button. Tap the Add button and the data is added to the
next empty location in the Custom ID list.
Insert
Tap on an empty line in the Custom ID list. The Add button changes to Insert. Enter data into both the Name
and ID Code fields and tap the Insert button. The data is added to the selected line in the Custom IDs list.
Summary of Contents for HX3
Page 1: ...HX3 Wearable Computer User s Guide ...
Page 36: ...3 4 ...
Page 40: ...4 4 ...
Page 87: ...5 47 ...
Page 110: ...6 18 ...
Page 126: ...7 16 Hat Encoding ...
Page 127: ...7 17 ...
Page 128: ...7 18 ...
Page 189: ...9 37 9 Click the Request a certificate link 10 Click on the advanced certificate request link ...
Page 190: ...9 38 11 Click on the Create and submit a request to this CA link ...
Page 198: ...10 2 ...
Page 220: ...12 12 ...
Page 229: ......