


3 Servicing
Cycle components
SMGB0120 rev.0 - 11/2017
74
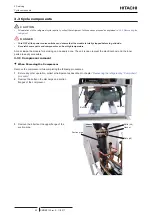
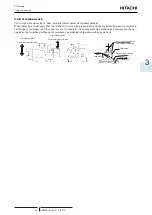
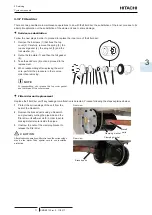
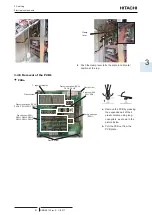
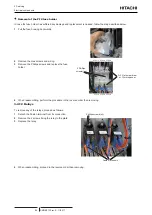
3.3.13
Replacement of the pressure sensor (PSW)
1
Disconnect the cables (7 and 8 of the pressure
sensor form the E-box of the compressor
terminal board).
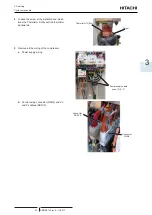
2
Unscrew the sensor and proceed to its
replacement
3
When reassembling proceed in reverse order
than removing.
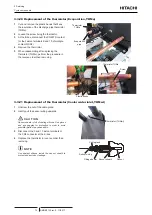
Pressure sensor
(PSW)
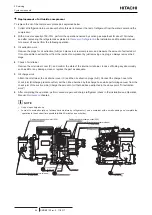
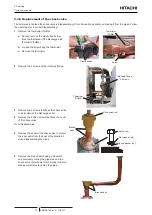
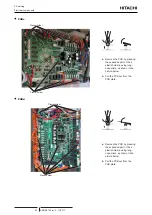
3.3.14
Replacement of the pressure relief valve
1
Remove the relief valve unscrewing the valve
with a spanner.
2
When reassembling after replacing the relief
valve, proceed in the reverse order than
removing. Use Teflon tape on the thread to
avoid any leakage.
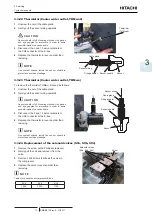
Relief valve
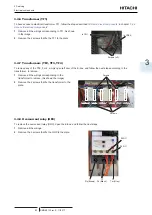
3.3.15
Replacement of the sight glass
To remove the sight glass proceed as follows:
1
Remove the brazed parts using a blowtorch
and previously cooling the pipe side and the
sight glass with wet cloth in order to avoid
brazing material enter inside the pipes.
2
When reassembling after replacing the sight
glass, perform the procedure in the reverse
order than removing.
Sight glass
Brazed parts
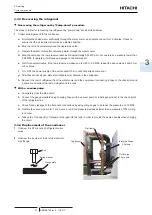
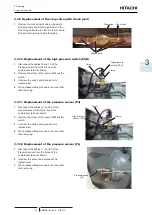
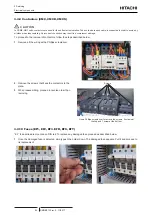
3.3.16
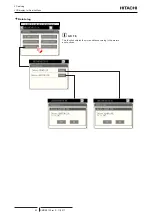
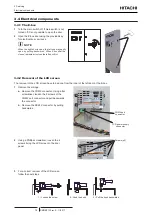
Replacement of the stop valve (x3)
There are 3 stop valves located along the refrigerant cycle: 2 are located close the expansion valves and 1 is located at
the filter drier, as shown in the pictures below.
Stop valve (x3)
At filter drier
At expansion valves
To replace the stop valves, unscrew the stop valve with a spanner. Remove and replace the stop valve. Use Teflon tape
to seal the thread and avoid any leakage.