3 Servicing
Cycle components
SMGB0120 rev.0 - 11/2017
71
3
3.3.7 Filter drier
There are two possible main maintenance operations to do with the filter drier: the substitution of the inner core due to its
adsorption saturation or the substitution of the whole unit due to some damage.
Solid core substitution
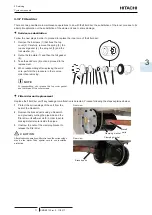
Follow the next steps in order to proceed to replace the inner core of the filter drier:
1
Remove the 8 screws (1) that fixes the top
cover (2). Carefully, remove the spring (3), the
top cover gasket (4), the wing nut (5) and the
lock washer (6).
2
Retire the top plate (7) and then the felt gasket
(8)
3
Take the solid core (9) out and proceed to the
replacement.
4
When reassembling after replacing the solid
core, perform the procedure in the reverse
order than removing.
?
N O T E
At reassembling, oil or grease the top cover gasket
and the thread of the cover screws.
1
2
3 4 5 6
7
8
9
Filter drier unit replacement
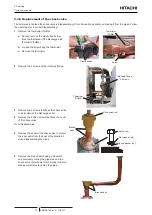
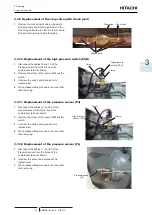
Replace the filter drier unit if any leakage or malfunction is detected. Proceed following the steps explained below:
1
Protect the surroundings of the unit from the
heat of the blowtorch.
2
Remove the brazed parts using a blowtorch
and previously cooling the pipe side and the
filter drier unit with wet cloth in order to avoid
brazing material enter inside the pipes.
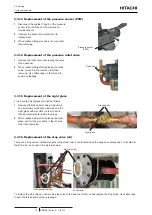
3
Unscrew the nuts of the clamping bracket to
release the filter drier.
!
C A U T I O N
After blowtorch operations, filter drier and the surroundings
may be too warm. Take special care to use insulation
protection.
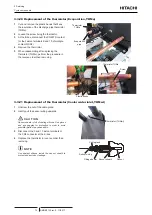
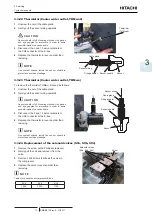
Brazed
parts
Clamping bracket
Front view
Brazed parts
Clamping bracket
Rear view

