


3 Servicing
Cycle components
SMGB0120 rev.0 - 11/2017
69
3
3.3.5
Replacement of the cooler
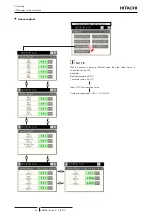
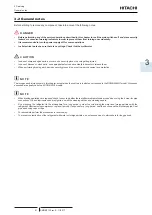
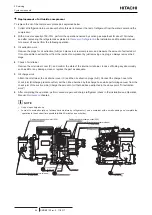
1
Unscrew the 4 screw of the refrigerant inlet
pipe flange and the 4 screws of the outlet
refrigerant pipe flange.
Bolt
Spring
washer
Flange
plate
Nut
Spring washer
Gasket
Flat washer
Cooler
Outlet pipe flange
4 Screws
Inlet pipe flange
4 Screws
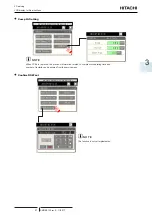
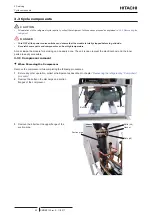
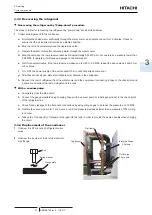
2
Remove the 2 Victaluic connections from the
water connections.
Victaulic
connections
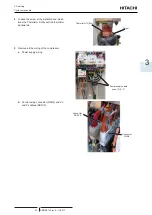
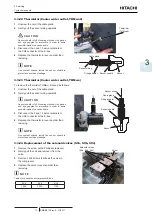
3
Screw eyebolts to both sides of the cooler to
the bolts for that purpose. Fasten a textile belt
to proceed to lift the cooler.
!
C A U T I O N
Do not never use chains or metallic ropes to lift the cooler
as they can damage the cooler.
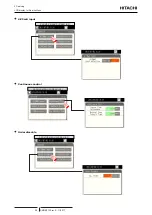
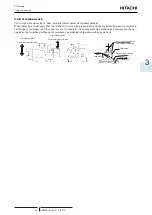
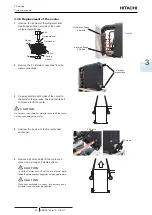
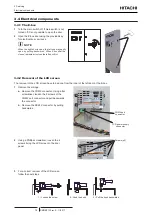
4
Unscrew the 4 screw of the foot plate heat
exchanger.
2 Screws
2 Screws
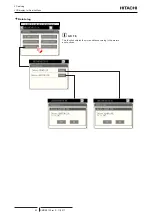
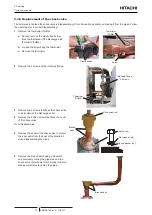
5
Remove de cooler. Softly lift the cooler and
place it on a strong and stable surface.
!
C A U T I O N
In spite of water shut-off valves are closed, water
inside the plate heat exchanger and water pipe remain.
!
C A U T I O N
Plate heat exchanger is heavy, two persons and a
portable crane or similar are required.