HAULOTTE GROUP
9 AXLE AND RELATED COMPONENTS
115
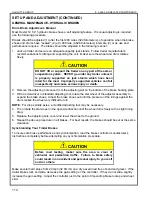
SET UP AND ADJUSTMENT (CONTINUED)
NOTE:
Not all trailer brakes are capable of wheel lockup. Loading conditions, brake type, wheel and
tire size can all affect whether a brake can lock. It is not generally considered desirable to lock up the
brakes and slide the tires. This can cause unwanted flat spotting of the tires and could also result in
a loss of control.
If the controller is applying the trailer brakes before the tow vehicle brakes, then the controller
adjustment should be made so the trailer brakes come on in synchronization with the tow vehicle
brakes. For proper braking performance, it is recommended that the controller be adjusted to allow
the trailer brakes to come on just slightly ahead of the tow vehicle brakes. When proper
synchronization is achieved there will be no sensation of the trailer “Jerking” or “Pushing” the tow
vehicle during braking.
Torque Requirements
In June of 2004, Dexter Axle ceased production of trailer wheels. If your vehicle is quipped with
Dexter steel wheels manufactured before that date, the following wheel torque information will be
applicable.
If your trailer is equipped with wheels produced by other manufacturers, you must consult with the
vehicle manufacturer to determine the appropriate torque lever for your wheels. However, you must
not exceed the limits of the wheel mounting studs on the axles.
It is extremely important to apply and maintain proper wheel mounting torque on your trailer axle.
Torque is a measure of the amount of tightening applied to a fastener (nut or bolt) and is expressed
as length force. For example, a force of 90 pounds (40 kilograms) applied at the end of a wrench one
(1) foot (.304 meter) long will yield 90 ft.-lbs (122N-m) of torque. Torque wrenches are the best
method to assure the proper amount of torque is being applied to a fastener.
Be sure to use only the fasteners matched to the cone angle of your wheel (usually 60° or 90°). The
proper procedure for attaching your wheels is as follows:
1. Start all bolts or nuts by hand to prevent cross threading.
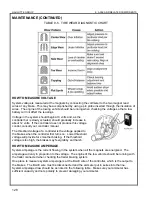
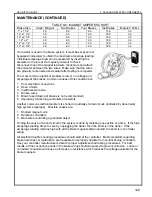
2. Tighten bolts or nuts in the sequence shown for Wheel Torque Requirements.
3. The tightening of the fasteners should be done in stages. Following the recommended sequence,
tighten fasteners per wheel torque requirements diagram.
CAUTION
DO NOT attempt to repair or modify a damaged wheel.
Even minor modifications can cause a dangerous failure of
the wheel and result in personal injury or death.
CAUTION
Wheel nuts or bolts must be tightened and maintained at
the proper torque levels to prevent loose wheels, broken
studs, and possible dangerous separation of wheels from
your axle, which can lead to an accident, personal injury or
death.
Summary of Contents for 3522A
Page 1: ...OPERATOR S MAINTENANCE MANUAL B33 01 0093 Rev 4 May 2013...
Page 76: ...HAULOTTE GROUP 6 DECAL REPLACEMENT 76 DECAL KIT ANSI...
Page 78: ...HAULOTTE GROUP 6 DECAL REPLACEMENT 78 IDENTIFICATION PLATES OPTIONAL EQUIPMENT ANSI...
Page 84: ...HAULOTTE GROUP 6 DECAL REPLACEMENT 84 DECAL KIT CE...
Page 86: ...HAULOTTE GROUP 6 DECAL REPLACEMENT 86 IDENTIFICATION PLATES OPTIONAL EQUIPMENT CE...
Page 88: ...HAULOTTE GROUP 6 DECAL REPLACEMENT 88 DECAL KIT AU...
Page 90: ...HAULOTTE GROUP 6 DECAL REPLACEMENT 90 IDENTIFICATION PLATES OPTIONAL EQUIPMENT AU...
Page 92: ...HAULOTTE GROUP 6 DECAL REPLACEMENT 92...
Page 106: ...HAULOTTE GROUP 8 MATERIAL SAFETY 106 MATERIAL SAFETY DATA SHEET POWERFLOW AW HVI HYDRAULIC OIL...

