background image


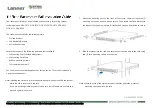
Figure 4 Removing a power supply with a latch (AC) 


Replacing a card 


CAUTION: 

  The cards on the routers are hot swappable. However, to remove the only MPU on the router, you 

must first power off the router. 

  To replace an MPU or service module, first remove all its cables. 

  Replace all Type-A switching fab

r

ic modules if one of them needs to be replaced. For more 

information, see 

H3C CR16000-F Router Series Hardware Information and Specifications


The  replacement procedure is the same for the  cards installed in horizontal or vertical slots. The 
following procedure replaces a card in a horizontal slot. 

To replace a card: 

1. 

Prepare an antistatic mat to place the removed card. 

2. 

Wear an ESD wrist strap and make sure it makes good skin contact and is correctly grounded. 
For more information, see "Attaching an ESD wrist strap." 

3. 

Use a Phillips screwdriver to loosen the captive screws on the card. 

4. 

Press the ejector buttons on the ejector levers to release the ejector levers. (This step is 
applicable only to a switching fabric module with ejector buttons on the ejector levers.) 

5. 

Press the ejector levers down so that they are vertical to the front panel. (This step applies only 
to ejector levers similar to those on a CSPEX-1504X card.) 

6. 

Open the locking clip or micro switch, if any, on the module. 

7. 

Move the ejector levers outwards to separate the card from the backplane. 

8. 

Use one hand to slowly move the card outwards. Supporting the bottom of the card with the 
other hand, pull the card out of the slot along slide rails. 

9. 

Put the removed card on the antistatic mat. 

Summary of Contents for CR16000-F

Page 1: ...H3C CR16000 F Routers Installation Guide New H3C Technologies Co Ltd http www h3c com Document version 5W107 20231023...

Page 2: ...respective owners Notice The information in this document is subject to change without notice All contents in this document including statements information and recommendations are believed to be acc...

Page 3: ...rguments that are optional x y Braces enclose a set of required syntax choices separated by vertical bars from which you select one x y Square brackets enclose a set of optional syntax choices separat...

Page 4: ...s a Layer 2 or Layer 3 switch or a router that supports Layer 2 forwarding and other Layer 2 features Represents an access controller a unified wired WLAN module or the access controller engine on a u...

Page 5: ...Documentation feedback You can e mail your comments about product documentation to info h3c com We appreciate your comments...

Page 6: ...1 General safety recommendations 1 Electricity safety 1 Moving safety 1 ESD prevention 1 Laser safety 2 Examining the installation site 2 Weight support 2 Temperature 2 Humidity 2 Cleanliness 3 EMI 3...

Page 7: ...fety grounds and wet floors Locate the emergency power off switch in the room before installation so you can quickly shut power off when an electrical accident occurs Remove all external cables includ...

Page 8: ...ck chassis cards power supplies and all other components Additionally the floor loading plan must also consider system expansion such as adding more cards For more information see H3C CR16000 F Router...

Page 9: ...4 Corrosive gas concentration limits in the equipment room Gas Average concentration mg m 3 Maximum concentration mg m 3 SO2 0 3 1 0 H2S 0 1 0 5 Cl2 0 1 0 3 HCI 0 1 0 5 HF 0 01 0 03 NH3 1 0 3 0 O3 0 0...

Page 10: ...maximum output power of all power supplies must be higher than the system power consumption For more information about available power supplies see H3C CR16000 F Router Series Hardware Information an...

Page 11: ...airflow into the power supplies 2 Direction of the airflow out of the power supplies 3 Direction of the airflow into the chassis 4 Direction of the airflow out of the chassis Figure 2 Airflow through...

Page 12: ...chassis 4 Direction of the airflow out of the chassis Figure 3 Airflow through the CR16018 F chassis and CR16018 FA chassis 1 Direction of the airflow into the power supplies 2 Direction of the airfl...

Page 13: ...7 Figure 4 Airflow through the CR16005E F chassis Figure 5 Airflow through the CR16010E F chassis...

Page 14: ...front end of the cable management brackets 681 mm 26 81 in from the mounting surface of the mounting brackets to the ejector levers of the switching fabric modules A minimum of 94 mm 3 70 in between...

Page 15: ...the interior side of the rear door including the door lock and handle If the rack meets these requirements and has a minimum depth of 0 8 m 2 62 ft you can mount the router in the rack As a best prac...

Page 16: ...ior side of the front door including the door lock and handle A minimum of 628 mm 24 72 in between the front rack posts and the interior side of the rear door including the door lock and handle Figure...

Page 17: ...11 Figure 8 CR16010H F chassis depth 1 Handle at the rear of the chassis 2 Cable management bracket 663 mm 26 10 in 114 mm 4 49 in 1 1 2...

Page 18: ...as a conductor cross section area of a minimum of 16 sq mm 0 02 sq in leave more space between the front rack posts and the front door as appropriate Tools and equipment No installation tools and equi...

Page 19: ...iagonal pliers Combination pliers Wire stripping pliers Crimping pliers RJ 45 crimping pliers File Handsaw Auxiliary tools ESD wrist strap Hair brush Paper knife Hand bellows Electric iron Solder wire...

Page 20: ...stalling mounting brackets 3 Optional Installing an air filter 4 Installing an air filter for a CR16010 F router 4 Installing an air filter for the CR16010H F CR16010H FA CR16018 F CR16018 FA CR16005E...

Page 21: ...ces to be installed is no higher than the available installation height of the rack and enough clearance is reserved for cable routing The router is ready for installation and has been carried to a pl...

Page 22: ...ets and mounting brackets for the CR16014 F router Before installing the CR16014 F router in the rack install the cable management brackets and mounting brackets shipped with the router The cable mana...

Page 23: ...acket with the installation holes in the chassis 3 Use screws to secure the power cord management bracket to the chassis Figure 2 Installing a power cord management bracket Installing mounting bracket...

Page 24: ...d over the air inlet vents at the bottom front of the chassis Before installing an air filter install the power cord management bracket for the chassis CR16010H F CR16010H FA CR16018 F CR16018 FA Use...

Page 25: ...on the cabinet For a cabinet with a double leaf door cut the air filter into two halves based on the door size and install the air filter on the two door leaves To install an air filter on a cabinet 1...

Page 26: ...single leaf door 2 Securing strip installation position on a double leaf door 2 Press the air filter onto the securing strips to cover the entire cabinet door Figure 6 Pasting the air filter onto the...

Page 27: ...securing strips tightly Installing an air filter for a CR16000 F router 1 Place the air filter over the inlet vents on the left panel of the chassis and then align the captive screws on the air filter...

Page 28: ...an the slide rails on the rack 3 Place the router on the slide rails and slide the router along the slide rails until the mounting brackets on the router touch the front rack posts 4 Attach the chassi...

Page 29: ...unding post of the grounding strip and fasten the grounding cable to the grounding strip with the hex nut Figure 10 Connecting the grounding cable to a grounding strip Grounding the router through the...

Page 30: ...nded from the DC egress of the DC power cabinet If the router is powered by a 48 V DC power supply and no grounding strip is available at the installation site you can ground the router through the re...

Page 31: ...stalling a power supply 6 Installing a power supply 7 Connecting an AC power cord 8 Connecting a DC power cord 10 Optional Installing transceiver modules 13 Installing an XFP QSFP QSFP28 SFP28 SFP SFP...

Page 32: ...rap and make sure it is reliably grounded when installing modules To use an ESD wrist strap 1 Make sure the router is reliably grounded For how to ground your router see Grounding the router 2 Put on...

Page 33: ...ss otherwise stated MPUs service modules and switching fabric modules are collectively referred to as cards in this document These cards are hot swappable The card slots on the router are either horiz...

Page 34: ...ane 10 Push the ejector levers up to its original position This step applies only to ejector levers similar to those on a CSPEX 1504X card 11 Close the locking clip or micro switch if any on the modul...

Page 35: ...a card with a locking clip Figure 5 Install a card with a micro swtich Installing a subcard CAUTION To ensure good ventilation install filler panels in unused slots All subcards except for the MIC SM...

Page 36: ...Unpack the subcard 4 Remove the filler panel if any from the target slot on the base card Keep the removed filler panel secure for future use 5 Open the ejector levers of the subcard and gently push t...

Page 37: ...for each power supply and make sure the circuit breaker is off before installation Do not install power supplies of different models on the same router When moving the power supply support the bottom...

Page 38: ...SD wrist strap 2 Remove the filler panel if any from the power supply slot If the filler panel has captive screws use a Phillips screwdriver to loosen the captive screws on the filler panel first and...

Page 39: ...le on the power supply 2 Use a releasable cable tie to secure the power cord to the cable management bracket For the CR16010 F CR16014 F CR16010H F CR16010H FA CR16018 F CR16018 FA that provides verti...

Page 40: ...9 Figure 11 Securing the power cord method one Figure 12 Securing the power cord method two...

Page 41: ...an LSUM1DC2400 or PSR2400 12D power supply 1 Connect the power cord to the power receptacle of the power supply 2 Fasten the screw to secure the power cord Figure 14 Connecting a power cord to an LSUM...

Page 42: ...requirements and match the terminals on the PSR2400 D power supplies use the power cords or power cord lugs provided by H3C To connect a DC power cord to a PSR2400 D power supply 1 Use a Phillips scre...

Page 43: ...supply 1 Remove the protection cover from the power supply 2 Use a Phillips screwdriver to loosen the screws on the wiring terminals 3 Connect the DC power cord to the power supply a Connect the wire...

Page 44: ...ation procedure is similar for XFP QSFP QSFP28 SFP28 SFP and SFP transceiver modules The following uses an SFP transceiver module for illustration To install an SFP transceiver module 1 Wear an ESD wr...

Page 45: ...e front face of the transceiver module instead of the two sides 5 Fasten the captive screws on the transceiver module to secure it in place If a screw cannot be fastened adjust the CFP transceiver mod...

Page 46: ...ten the screws on the connector 3 Connect the other end of the E1 cable to the peer device Figure 21 Installing an E1 cable Installing an SMB coaxial clock cable 1 Wear an ESD wrist strap and make sur...

Page 47: ...16 Figure 22 Installing an SMB coaxial clock cable...

Page 48: ...ation environment 1 Downloading a USB to serial driver 3 Setting terminal parameters 3 Powering on the router 4 Connecting the router to the network 5 Connecting your router to the network through twi...

Page 49: ...ing the router for the first time The first time you access the router you must use a console cable to connect the console port or USB console port on the router to a configuration terminal a PC for e...

Page 50: ...onnecting the console port to the terminal IMPORTANT Identify the marks on the console port and USB console port and make sure you are connecting to the correct port The serial ports on PCs do not sup...

Page 51: ...nage 2 On the Computer Management page select Device Manager 3 Expand Ports COM LPT If XR21V1410 USB UART COM5 is displayed the USB to serial driver has been installed successfully Setting terminal pa...

Page 52: ...er The console cable is correctly connected The terminal or PC used for configuration has started and the configuration parameters have been set To power on the router 1 Turn on the power source of th...

Page 53: ...n and Specifications To connect a 10 100BASE TX or 1000BASE T port to a peer device 1 Connect one end of a twisted pair cable to the port 2 Connect the other end of the twisted pair cable to the RJ 45...

Page 54: ...t on one end must connect to the receiver RX port on the other end Figure 4 Using an LC optical fiber connector to connect an SFP module Testing the network connectivity After you connect the router t...

Page 55: ...terminal problems 1 No terminal display 1 Garbled terminal display 1 Troubleshooting the router during the operation 2 Power supply system failure 2 Fan failure 2 MPU failure 3 Service module and swit...

Page 56: ...es Hardware Information and Specifications If you cannot locate failures by following the guidelines in this chapter contact the local agents or technical support engineers For more information see Te...

Page 57: ...utput short circuit output over current output over voltage input under voltage or remote disconnection The DC LED also turns red if the input of the power supply is disconnected while the other power...

Page 58: ...e sure the MPU is fully seated 3 Press the RESET button of the MPU to reset the MPU After the MPU is reset verify whether the corresponding RUN LED is on 4 If the router has empty MPU slots install th...

Page 59: ...interface uses a transceiver make sure the current transceiver operates correctly by replacing a normal transceiver 5 If the interface is a combo interface which contains a fiber and a copper port mak...

Page 60: ...rranty card Brief problem description Brief explanation of the troubleshooting measures that have been taken You can contact the customer service through the H3C website or email Website http www h3c...

Page 61: ...ubcard 6 Replacing a hard disk 7 Replacing a fan tray 8 Replacing an air filter 9 Replacing a CF card 10 Replacing a transceiver module 12 Replacing an XFP QSFP QSFP28 SFP28 SFP SFP transceiver module...

Page 62: ...ower supply Replacement precautions Before you replace a power supply read the following precautions carefully Strictly follow the procedures shown in Figure 1 and Figure 2 to replace a power supply t...

Page 63: ...power cord and remove the power cord plug from the power supply DC power cord from a PSR2400 D power supply Remove the cable tie from the power cord remove the protection cover over the wiring termin...

Page 64: ...r cord plug from the power supply DC power cord from a PSR2400 D power supply Remove the cable tie from the power cord remove the protection cover over the wiring terminals remove the screws on the wi...

Page 65: ...SD wrist strap and make sure it makes good skin contact and is correctly grounded For more information see Attaching an ESD wrist strap 3 Use a Phillips screwdriver to loosen the captive screws on the...

Page 66: ...5 Figure 5 Removing a common card Figure 6 Removing a card with a locking clip 1 3 2...

Page 67: ...pable This section describes the procedure for replacing a subcard on a base card To replace a subcard 1 Prepare an antistatic mat to place the removed subcard 2 Put on an ESD wrist strap and make sur...

Page 68: ...D wrist strap and make sure the wrist strap makes good skin contact and is reliably grounded For more information see Attaching an ESD wrist strap 3 Press the button on the hard disk panel The hard di...

Page 69: ...es To replace a fan tray on a CR16000 F router except CR16010E F 1 Prepare an antistatic mat to place the fan tray to be removed 2 Put on an ESD wrist strap and make sure the wrist strap makes good sk...

Page 70: ...ke out the fan tray from the chassis 5 Put the removed fan tray on the antistatic mat 6 Unpack the fan tray to be installed 7 Holding the handle of the fan tray with one hand and supporting bottom wit...

Page 71: ...uter For the installation procedures see Optional Installing an air filter on the chassis Replacing a CF card CAUTION To avoid hardware or file system damage do not remove a CF card when the router is...

Page 72: ...llips screwdriver to loosen the screw at the right side of the CF card protection cover and open the CF card protection cover Skip this step if the MPU does not have a CF card protection cover 3 Push...

Page 73: ...SD wrist strap and make sure it makes good skin contact and is correctly grounded For more information see Attaching an ESD wrist strap 2 Remove the optical fibers from the module There is a latching...

Page 74: ...nd the module or fiber port might be damaged 5 Insert the plugs into the removed module and put the module into its packaging bag 6 Install a new module For the installation procedure see Installing a...

Page 75: ...l a new E1 cable For the installation procedure see Connecting an E1 cable Replacing an SMB coaxial clock cable 1 Wear an ESD wrist strap and make sure it makes good skin contact and is reliably groun...

Page 76: ...15 Figure 19 Replacing an SMB coaxial clock cable...

Page 77: ...3 Affixing labels 3 Affixing a label to a signal cable 3 Affixing a label to a power cord 4 Affixing a generic label 5 Affixing a label to a device 6 Guidelines 6 Examples 6 Engineering labels for ne...

Page 78: ...is located at the lower right corner of the label to identify the peer end of the cable on which the label is affixed As shown in Figure 1 write a signal cable label as follows Write the position of...

Page 79: ...shaped with fixed dimensions It is applicable to both signal cables and power cords A mark TO is located at the upper left corner in the right area of the label to identify the peer end of the cable...

Page 80: ...n about using a label printer see the user guide of the printer To write labels use black markers A marker has two nibs Be sure to use the smaller nib to write labels Affixing labels After printing or...

Page 81: ...a on the identification plate You can stick the label to either side of the identification plate Be sure to affix the labels on the same side of the identification plates A cable tie is bundled 2 cm 0...

Page 82: ...t side of the cable in vertical cabling Make sure the label is facing out as shown in Figure 7 Figure 7 Affixed labels Affixing a generic label The requirements for affixing a generic label are the sa...

Page 83: ...ns of power cords with identification plates on the same side The positions of up down right or left are all based on the viewpoint of the engineering person who is working on the label Examples The l...

Page 84: ...ack number and chassis number or the specific location of the server if the server is laid separately On a label for the Ethernet cable that connects the router and a terminal For the router end Rack...

Page 85: ...f the equipment room B Chassis number C Slot number D Fiber port number R Optical receiving interface T Optical transmitting interface N A Labels for the fiber that connects the device and the ODF Tab...

Page 86: ...s connected to the optical receiving terminal on Row 01 Column 01 of the ODF in Row G Column 01 in the equipment room A01 01 05 05 R The peer end of the optical fiber is connected to Optical Receiving...

Page 87: ...pply which is from the loaded cabinet on Row B Column 03 in the equipment room In the power distribution box or the first power cabinet of a row in the transmission equipment room every terminal block...

Page 88: ...e local end is not necessary Make sure labels are affixed in the correct direction That is after the cable ties are bundled onto the cable the identification plates with the labels should face up and...

Page 89: ...12 Figure 14 Example of a device label...

Page 90: ...i Contents Appendix B Cable management 1 General cabling requirements 1 Cable management guidelines 1 Cable management 3...

Page 91: ...the cabling plate should be a minimum of 25 times of the fiber s diameter When the fiber is being moved the curvature radius of the fiber should be a minimum of 20 times of the fiber s diameter When...

Page 92: ...rs Figure 2 Binding the cables When you route cables through sharp sheet metal penetration points or along sharp edges of mechanical parts use bushings or take any other action to protect the cables f...

Page 93: ...ou connect a grounding cable to a rack door leave enough slack in cables and make sure they are not stressed from any movement of the part Cables must be protected at points where they might rub or co...

Page 94: ...tape use instructions Figure 5 Optical fiber management Power cord management Route the power cords according to the actual conditions in the equipment room such as the locations of power distribution...

Page 95: ...5 For future device maintenance avoid blocking the device modules such as fan trays when routing power cords Figure 6 Routing AC power cords...

Page 96: ...6 Figure 7 Routing DC power cords...

Page 97: ...ble 1 Removing the twisted pair and optical fiber 2 Repackaging the router accessories 2 Repackaging the power supply 2 Repackaging the card 3 Repackaging the router chassis 3 Removing the chassis fro...

Page 98: ...rist strap 3 Remove the power cord plug AC power cord Remove the cable tie that secures the power cord and then pull out the plug DC power cord Remove the cable tie that secures the power cord loosen...

Page 99: ...end of all power cords and remove all the power cords to avoid device damage and bodily injury To repackage a power supply 1 Prepare the packing bag and box of the power supply Make sure the bag is cl...

Page 100: ...the box with packing tape Place the card in a correct direction onto the foam cushion in the box otherwise the power supply cannot be completely seated into the foam cushion Repackaging the router ch...

Page 101: ...Removing the mounting brackets 1 Prepare the packing box of the mounting brackets Make sure the box is clean dry and not damaged 2 As shown in Figure 3 use a Phillips screwdriver to loosen the screws...

Page 102: ...r chassis Repackaging the router chassis only for the CR16014 F router 1 As shown in Figure 5 align the screw holes on the two sides of the chassis bottom to the L type brackets on the pallet base of...

Page 103: ...ning lines respectively on the wooden pallet base Figure 6 wooden pallet base 1 Rear positioning line 2 Left and right positioning lines 2 Use screws to attach L type brackets to the chassis 3 Align t...

Page 104: ...uter and CR16018 FA router attach the four wooden side panels of the wooden box to the pallet base For the CR16006 F CR16010 F CR16010H FA CR16010H F CR16005E F and CR16010E F routers erect one paper...

Page 105: ...8 Figure 8 Repackaging the chassis CR16006 F 1 Accessories box 2 Cardboard box 3 Foam cushion 4 Paper angle bead 2 3 4 1...

Reviews: