4.
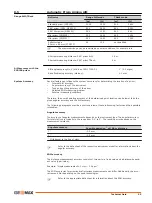
Check the position of the circular level on the instrument and tribrach:
a
)
If both circular levels are centred, no adjustments are necessary.
b
)
If one or both circular levels are not centred, adjust as follows:
•
Instrument: If it extends beyond the circle, use the supplied allen key to
centre it with the adjustment screws. Turn the instrument by 200 gon
(180°). Repeat the adjustment procedure if the circular level does not
stay centred.
•
Tribrach: If it extends beyond the circle, use the supplied allen key to
centre it with the adjustment screws.
☞
After the adjustments, all adjusting screws must have the same tightening tension
and no adjusting screw should be loose.
6.2.5
Adjusting the Circular Level of the Prism Pole
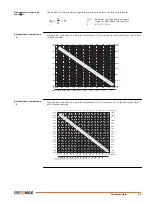
1.
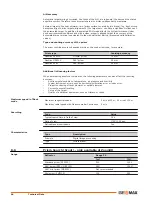
Suspend a plumb line.
1
2
4b
4a
TS_080
2.
Use a pole bipod, to align the prism pole
parallel to the plumb line.
3.
Check the position of the circular level
on the prism pole.
4.
a
If the circular level is centred, no
adjustment is necessary.
b
If the circular level is not cen-
tred, use an allen key to centre
it with the adjustment screws.
☞
After the adjustments, all adjusting screws must have the same tightening tension
and no adjusting screw should be loose.
6.2.6
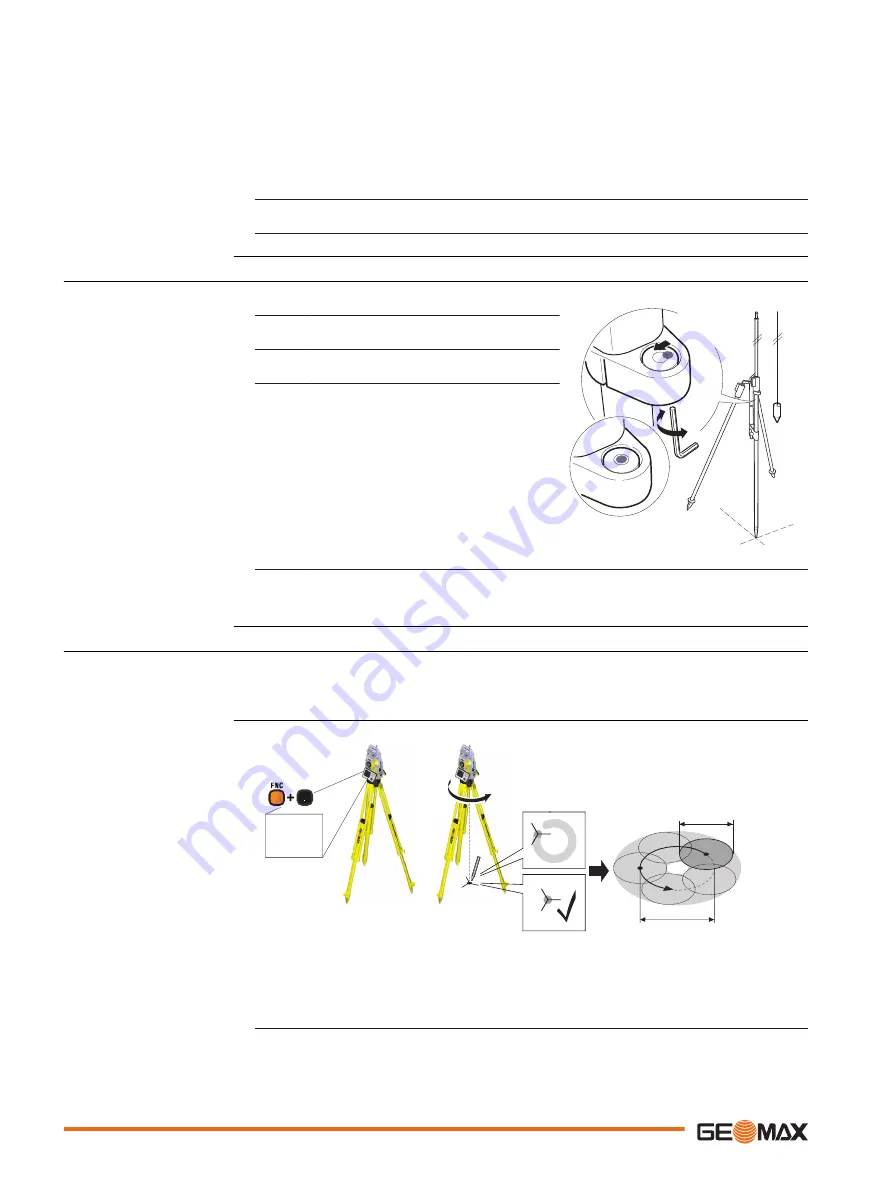
Inspecting the Laser Plummet of the Instrument
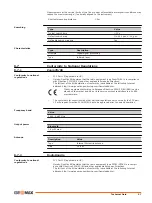
The laser plummet is located in the vertical axis of the instrument. Under normal conditions of
use, the laser plummet does not need adjusting. If an adjustment is necessary due to external
influences, return the instrument to any GeoMax authorised service workshop.
1
5
6
6
360°
≤
3 mm / 1.5 m
Ø 2.5 mm / 1.5 m
3
9865_002
The following table explains the most common settings.
1.
Place and secure the instrument into the tribrach and onto a tripod.
Adjusting the circular
level step-by-step
☞
Inspecting
the laser plummet
step-by-step
48
Apps


