


Moxi V
™
User Guide
Page 42
All saved tests can be deleted as a batch by selecting the
Delete All
button in the
Saved Data
area of the instrument or by checking tests in the
Saved Data
area and selecting the
Delete
Selected
button.
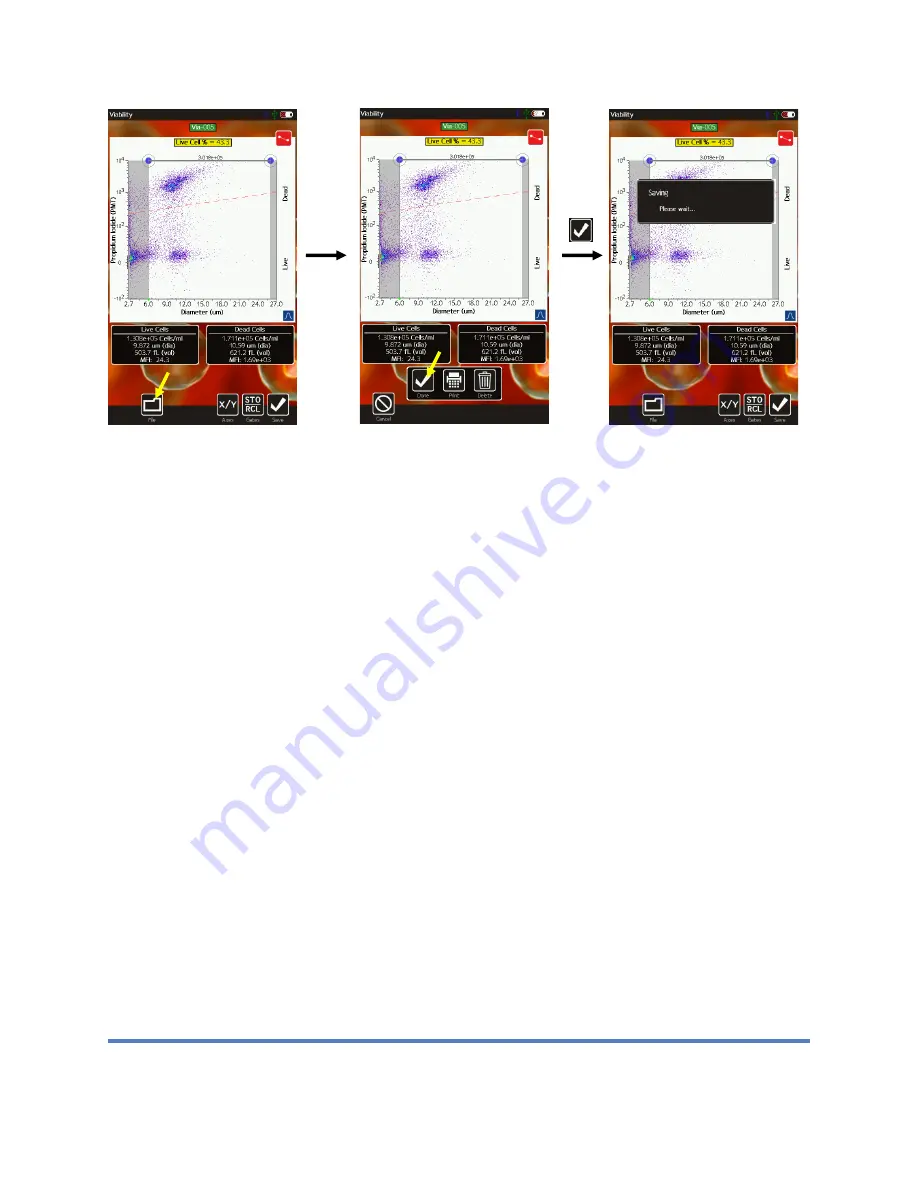
Exporting Data Screenshots
Exact data screenshots can be generated from the instrument by selecting
File
|
|
Export
Screenshot
(see image sequence below) from the test screen. Selecting this option will save a
bitmap file named after the test with a .bmp extension (in the example below, it will be saved as
Open-011.bmp).
Note: Subsequent screenshot exports for the same test will overwrite any
existing screenshot associated with that test. The exception to that is the Cell QC assay. When
saving the raw data, scatter plot view for those tests, a “_scatter.bmp” extension is used so that
it does not overwrite any screenshot of the simplified view.
The screenshot will be an exact
pixel-by-pixel representation of the current screen display without the buttons at the bottom of
the screen. These screenshots can then be copied to a computer following the instructions in
the “Exporting Data” section of this User Guide.
Editing Saved Tests
All saved tests can be accessed by touching the
Saved Tests
icon from the
Home
screen.
Doing so provides a list of all files stored on the Moxi V™. File types are color coded (image
below) as follows:
•
Test (FCS) files are displayed as green entries.
•
QC Batch Directories (and user created directories) are shown as orange entries
•
Exported screenshots are displayed as dark gray rows
•
Operating system files are displayed as black rows.
•
Special .csv “linkage” files (files that correlate two tests for quick reference/loading, e.g.
for Overlays) are shown in blue
•
Moxi V configuration files are displayed as light gray.


