3
Install Stand
4 (optional)
Place Protective Cover onto VESA 100 arm, based from Fig., place the monitor
into the Protective Cover, place the magnetic clip on top
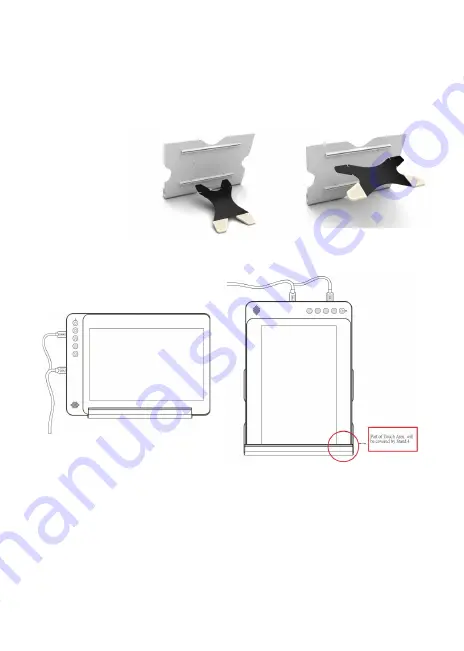
Step 1 Assemble Stand 4
Select the desired angle placement to assemble Stand 4. Before assembly,
check if X plate is properly inserted onto slot.
Step2: Place On-Lap monitor onto Stand 4
Place On-Lap monitor onto Stand 4. Stand 4 is positioned at the bottom cen-
ter of monitor.
(Remark: Place On-Lap 1002 vertically onto Stand 4. Touch screen will be
covered by Stand 4, may affect some Windows 8 touch gestures. Stand 4 is
not recommended for Windows 8 user who needs to place the monitor verti-
cally.
Section 2 Connect the Video Cable and USB Touch Output and
Power Cable
Step1: Connect USB Touch Output and Power Cable
Connect USB Touch Output and Power Cable’s Micro USB (B type) con-
nector to On-Lap 1002’s Micro USB port. Connect the other end, USB con-
nector to USB port of laptop. With this connection, laptop will provide power
and touch signal to On-Lap 1002.
5
Fig : Install Stand 4
Fig : Place On-Lap 1002 onto Stand 4


