RX II Series User Manual
Installation
2-29
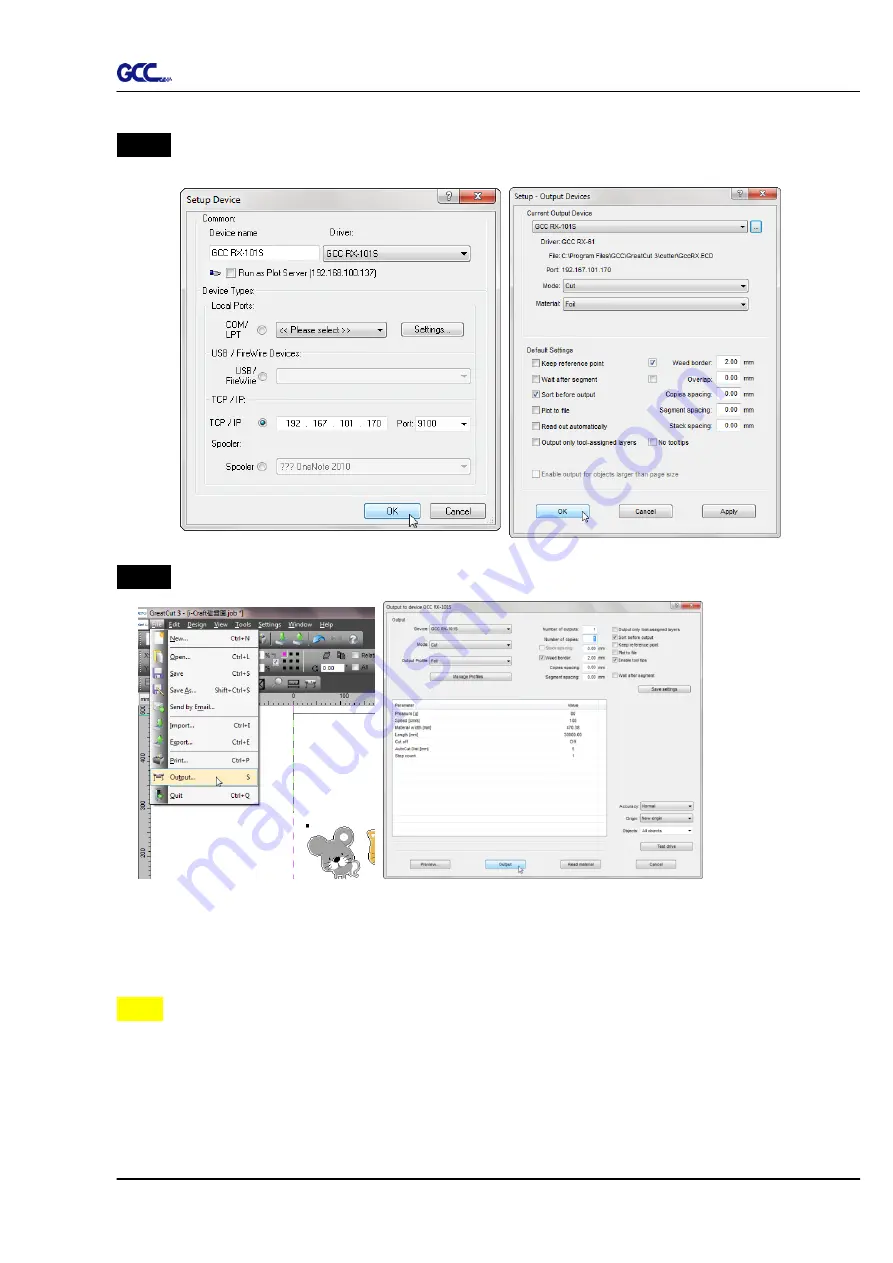
Step 4
Input the IP address you had acquired from the control panel to the TCP/IP. Click
OK to complete settings.
Step 5
Go to
Output
under File to check the settings.
Complete the driver installation process and your GCC Cutting Plotter is now allowed to
network.
Note:
If you want to add new local device, please go to
Output Devices
under Settings,
and press the button on the right of Current Output Device and select
Add local
device
(if the device has been installed but you wanted to output through another
device, please select
Change
to set the IP address of another device).
Summary of Contents for RX II Series
Page 1: ...V 24 2020 May RX II Series User Manual http www GCCworld com...
Page 174: ...RX II User Manual GreatCut Plug In A 6 Step 5 Press the button on the right of Jog marks...
Page 190: ...RX II User Manual GreatCut Plug In A 6 Step 11 Go to GreatCut window press Output button...
Page 191: ...RX II User Manual GreatCut Plug In A 6...
Page 205: ...RXII User Manual SignPal 12 Instruction A 6...


