JF-2418UV User Manual
138
observe that Cyan line and Black line are aligned at number “1” line. Keep a record on the
number where two lines are aligned.
Step 2. Use a magnify lens to observe that Magenta line and the Black line are aligned at number
“-3” line (as Example 2), please keep a record on the number where two lines are aligned.
Step 3. After record all the offsets for all the colors, go to the control interface of “Bidirection
Offset
「
K
、
C
、
M
、
Y
、
W
、
V
」
” for JF-2418UV VCLD software to conduct bidirectional
calibration.
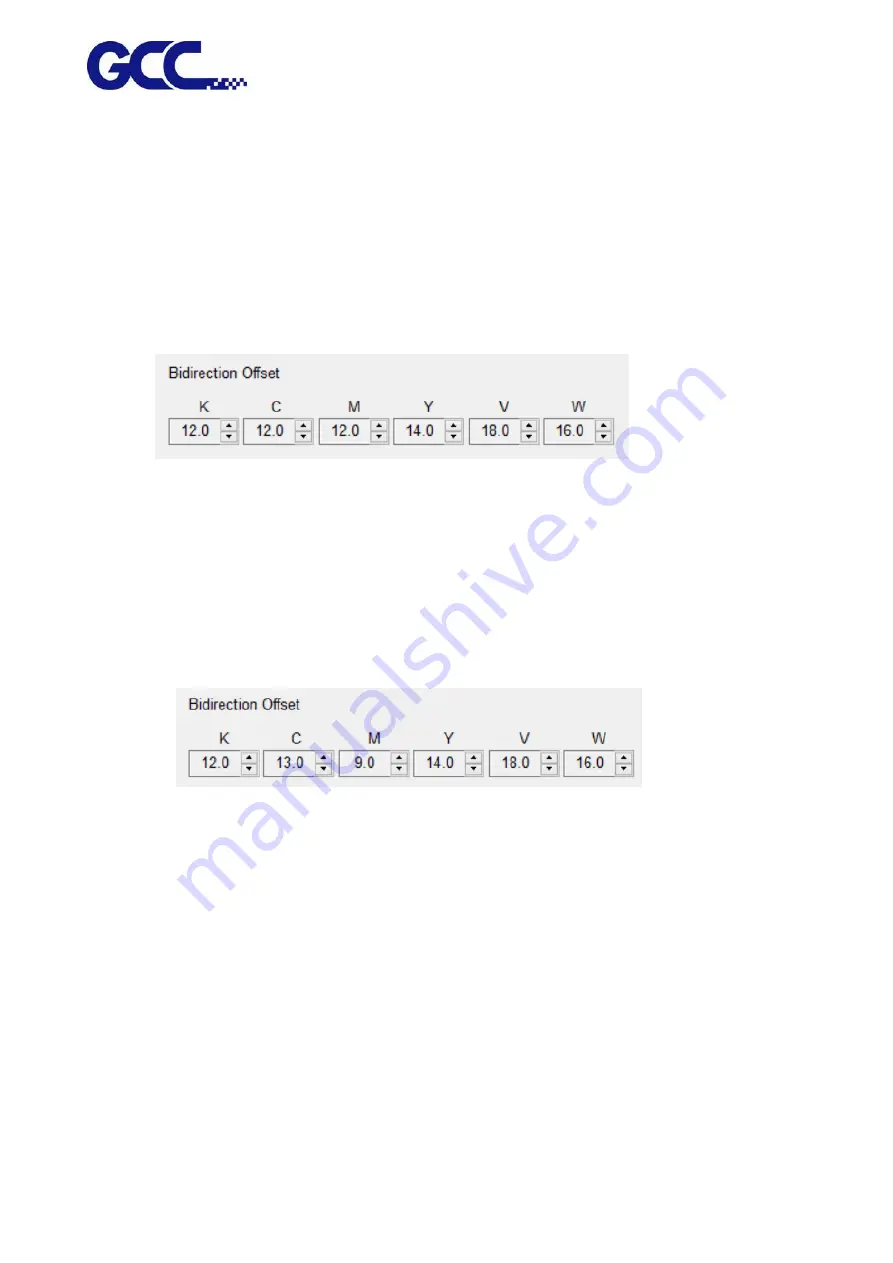
In the Example 1: Cyan line shift 1 line to the left indicates that the bidirectional offset for the color
Cyan need to be increased 1. In the Example 2 : Magenta line shift 3 line to the right stands for that
the horizontal offset for the color Magenta need to be decreased 3.
For example: M=12-3=9 (Enter 9 in JF-2418UV (VLCD)
C=12+1=13 (Enter 13 in JF-2418UV (VLCD)
Step 4. Use the same approach to calibrate other inkjet heads.
Step 5. Use this method to enter the offset values for all the inkjet heads, then press Save to
update the settings.
Summary of Contents for JF-2418UV
Page 1: ...JF 2418UV User Manual http www GCCworld com V 1 2022 Mar GCC GCC Club...
Page 3: ...JF 2418UV User Manual 2 Release Note Version Change V 1 2021 Nov Add JF 2418UV User Manual...
Page 24: ...JF 2418UV User Manual 23 Control panel flow...
Page 25: ...JF 2418UV User Manual 24 Operating work flow...
Page 27: ...JF 2418UV User Manual 26 Operating work flow...
Page 28: ...JF 2418UV User Manual 27 Control panel flow O N FRONT REAR O N O N OFF OFF...
Page 42: ...JF 2418UV User Manual 41 B Set the PH Gap Auto Adjustment to be OFF on the control panel...
Page 57: ...JF 2418UV User Manual 56 Step 4 The settings is completed and open FlexiPRINT GCC Edition...
Page 88: ...JF 2418UV User Manual 87 8 Select Advanced...
Page 169: ...JF 2418UV User Manual 168 Step 2 Enter the password caldera Step 3 Click Next...
Page 170: ...JF 2418UV User Manual 169...


