


134
Chapter 7: Upgrading Your Computer
www.gateway.com
5
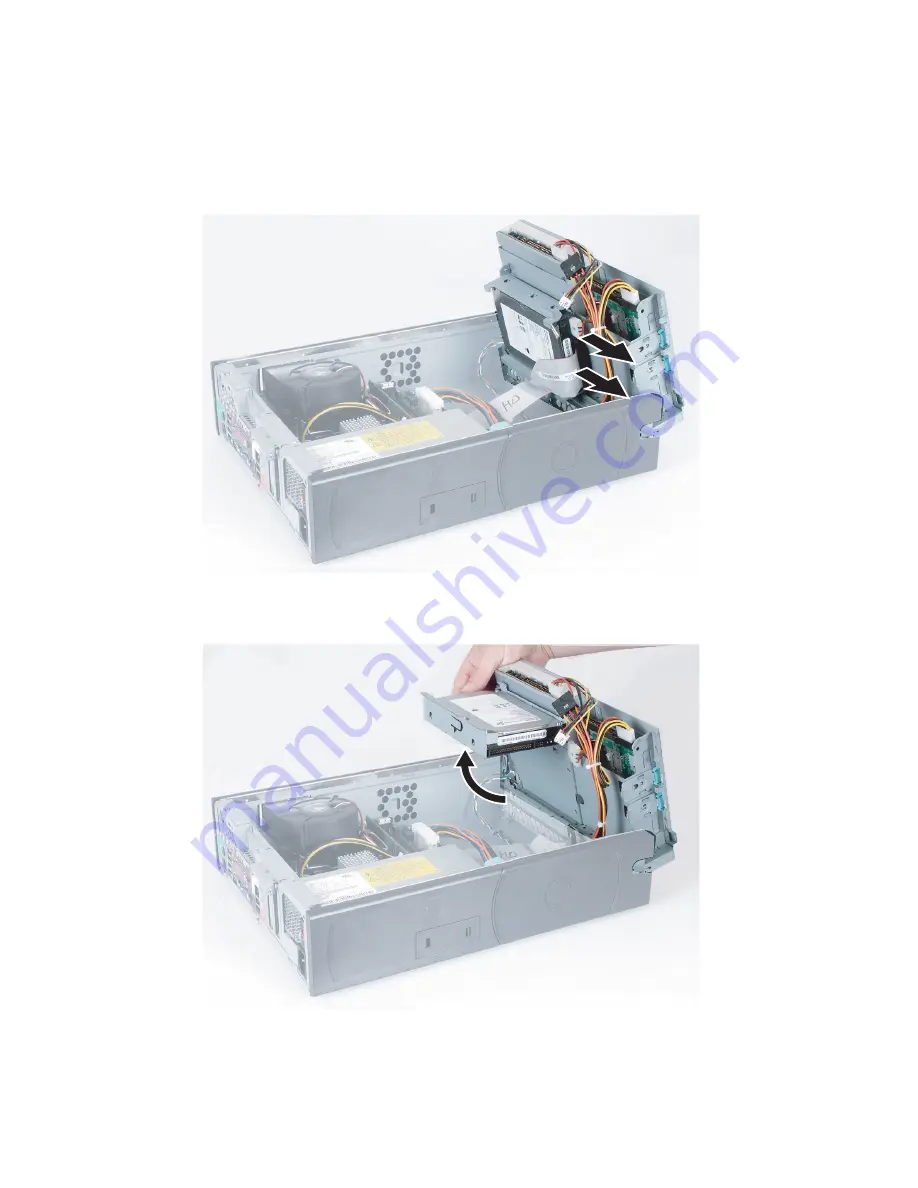
If you are replacing a drive, disconnect the drive cables, noting their
locations and orientation. (You will reconnect the cables after you install
the new drive.) See the drive documentation for further instructions.
6
Pivot the hard drive cage away from the drive cage assembly.
Summary of Contents for E-4100
Page 1: ...Your Gateway Computer Customizing Troubleshooting E 4100 user s guide...
Page 2: ......
Page 26: ...20 Chapter 1 Checking Out Your Gateway E 4100 Computer www gateway com...
Page 44: ...38 Chapter 3 Getting Help www gateway com...
Page 63: ...57 Creating CDs and DVDs www gateway com The screen you use to add files opens...
Page 92: ...86 Chapter 5 Maintaining Your Computer www gateway com...
Page 102: ...96 Chapter 6 Restoring Software www gateway com...
Page 108: ...102 Chapter 7 Upgrading Your Computer www gateway com 6 Push in on the cover release handle...
Page 109: ...103 Gateway Mid Tower Case www gateway com 7 Pull the side panel away from the case...
Page 132: ...126 Chapter 7 Upgrading Your Computer www gateway com 9 Lift the side panel away from the case...
Page 136: ...130 Chapter 7 Upgrading Your Computer www gateway com 6 Unlock the release lever...
Page 190: ...184 Chapter 9 Troubleshooting www gateway com...
Page 208: ...202 Appendix B Safety Regulatory and Legal Information www gateway com...
Page 217: ......


