129
Gateway Micro Tower Case
www.gateway.com
4
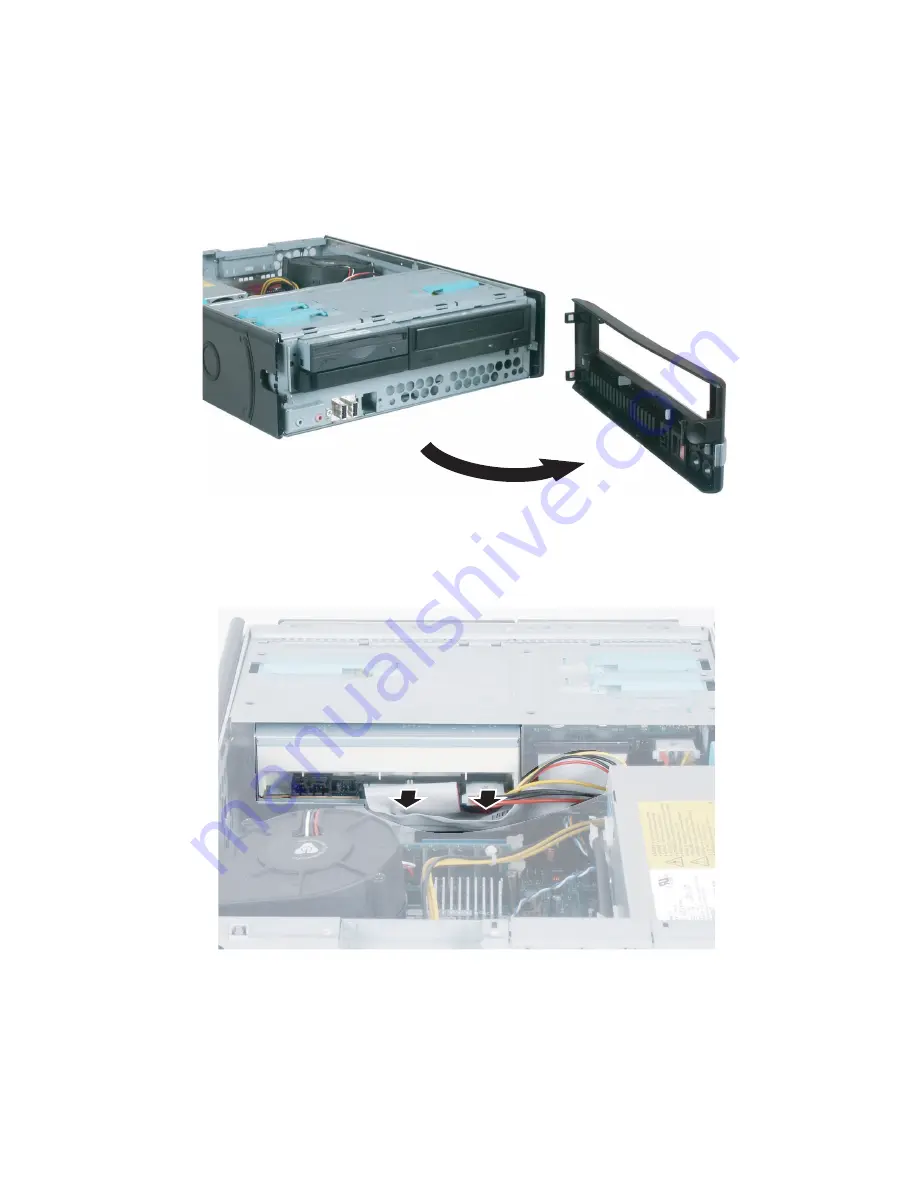
While pushing in on the bezel release tab (see Step 3), pull the left side of
the bezel forward until the bezel release tab unlocks from the case, then
swing the front bezel outward and to the right until the right-side bezel
tabs unhook from the computer case.
5
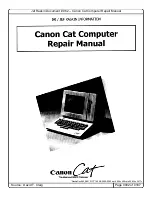
If you are replacing a drive disconnect the drive cables, noting their
locations and orientation. (You will reconnect the cables after you install
the new drive.) See the drive documentation for further instructions.
Summary of Contents for E-4100
Page 1: ...Your Gateway Computer Customizing Troubleshooting E 4100 user s guide...
Page 2: ......
Page 26: ...20 Chapter 1 Checking Out Your Gateway E 4100 Computer www gateway com...
Page 44: ...38 Chapter 3 Getting Help www gateway com...
Page 63: ...57 Creating CDs and DVDs www gateway com The screen you use to add files opens...
Page 92: ...86 Chapter 5 Maintaining Your Computer www gateway com...
Page 102: ...96 Chapter 6 Restoring Software www gateway com...
Page 108: ...102 Chapter 7 Upgrading Your Computer www gateway com 6 Push in on the cover release handle...
Page 109: ...103 Gateway Mid Tower Case www gateway com 7 Pull the side panel away from the case...
Page 132: ...126 Chapter 7 Upgrading Your Computer www gateway com 9 Lift the side panel away from the case...
Page 136: ...130 Chapter 7 Upgrading Your Computer www gateway com 6 Unlock the release lever...
Page 190: ...184 Chapter 9 Troubleshooting www gateway com...
Page 208: ...202 Appendix B Safety Regulatory and Legal Information www gateway com...
Page 217: ......


