10. HOW TO RECORD, PLAY BACK DATA
10-12
10.5
Screenshot (Screen Capture)
This system has a screen capture function. The screenshot data is saved in the inter-
nal memory. Also, you can transfer the data to a USB flash memory as follows:
1. Assign screenshot function to a function key (see paragraph 1.7.2). The default
function for the
F2
key is screenshot.
2. Press the function key assigned the screenshot function (e.g.
F2
key) when the
picture to copy is displayed. The message "SAVED SCREENSHOT" appears.
Note:
Do not operate any keys until the message disappears.
3. Connect a USB flash memory in the USB drive.
4. Press the
MENU
key to open the main menu.
5. Select [3. USB/INTERNAL MEMORY MANAGEMENT].
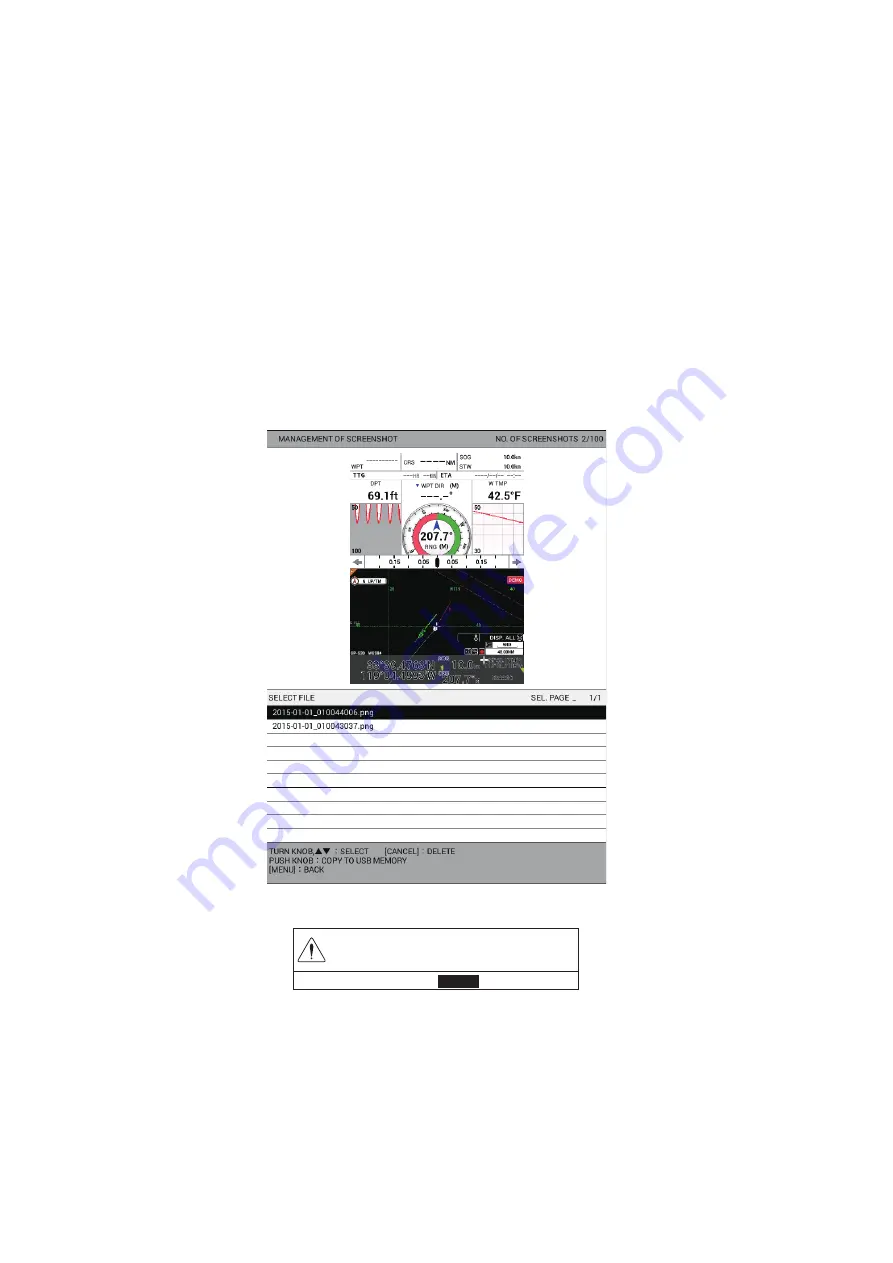
6. Select [0. MANAGEMENT OF SCREENSHOT]. The preview for the highlighted
file is displayed on the upper side of the screen.
7. Push the
ENTER
knob to show the following message.
8. Select [RUN] to transfer the screenshot data to the USB flash memory. The mes-
sage "TRANSFERRING. PLEASE WAIT." appears.
9. After the message "TRANSFER COMPLETED" appears, push the
ENTER
knob.
10. Press the
DISP
key to close the menu.
OVERWRITE CURRENT SCREENSHOT DATA
TO USB MEMORY.
ARE YOU SURE?
㻾㼁㻺䚷䚷䚷㻌㻌㻌㻌㻌
㻯㻭㻺㻯㻱㻸
Summary of Contents for GP-3700F
Page 14: ...SYSTEM CONFIGURATION xii This page is intentionally left blank...
Page 30: ...1 OPERATIONAL OVERVIEW 1 16 This page is intentionally left blank...
Page 42: ...2 PLOTTER DISPLAY OVERVIEW 2 12 This page is intentionally left blank...
Page 74: ...4 MARKS LINES 4 14 This page is intentionally left blank...
Page 92: ...6 ROUTES 6 8 This page is intentionally left blank...
Page 134: ...9 OTHER FUNCTIONS 9 26 This page is intentionally left blank...
Page 212: ...AP 12 APPENDIX 3 TIME DIFFERENCES...


