3. TRACK
3-16
Note:
If other ship information does not appear when putting the cursor on the target
symbol, do the following:
1) Press the
MENU
key to open the main menu.
2) Select [0. SYSTEM SETTING].
3) Select [1. DISPLAY FORMAT].
4) Select [OTHR SHIP INFO DISP.] on page 5.
5) Select [SHOW].
6) Press the
DISP
key to close the menu.
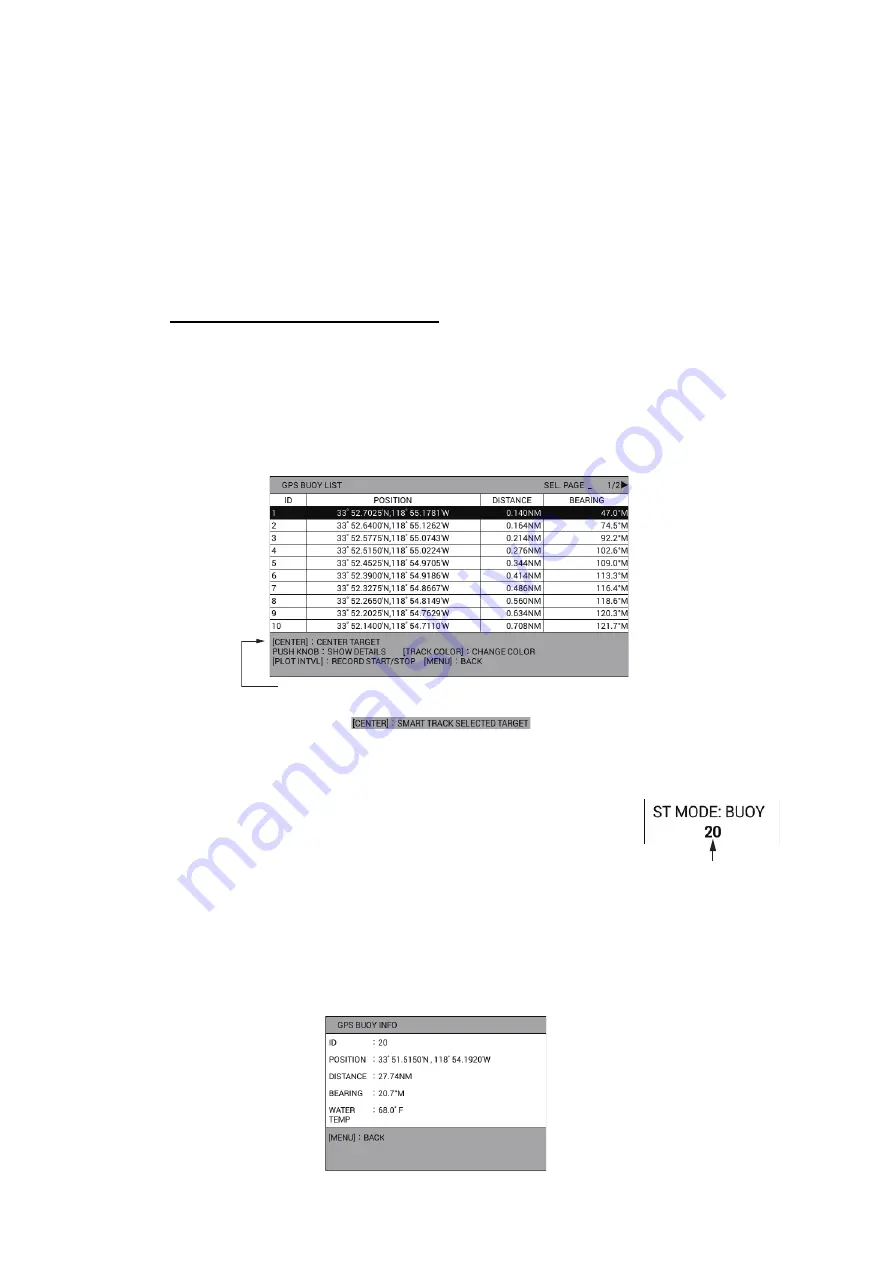
How to display the GPS buoy list
The GPS buoy list shows all the GPS buoys in your area. You can show the list as
follows:
1. Press the
MENU
key to open the main menu.
2. Select [2. OTHER SHIPS LIST].
3. Select [4. GPS BUOY LIST] to display the GPS buoy list.
•
,
: Shifts the page.
•
,
, or rotation of the
ENTER
knob: Selects a GPS buoy.
•
CENTER
key: Centers the selected GPS buoy on the
plotter display. When [TARGET SMART TRACK] is set to
[ON] (see page 9-14) and [DISPLAY GPS BUOY SYM-
BOLS] is set to [SHOW] (see section 3.1.2), each press
of the key centers the GPS buoy or own ship on the plot-
ter display. For the GPS buoy, the indication as shown in
the right figure appears at the top left of the screen.
Note:
The orientation mode can not be changed during OS (other ship) mode.
• Pushing of the
ENTER
knob: Displays the detailed information for the selected
GPS buoy.
When [TARGET SMART TRACK] is set to [ON],
this indication changes as below (see page 9-15).
Target no.
Summary of Contents for GP-3700F
Page 14: ...SYSTEM CONFIGURATION xii This page is intentionally left blank...
Page 30: ...1 OPERATIONAL OVERVIEW 1 16 This page is intentionally left blank...
Page 42: ...2 PLOTTER DISPLAY OVERVIEW 2 12 This page is intentionally left blank...
Page 74: ...4 MARKS LINES 4 14 This page is intentionally left blank...
Page 92: ...6 ROUTES 6 8 This page is intentionally left blank...
Page 134: ...9 OTHER FUNCTIONS 9 26 This page is intentionally left blank...
Page 212: ...AP 12 APPENDIX 3 TIME DIFFERENCES...


