4-2
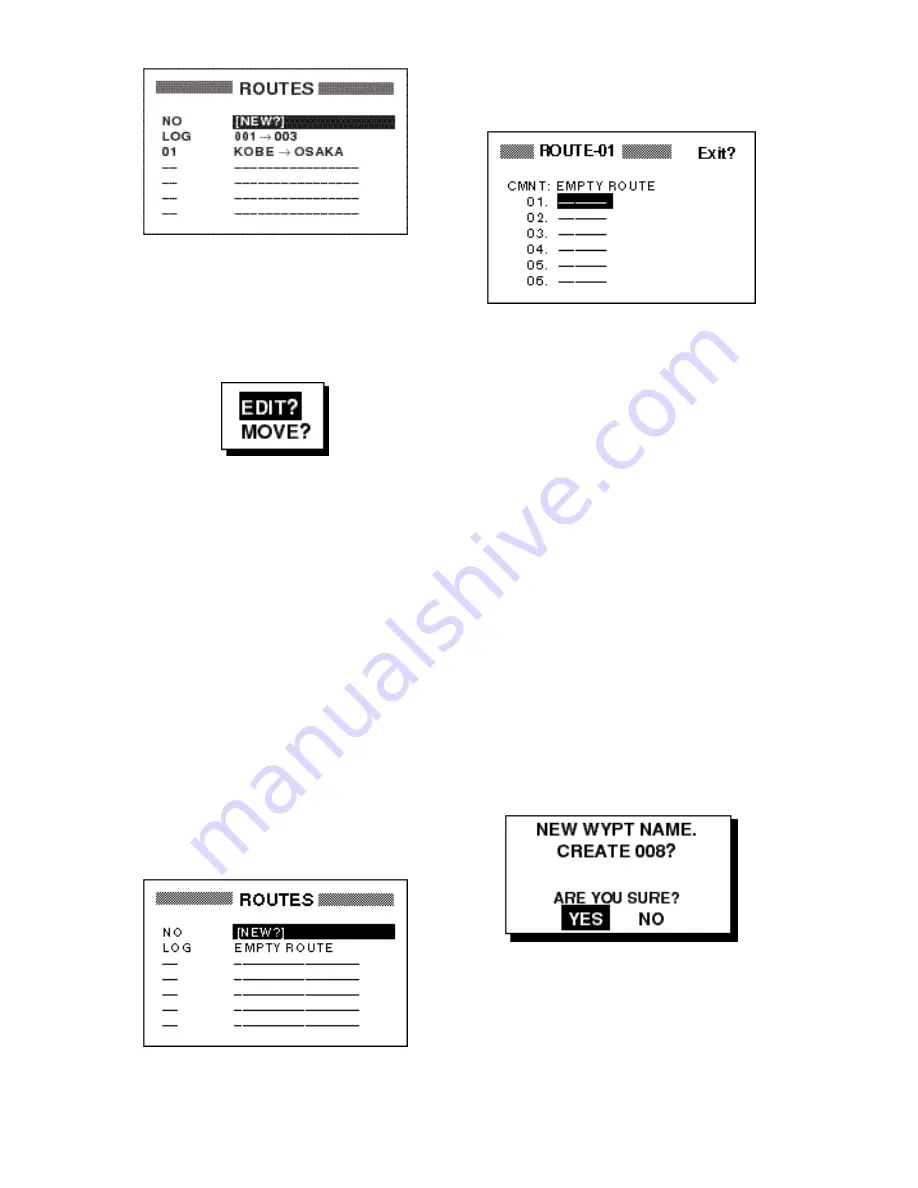
Figure 4-4 ROUTES menu
8. The LOG field shows the first and last
waypoints entered for the log route you
are currently creating. Select the LOG
field and press the [ENT] key. The EDIT/
MOVE window appears.
Figure 4-5 EDIT/MOVE window
9. Select “MOVE?” and press the [ENT]
key. The route is moved from the LOG
field and is registered under the next se-
quential route number.
Creating a route with preregistered
waypoints from the route menu
The procedure which follows describes how
to create a route from two preregistered
waypoints, KOBE and OSAKA, on the
ROUTE screen.
1. Press the [MENU] key once or twice to
display the menu.
2. Select ROUTES.
3. Press the [ENT] key. The screen shown
in Figure 4-6 appears.
Figure 4-6 ROUTES list
4. Select “NEW?” and press the [ENT] key.
The screen shown in Figure 4-7 ap-
pears.
Figure 4-7 Screen for entering route
5. Press
▲
and the [ENT] key to change
route name, if desired. (If no name is
entered the name of the first and last
waypoints in the route will become the
route name, although you may change
the name at a later time.) Enter route
name and press the [ENT] key.The cur-
sor is on line 01 and press the [ENT]
key.
6. Press [ENT] key and press
▲
or
▼
to
display waypoint name. (In the example,
KOBE.)
7. Press the [ENT] key. The cursor moves
to the next line.
8. Repeat steps 6 and 7 until you have en-
tered all waypoints desired.
Note: If you enter a waypoint which has
not been registered, the display will look
something like the one below. Select
YES to create a new waypoint; NO to
return to the route entry screen.
Figure 4-8 New waypoint name screen
When you select YES followed by [ENT]
key,following screen appears.Edit the
waypoint,select Exit and press the
[ENT] key.
Summary of Contents for GP-31
Page 1: ...GPS NAVIGATOR DGPS NAVIGATOR GP 31 GP 36...
Page 7: ...v SYSTEM CONFIGURATION GP 36 System configuration GP 31 System configuration...
Page 18: ...This page is intentionally left blank...
Page 22: ...This page is intentionally left blank...
Page 28: ...This page is intentionally left blank...
Page 63: ...AP 1 Menu Tree Default settings shown in boldface italic...
Page 64: ...AP 2...
Page 70: ......
Page 71: ......
Page 72: ......
Page 73: ......
Page 74: ......
Page 75: ......
Page 76: ......
Page 77: ......
Page 80: ......
Page 81: ......


