138
Upgrade and Maintenance Manual
TX1320
M1
Hard disk drives / solid state drives
7.3.4.1
Preliminary steps
Before replacing a 3.5-inch HDD module, perform the following steps:
Ê
Ensure that the HDD module to be removed is not combined into a RAID
array. If the drive is part of a RAID array, you first need to delete the array
using ServerView RAID Manager.
V
CAUTION!
All data on all HDDs in the array will be lost! Be sure to back up your
data before deleting a RAID array.
I
For further information, please refer to the "ServerView Suite RAID
Management" user guide, available online at
http://manuals.ts.fujitsu.com
(EMEA market) or
http://jp.fujitsu.com/platform/server/primergy/manual/
(Japanese
market) or from the ServerView Suite DVD supplied with your
PRIMERGY server.
Ê
Shut down the server as described in section
"Shutting down the server" on
page 52
.
Ê
Remove the server cover as described in section
"Opening the server" on
page 55
.
Ê
Open the front cage as described in section
"Opening the front cage" on
page 60
.
Ê
Locate the defective HDD module as described in section
"Local diagnostic
indicators on the front" on page 48
.
Only applicable for removing intact HDD modules:
Ê
Before removing a non-defective HDD module, put the drive into "Offline"
mode using your RAID configuration software.
7.3.4.2
Removing a 3.5-inch HDD module
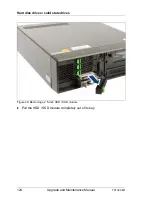
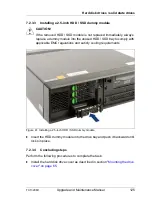
Ê
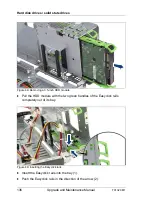
Remove the HDD module to be replaced from the server as described in
section
"Removing a 3.5-inch HDD module" on page 135
.
Summary of Contents for PRIMERGY TX1320 M1
Page 18: ...Upgrade and Maintenance Manual TX1320 M1 Contents ...
Page 42: ...42 Upgrade and Maintenance Manual TX1320 M1 Important information ...
Page 106: ...106 Upgrade and Maintenance Manual TX1320 M1 Basic software procedures ...
Page 150: ...150 Upgrade and Maintenance Manual TX1320 M1 Hard disk drives solid state drives ...
Page 280: ...280 Upgrade and Maintenance Manual TX1320 M1 Front panel ...
Page 320: ...320 Upgrade and Maintenance Manual TX1320 M1 Cables Figure 200 Cabling with extension box ...

