112
Upgrade and Maintenance Manual
TX1320
M1
Power supply
Ê
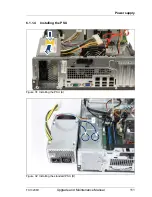
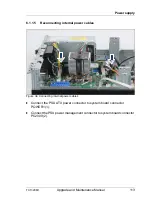
Insert the PSU into the chassis leaving a gap of about 3 cm to the rear
chassis wall (1) in
figure 31
.
Ê
Ensure that the mounting bracket on the chassis (see circle in
figure 32
)
engages with the notch on the lower surface of the PSU.
Ê
Slide the new PSU towards the rear of the chassis (2) in
figure 31
.
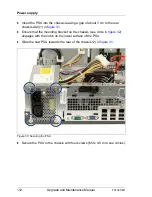
Figure 33: Securing the PSU
Ê
Secure the PSU to the chassis with four screws (M3 x 4.5 mm, see circles).
Summary of Contents for PRIMERGY TX1320 M1
Page 18: ...Upgrade and Maintenance Manual TX1320 M1 Contents ...
Page 42: ...42 Upgrade and Maintenance Manual TX1320 M1 Important information ...
Page 106: ...106 Upgrade and Maintenance Manual TX1320 M1 Basic software procedures ...
Page 150: ...150 Upgrade and Maintenance Manual TX1320 M1 Hard disk drives solid state drives ...
Page 280: ...280 Upgrade and Maintenance Manual TX1320 M1 Front panel ...
Page 320: ...320 Upgrade and Maintenance Manual TX1320 M1 Cables Figure 200 Cabling with extension box ...

