TX1320 M1
Upgrade and Maintenance Manual
225
Processors
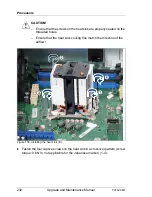
11.2.2 Removing the processor heat sink
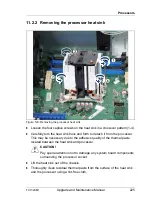
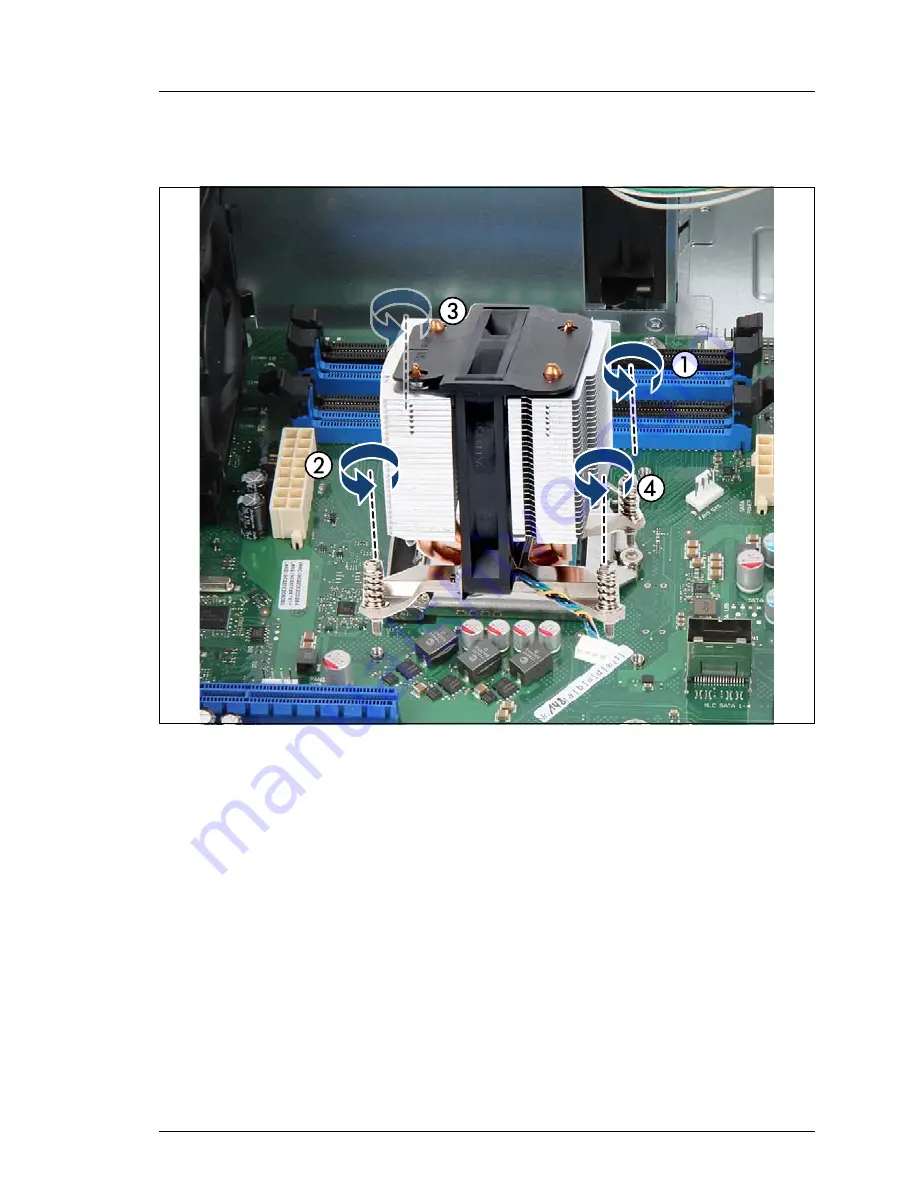
Figure 120: Removing the processor heat sink
Ê
Loosen the four captive screws on the heat sink in a crossover pattern (1-4).
Ê
Carefully turn the heat sink back and forth to detach it from the processor.
This may be necessary due to the adhesive quality of the thermal paste
located between the heat sink and processor.
V
CAUTION!
Pay special attention not to damage any system board components
surrounding the processor socket.
Ê
Lift the heat sink out of the chassis.
Ê
Thoroughly clean residual thermal paste from the surface of the heat sink
and the processor using a lint-free cloth.
Summary of Contents for PRIMERGY TX1320 M1
Page 18: ...Upgrade and Maintenance Manual TX1320 M1 Contents ...
Page 42: ...42 Upgrade and Maintenance Manual TX1320 M1 Important information ...
Page 106: ...106 Upgrade and Maintenance Manual TX1320 M1 Basic software procedures ...
Page 150: ...150 Upgrade and Maintenance Manual TX1320 M1 Hard disk drives solid state drives ...
Page 280: ...280 Upgrade and Maintenance Manual TX1320 M1 Front panel ...
Page 320: ...320 Upgrade and Maintenance Manual TX1320 M1 Cables Figure 200 Cabling with extension box ...

