399
Co
m
p
ut
e
r O
p
er
at
io
n
s
12
Private Charge Print
This feature allows you to temporarily store print data in the machine for each
authentication user ID, and request on the machine's control panel to print the data. As the
feature enables you to select and print only necessary jobs, you can avoid printing
unnecessary jobs. Furthermore, the machine displays only the jobs of authenticated users
and their associated sub users to securely protect the privacy of the users. This feature is
suitable for authenticating and managing specific users managed by the system
administrator.
Note
•
If you do not want to store unnecessary jobs, you can configure the machine to store only the jobs
whose authentication succeeded.
•
An application (sold separately) is required to use the feature that associates sub users with the User
ID of a login user. For more information, contact our Customer Support Center.
For information on how to set Private Charge Print, refer to "5 Tools" > "Authentication/Security Settings" > "Authentication"
> "Charge/Private Print Settings" in the Administrator Guide. For information on how to print a Private Charge Print job, refer
to "Private Charge Print" (P.386).
Setup
To print from your computer, your computer must have a print driver installed.
For information on how to install the print driver, refer to the manual included in the Media (Software/Product Manual).
Note
•
When printing using authentication information, you must configure the printer settings on your
computer. Make the necessary settings on the [Configuration] tab of the printer’s properties. For
more information, refer to the print driver's help.
Printing
This following describes how to print documents.
The printing procedure depends on the application software you use. For more information,
refer to the documentation provided with the application.
For more information on print features, click [Help] on the print driver screen to view the print driver's help.
1
Select [Print] from the [File] menu on the application.
2
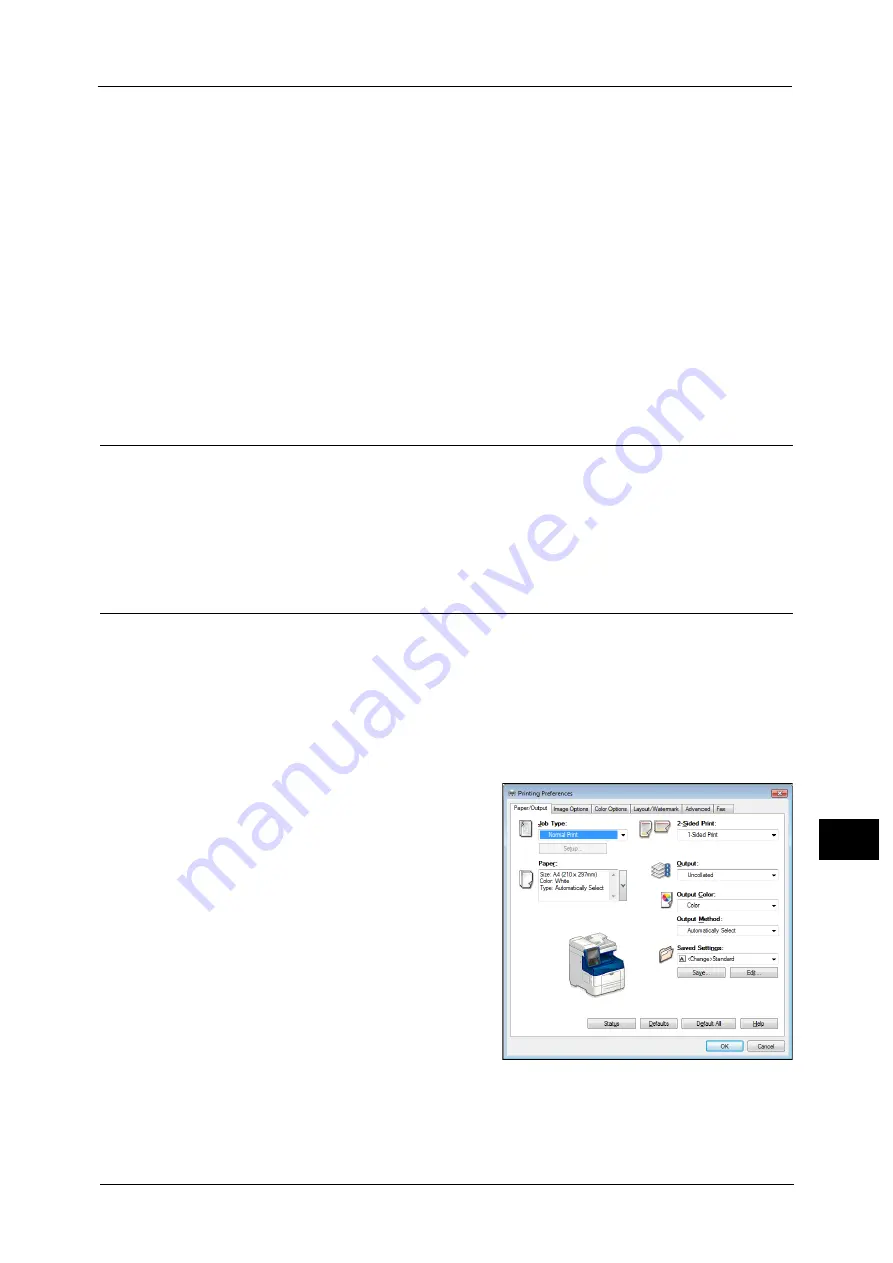
Confirm the printer name to be used and set [Preferences] if necessary.
Note
•
You can change the print feature in [Job
Type].
3
Click [OK].
4
Click [OK] in the [Print] dialog box.
Summary of Contents for ApeosPort-V C3320
Page 1: ...User Guide ApeosPort V C3320 DocuPrint CM415 AP...
Page 12: ...12...
Page 58: ...1 Before Using the Machine 58 Before Using the Machine 1...
Page 80: ...2 Product Overview 80 Product Overview 2...
Page 316: ...5 Scan 316 Scan 5...
Page 348: ...8 Stored Programming 348 Stored Programming 8...
Page 368: ...10 Media Print Text and Photos 368 Media Print Text and Photos 10...
Page 394: ...11 Job Status 394 Job Status 11...
Page 416: ...12 Computer Operations 416 Computer Operations 12...
Page 417: ...13 Appendix This chapter contains a glossary of terms used in this guide Glossary 418...
Page 428: ...Index 428 Index...


