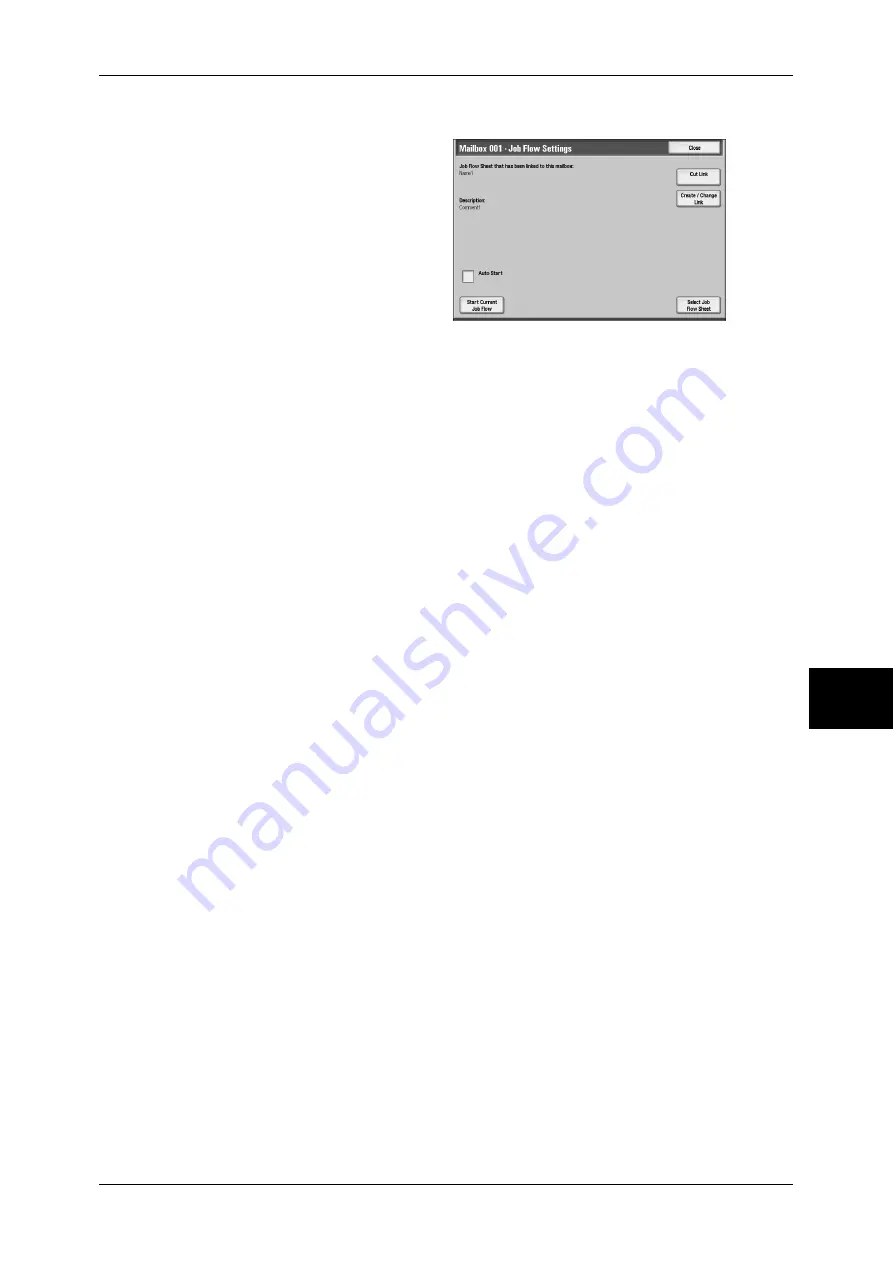
Configuring/Starting Job Flow
61
Send from Mailbox
6
USB cable is disconnected while the document is being printed.
1
On the [Document List] screen,
select documents.
2
Select [Job Flow Settings].
3
Select any item.
Auto Start
Sets auto start of the job flow for documents stored in the mailbox. If Auto Start is
selected, the job flow automatically starts when a document is stored.
Start Current Job Flow
Select a document in the mailbox and press this button to starts the job flow linked to
the mailbox.
Important •
After executing the job flow, print the job history report to check the result. For information on
the job history report, refer to “Job Status/Activity Report” of “Print Report/List” under
‘Chapter 12 Machine Status’ in the User Guide.
Cut Link
Cancels the link between a mailbox and its job flow sheet.
Create/Change Link
Displays the [Link Job Flow Sheet to Mailbox] screen.
You can change the link between the mailbox and its job flow.
Important •
Pressing [Save] without selecting a job flow does not set a link. If the selected job flow is
already linked, then the link is cancelled.
Note
•
The settings for linking, delinking, and Auto Start can also be made during the creation of a
mailbox.
z
Save
Links the selected job flow.
z
Search by Name
Searches for job flows that partially match the entry. The machine searches through
job flow names that were registered upon each job flow creation. The entry can be
up to 128 characters long.
z
Search by Keyword
Searches for job flows that fully match the entry. The machine searches through
keywords that were registered upon each job flow creation. The entry can be up to
12 characters long.
z
Select Keyword
Displays the [Select Keyboard] screen. Select a keyword registered in the system
settings to search for job flows. Job flows that fully match the entry are searched. The
machine searches through keywords that were registered upon each job flow
creation.
For information on how to register keywords, refer to "Job Flow Sheet Keywords" of
"Setup Menu" under "Chapter 11 System Settings" in the User Guide.
z
Sheet Filtering
Displays the [Sheet Filtering] screen.
Summary of Contents for ApeosPort-II C2200
Page 1: ...ApeosPort II C4300 C3300 C2200 ApeosPort Function Guide...
Page 5: ...Table of Contents 3 11 Job Status 129 Job Status Screens 130 Job Status Overview 132...
Page 6: ......
Page 22: ...3 Copy 20 Copy 3 Copy Feature List This section describes items in the copy feature...
Page 34: ...3 Copy 32 Copy 3...
Page 40: ...4 Fax 38 Fax 4...
Page 54: ...5 Scan 52 Scan 5...
Page 66: ...6 Send from Mailbox 64 Send from Mailbox 6...


