66
4 Printing
4.4
Printing on Custom Size Paper
Loading Custom Size Paper
The method for loading custom size paper is the same as the method for loading standard size paper.
Refer
For more information, refer to "Loading Paper" (P.47).
Registering Custom Size Paper
Configure the following settings in advance when printing on custom size paper.
Register a custom size as a user-defined paper in the print driver.
When you load custom size paper in Tray 1 to 4 (paper trays 3 and 4 are optional), configure the tray paper size
using the control panel.
Note
[Long Paper A (297x900mm)] or [Long Paper B (297x1200mm)] may be selected instead of user-defined paper for long
size paper.
If [Original Document Size]-[Long Paper A (297x900mm)] or [Long Paper B (297x1200mm)] is selected, the document
orientation may not be correctly printed in some applications. In such a case, register the long size paper to print in
[Custom Paper Size].
When you print to long paper with a Finisher installed, a Side Tray (optional) is required as an ejection destination.
Refer
For information about how to configure the settings in the control panel, refer to "Changing the Paper Settings" (P.58).
1.
Click [Start]>[Windows System]>[Control Panel]>[View devices and printers] or [Devices and Printers].
2.
Right-click the machine icon and select [Printing Preferences].
3.
Click
beside [Paper] to display the options, and then select [Advanced Paper Selection].
4.
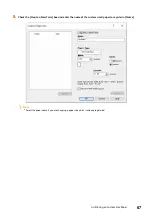
Select [Custom...] for [Original Document Size].

