FortiMail-2000B hardware installation
Installing the hard drives
FortiMail™ Secure Messaging Platform Version 4.0 Patch 1 Install Guide
Revision 2
47
•
2
From the RAID management software, prepare the drive for removal. Wait until the
hard-drive indicators on the drive carrier signal that the drive can be removed safely.
See your SAS RAID controller documentation for information about hot-swap drive
removal.
If the drive has been online, the green activity/fault indicator will flash as the drive is
powered down. When the drive indicators are off, the drive is ready for removal.
3
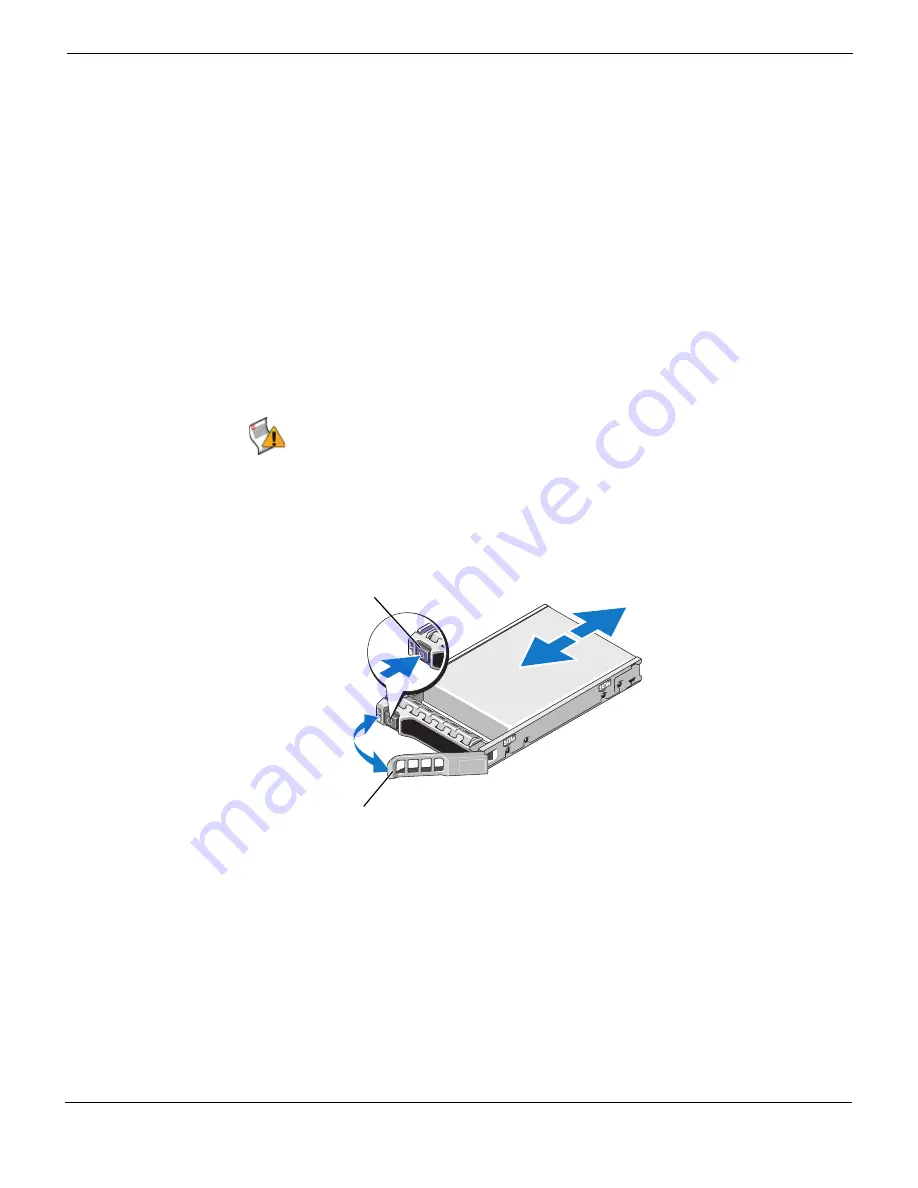
Press the button on the front of the drive carrier and open the drive carrier release
handle to release the drive. See Figure 14.
4
Slide the hard drive out until it is free of the drive bay.
5
Insert a drive blank in the vacated drive bay. See
“Installing a hard-drive blank” on
6
If applicable, install the bezel. See
“Installing the Bezel” on page 18
Installing a hot-swap hard drive
1
If present, remove the front bezel. See
“Installing the Bezel” on page 18
.
2
If a drive blank is present in the bay, remove it. See
“Removing a hard-drive blank” on
Figure 14: Installing a hot-swap hard drive
3
Install the hot-swap hard drive.
• Press the button on the front of the drive carrier and open the handle.
• Insert the hard-drive carrier into the drive bay until the carrier contacts the
backplane.
• Close the handle to lock the drive in place.
4
If applicable, install the bezel. See
“Installing the Bezel” on page 18
Caution:
When installing a hard drive, ensure that the adjacent drives are fully installed.
Inserting a hard-drive carrier and attempting to lock its handle next to a partially installed
carrier can damage the partially installed carrier's shield spring and make it unusable.
1
release button
2
hard drive carrier handle
2
1
Summary of Contents for FortiMail-100
Page 1: ...FortiMail Secure Messaging Platform Version 4 0 Patch 1 Install Guide...
Page 173: ...www fortinet com...
Page 174: ...www fortinet com...


