


69
15-1-4. Crop and Border
Using the procedure just used for PiP1, Insert PinP2 to the PGM image, move PinP2 to a
desired position and change PinP2 size. The example below shows how to crop PinP and
add a border.
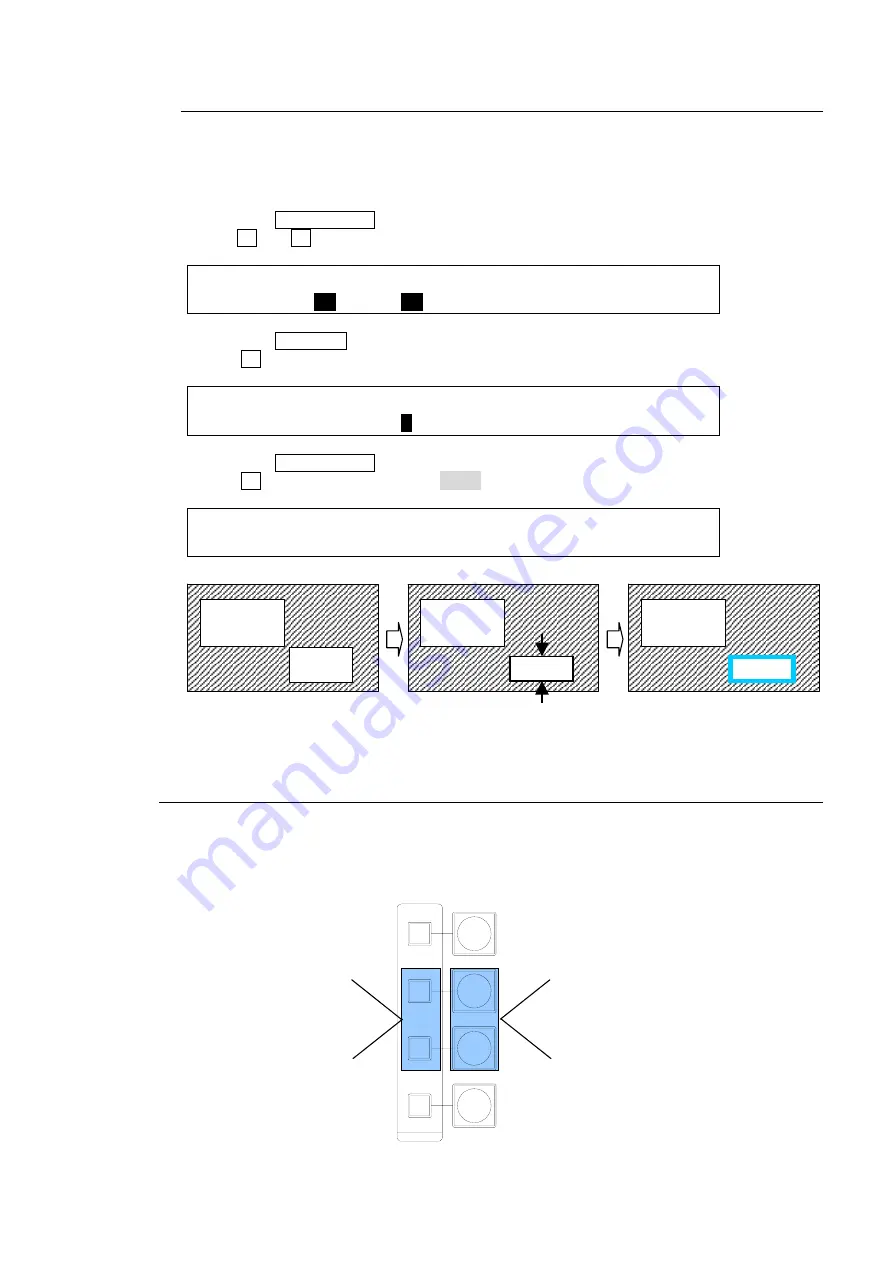
(1) Press twice quickly the PinP1 button in the BUS SELECT to display the PinP1 menu.
(2) Press the PAGE DOWN button to go to PAGE4.
(3) Use F1 and F2 to crop PinP1 on the top and bottom.
PinP2 : TOP :BOTTOM : LEFT : RIGHT : 3/4
CROP : =
30
: =
20
: =0 : =0 :
(4) Press the PAGE UP button to return to PAGE1.
(5) Turn F2 to set the border width.
PinP1 : XPT : BORDER :ASPECT : 1/4
XPT : =IN10 :W=
5
S=0 : =16:9 :
(6) Press the PAGE DOWN button to go to PAGE 2.
(7) Turn F4 to set the border color to BLUE.
PinP2 : BORDER COLOR :RECALL : 2/4
BDR COL :S=66.3 L=5.4 H=3.5 : >BLUE :
15-2. IN/OUT Effects
The following buttons switch PinP 1 and PinP 2 between on-air and off-air. The ON AIR buttons
at the left side perform cut in and cut out and the PinP Auto buttons at the right side performs mix
in and mix out of PinPs at the default setting. These buttons, however, can change their
functional behavior as shown in the figure below.
Border added
PinP2
PinP1
Cropped on the top
and bottom
PinP2
PinP1
PinP1
PinP2
DSK
KEYER
P IN P
1
2
P IN P
ON AIR
MIX (default)
CUT (If pressing shortly.)
MIX (If pressing and holding
down for a while.)
CUT (default)
Scaling
Slide In/Out
Wipe In/Out
Summary of Contents for HVS-300HS
Page 1: ...HVS 300HS Digital Video Switcher HVS 30OU Operation Unit 1st Edition Rev 1 OPERATION MANUAL...
Page 104: ......
Page 108: ......


