3. OPERATION
Page 27
© 1998-2007 DH Instruments, a Fluke Company
3.3
MANUAL OPERATION
molbox RFM is designed to offer the optimum balance between simple, intuitive operation
and the availability of a wide variety of functions with a high level of operator discretion. The
local operator interface is through the front panel’s 2 x 20 character alpha-numeric display
and a 4 x 4 multi-function keypad. Remote operation by RS232 or IEEE-488 interface is also
available (see Section 4).
3.3.1
KEYPAD LAYOUT AND PROTOCOL
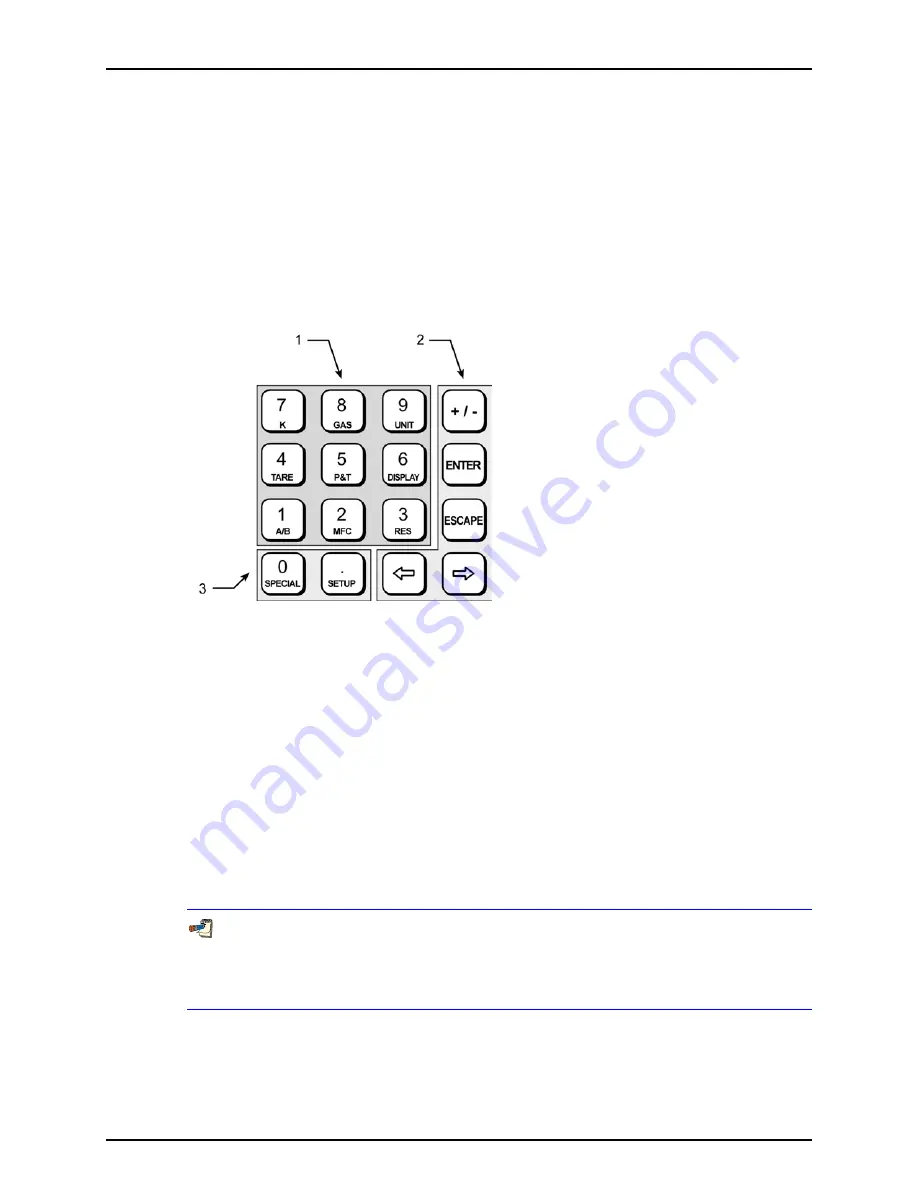
Molbox RFM has a 4 x 4 keypad for local operator access to direct functions, function menus
and for data entry.
1.
The Function/Data keys
allow very commonly
used functions to be accessed directly from the
MAIN run screen by a single keystroke. The name of
the function is on the bottom half of the key (see
Section 3.4). These keys enter numerical values
when editing.
2.
The Editing and Execution keys
are for
execution, suspending execution, backing up in
menus and editing entries
3.
The Menu/Data keys
provide access to function
menus from the MAIN run screen. The menu
name is on the bottom half of the key. The SETUP
menu is for more frequently used functions. The
SPECIAL menu is for less frequently used and
internal functions. These keys enter numerical
values when editing.
Figure 4.
Keypad Layout
Pressing the
[ENTER]
key generally causes execution or forward movement in the menu tree.
Pressing the
[ESCAPE]
key generally allows movement back in the menu tree and/or causes
execution to cease or suspend without changes being implemented. Pressing
[ESCAPE]
repeatedly eventually returns to the MAIN run screen. From the MAIN run screen, pressing
[ESCAPE]
allows momentary viewing of the molbox RFM identification screen.
Pressing the
[+/-]
key changes a numerical sign when editing. It also toggles through
multiple screens when available.
Pressing the
[
←
]
and
[
→
]
keys allows reverse and forward cursor movement when editing
data entry. These keys are also used to scroll through menu choices.
Menu selections can be made by pressing the number of the selection directly or by pressing
[
←
]
and
[
→
]
to place the cursor on the number of the desired selection and pressing
[ENTER]
.
Some screens go beyond the two lines provided by the display. This is indicated by a
flashing arrow in the second line of the display. Press [
←
] and [
→
] to move the cursor
to access the lines that are NOT visible or directly enter the number of the hidden menu
choice if you know it.


